
No Bake Biscoff Cheesecake Dessert is a delightful treat that combines the rich, caramelized flavors of Biscoff cookies with the creamy, velvety texture of cheesecake. This dessert is not only a feast for the taste buds but also a visual delight, making it perfect for any occasion. The origins of Biscoff cookies trace back to Belgium, where they were traditionally served with coffee, and their unique flavor has since captured hearts worldwide. People love this No Bake Biscoff Cheesecake Dessert for its simplicity and convenience; there’s no need to turn on the oven, making it an ideal choice for warm days or busy schedules. The combination of the crunchy cookie crust and the smooth cheesecake filling creates a heavenly contrast that leaves everyone wanting more. Join me as we dive into this easy-to-make recipe that is sure to impress your family and friends!

Ingredients:
– 300g Biscoff biscuits (crushed) – 150g unsalted butter (melted) – 400g cream cheese (softened) – 200g powdered sugar – 300ml heavy whipping cream – 200g Biscoff spread – 1 teaspoon vanilla extract – A pinch of salt – Extra Biscoff biscuits for garnish – Optional: chocolate shavings or caramel sauce for drizzlingPreparing the Crust
1. Start by crushing the Biscoff biscuits. You can do this by placing them in a ziplock bag and using a rolling pin to crush them into fine crumbs. Alternatively, you can use a food processor for a quicker method. Aim for a texture similar to sand. 2. In a mixing bowl, combine the crushed Biscoff biscuits with the melted unsalted butter. Mix well until all the crumbs are coated with butter. The mixture should hold together when pressed. 3. Next, prepare a 9-inch springform pan. Press the biscuit mixture firmly into the bottom of the pan to create an even layer. Use the back of a measuring cup or your fingers to pack it down tightly. This will form the base of your cheesecake. 4. Place the crust in the refrigerator to chill while you prepare the cheesecake filling. This will help it set and hold its shape better.Making the Cheesecake Filling
5. In a large mixing bowl, add the softened cream cheese. Using an electric mixer, beat the cream cheese on medium speed until it’s smooth and creamy, about 2-3 minutes. Make sure there are no lumps. 6. Gradually add the powdered sugar to the cream cheese, mixing on low speed until combined. Once incorporated, increase the speed to medium and beat for another minute until smooth. 7. In a separate bowl, whip the heavy whipping cream until stiff peaks form. This usually takes about 3-5 minutes. Be careful not to over-whip, as it can turn into butter. 8. Gently fold the whipped cream into the cream cheese mixture using a spatula. Start by adding a small amount of whipped cream to lighten the cream cheese mixture, then gradually fold in the rest. This will keep the filling light and airy. 9. Add the Biscoff spread, vanilla extract, and a pinch of salt to the mixture. Gently fold until everything is well combined and the mixture is smooth and creamy.Assembling the Cheesecake
10. Once the crust has chilled, remove it from the refrigerator. Pour the cheesecake filling over the crust, spreading it evenly with a spatula. Make sure to smooth the top for a nice finish. 11. To create a marbled effect, you can add dollops of extra Biscoff spread on top of the cheesecake filling. Use a knife or a skewer to swirl it gently into the filling. 12. Cover the cheesecake with plastic wrap or aluminum foil and return it to the refrigerator. Let it chill for at least 4 hours, but preferably overnight. This will allow the cheesecake to set properly.Serving the Cheesecake
13. Once the cheesecake has set, it’s time to serve! Carefully remove the sides of the springform pan. If you find it difficult to remove, run a knife around the edge to loosen it. 14. Before serving, you can garnish the cheesecake with crushed Biscoff biscuits on top for added texture and flavor. If you like, drizzle some chocolate shavings or caramel sauce over the top for an extra touch of indulgence. 15. Slice the cheesecake into wedges using a sharp knife. For clean cuts, dip the knife in hot water and wipe it dry before slicing. This will help you achieve neat slices. 16. Serve the cheesecake chilled. It pairs wonderfully with a cup of coffee or tea, making it a perfect dessert for any occasion.Storage Tips
17. If you have leftovers (which is rare because this cheesecake is so delicious!), store them in an airtight container in the refrigerator. It will keep well for up to 5 days. 18. You can also freeze the cheesecake for longer storage. Wrap individual slices in plastic wrap and then place them in a freezer-safe container. They can be frozen for up to 2 months. When you’re ready to enjoy, simply thaw in the refrigerator overnight.Variations and Tips
19. If you want to add a twist to your cheesecake, consider mixing in some chopped nuts or chocolate chips into the filling for added texture. 20. For a more intense Biscoff flavor, you can increase the amount of Biscoff spread in the filling or even add a layer of it between the crust and the filling. 21. If you’re looking for a lighter version, you can substitute half of the cream cheese with Greek yogurt. This will give you a tangy flavor while reducing the calories. 22. For a more festive touch, consider adding seasonal spices like cinnamon or nutmeg to the filling, especially around the holidays. 23. If you’re making this cheesecake for a special occasion, consider decorating the top with fresh fruit or edible flowers for a beautiful presentation. 24. Remember, the key to a successful no-bake cheesecake is patience. Allowing it to chill properly will ensure a creamy and firm texture that holds its shape when sliced. 25. Enjoy the process! Making this no-bake Biscoff cheesecake is not only rewarding but also a fun activity to do with friends or family. Share the joy of baking and indulge in this delightful dessert together. With these detailed steps and tips, you’re all set to create a delicious no-bake Biscoff cheesecake that will impress your friends and family. Happy baking!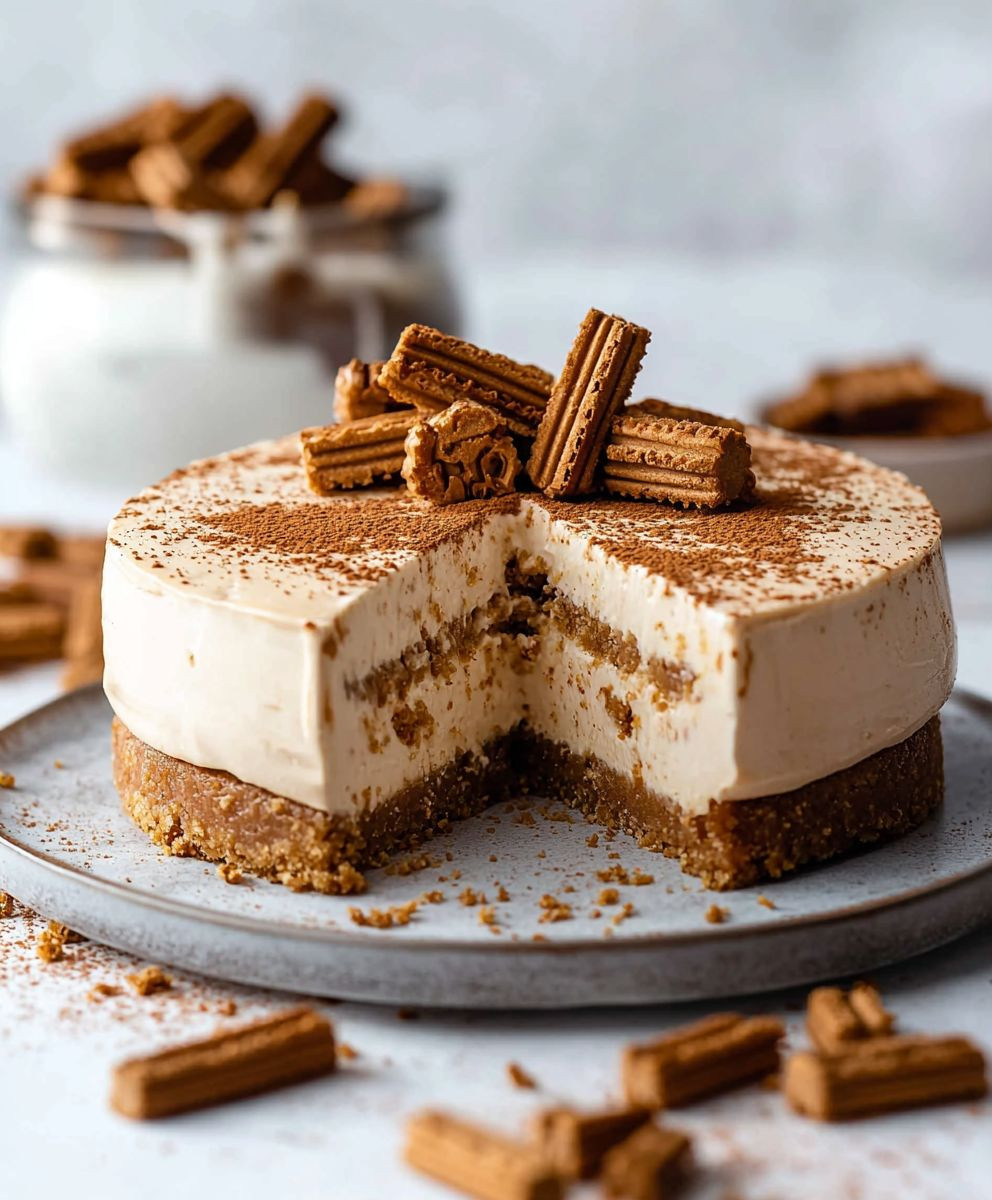
Conclusion:
In conclusion, this No Bake Biscoff Cheesecake Dessert is an absolute must-try for anyone who loves a sweet, creamy treat that requires minimal effort. The combination of the rich, velvety cheesecake filling and the crunchy, spiced Biscoff cookie crust creates a delightful contrast that will have your taste buds dancing with joy. Plus, the fact that it’s a no-bake recipe means you can whip it up in no time, making it perfect for those warm days when you want something sweet without turning on the oven. For serving suggestions, consider topping your cheesecake with a drizzle of melted Biscoff spread or a sprinkle of crushed Biscoff cookies for an extra touch of indulgence. You could also add fresh fruit like strawberries or raspberries for a pop of color and a refreshing contrast to the rich flavors. If you’re feeling adventurous, try incorporating different flavors by mixing in some chocolate or caramel swirls into the cheesecake filling, or even experimenting with different cookie bases like Oreos or graham crackers. I encourage you to give this No Bake Biscoff Cheesecake Dessert a try and experience the deliciousness for yourself. Whether you’re serving it at a gathering, celebrating a special occasion, or simply treating yourself after a long day, this dessert is sure to impress. Don’t forget to share your experience with friends and family, and let them know how easy and delightful this recipe is. I’d love to hear your thoughts and any variations you come up with! Happy baking (or should I say, no-baking)! Print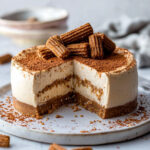
No Bake Biscoff Cheesecake Dessert: The Ultimate Indulgence for Cookie Butter Lovers
- Total Time: 270 minutes
- Yield: 12 servings 1x
Description
Indulge in a creamy, no-bake Biscoff cheesecake featuring a crunchy Biscoff biscuit crust and a rich filling infused with Biscoff spread. This easy-to-make dessert combines delightful flavors and textures, making it perfect for any occasion. With its velvety consistency and optional garnishes, this cheesecake is sure to impress and satisfy your sweet cravings. Enjoy a slice chilled, paired with coffee or tea, and savor the deliciousness of this delightful treat.
Ingredients
- 300g Biscoff biscuits (crushed)
- 150g unsalted butter (melted)
- 400g cream cheese (softened)
- 200g powdered sugar
- 300ml heavy whipping cream
- 200g Biscoff spread
- 1 teaspoon vanilla extract
- A pinch of salt
- Extra Biscoff biscuits for garnish
- Optional: chocolate shavings or caramel sauce for drizzling
Instructions
“`html
- Start by crushing the Biscoff biscuits. You can do this by placing them in a ziplock bag and using a rolling pin to crush them into fine crumbs. Alternatively, you can use a food processor for a quicker method. Aim for a texture similar to sand.
- In a mixing bowl, combine the crushed Biscoff biscuits with the melted unsalted butter. Mix well until all the crumbs are coated with butter. The mixture should hold together when pressed.
- Next, prepare a 9-inch springform pan. Press the biscuit mixture firmly into the bottom of the pan to create an even layer. Use the back of a measuring cup or your fingers to pack it down tightly. This will form the base of your cheesecake.
- Place the crust in the refrigerator to chill while you prepare the cheesecake filling. This will help it set and hold its shape better.
- In a large mixing bowl, add the softened cream cheese. Using an electric mixer, beat the cream cheese on medium speed until it’s smooth and creamy, about 2-3 minutes. Make sure there are no lumps.
- Gradually add the powdered sugar to the cream cheese, mixing on low speed until combined. Once incorporated, increase the speed to medium and beat for another minute until smooth.
- In a separate bowl, whip the heavy whipping cream until stiff peaks form. This usually takes about 3-5 minutes. Be careful not to over-whip, as it can turn into butter.
- Gently fold the whipped cream into the cream cheese mixture using a spatula. Start by adding a small amount of whipped cream to lighten the cream cheese mixture, then gradually fold in the rest. This will keep the filling light and airy.
- Add the Biscoff spread, vanilla extract, and a pinch of salt to the mixture. Gently fold until everything is well combined and the mixture is smooth and creamy.
- Once the crust has chilled, remove it from the refrigerator. Pour the cheesecake filling over the crust, spreading it evenly with a spatula. Make sure to smooth the top for a nice finish.
- To create a marbled effect, you can add dollops of extra Biscoff spread on top of the cheesecake filling. Use a knife or a skewer to swirl it gently into the filling.
- Cover the cheesecake with plastic wrap or aluminum foil and return it to the refrigerator. Let it chill for at least 4 hours, but preferably overnight. This will allow the cheesecake to set properly.
- Once the cheesecake has set, it’s time to serve! Carefully remove the sides of the springform pan. If you find it difficult to remove, run a knife around the edge to loosen it.
- Before serving, you can garnish the cheesecake with crushed Biscoff biscuits on top for added texture and flavor. If you like, drizzle some chocolate shavings or caramel sauce over the top for an extra touch of indulgence.
- Slice the cheesecake into wedges using a sharp knife. For clean cuts, dip the knife in hot water and wipe it dry before slicing. This will help you achieve neat slices.
- Serve the cheesecake chilled. It pairs wonderfully with a cup of coffee or tea, making it a perfect dessert for any occasion.
- If you have leftovers (which is rare because this cheesecake is so delicious!), store them in an airtight container in the refrigerator. It will keep well for up to 5 days.
- You can also freeze the cheesecake for longer storage. Wrap individual slices in plastic wrap and then place them in a freezer-safe container. They can be frozen for up to 2 months. When you’re ready to enjoy, simply thaw in the refrigerator overnight.
- If you want to add a twist to your cheesecake, consider mixing in some chopped nuts or chocolate chips into the filling for added texture.
- For a more intense Biscoff flavor, you can increase the amount of Biscoff spread in the filling or even add a layer of it between the crust and the filling.
- If you’re looking for a lighter version, you can substitute half of the cream cheese with Greek yogurt. This will give you a tangy flavor while reducing the calories.
- For a more festive touch, consider adding seasonal spices like cinnamon or nutmeg to the filling, especially around the holidays.
- If you’re making this cheesecake for a special occasion, consider decorating the top with fresh fruit or edible flowers for a beautiful presentation.
- Remember, the key to a successful no-bake cheesecake is patience. Allowing it to chill properly will ensure a creamy and firm texture that holds its shape when sliced.
- Enjoy the process! Making this no-bake Biscoff cheesecake is not only rewarding but also a fun activity to do with friends or family. Share the joy of baking and indulge in this delightful dessert together.
“`
Notes
- Der Teig darf während der Ruhezeit nicht bewegt werden.
- Für ein intensiveres Knoblaucharoma können mehr Zehen verwendet werden.
- Prep Time: 30 minutes
- Cook Time: 0 minutes

Leave a Comment