
There’s something magical about that first slice of Christmas dessert—the hush around the table, the sparkle in everyone’s eyes, and the way a single bite can wrap you in holiday warmth. This Christmas Red Velvet Cheesecake With Oreo Crust is exactly that kind of dessert. It’s a show-stopping swirl of creamy vanilla cheesecake and vibrant red velvet batter, all sitting atop a rich, chocolatey Oreo crust. Whether you’re hosting Christmas Eve dinner or attending a festive potluck, this cheesecake brings pure holiday joy to every plate.
What Is Christmas Red Velvet Cheesecake With Oreo Crust
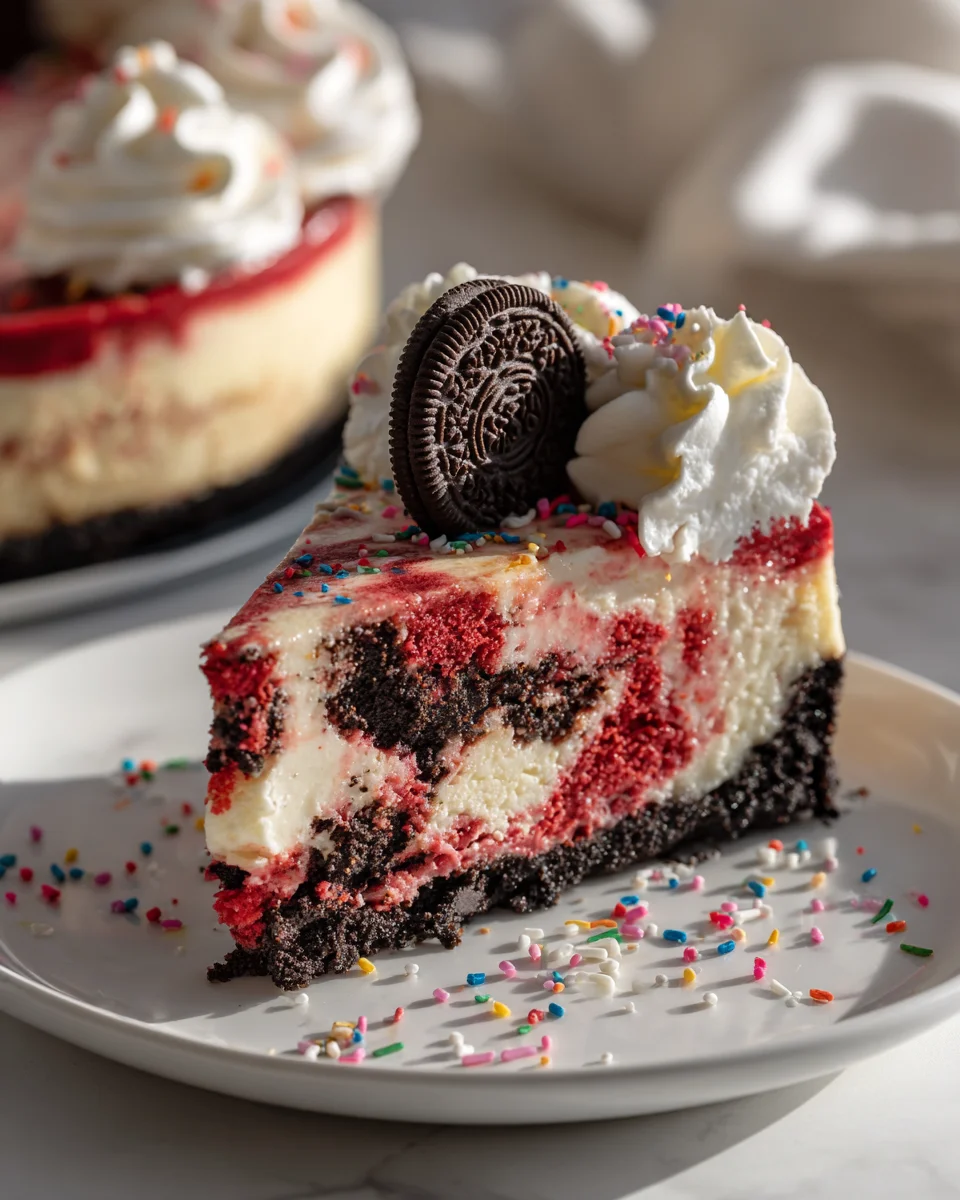
Christmas Red Velvet Cheesecake With Oreo Crust is a decadent, bakery-style cheesecake that combines two beloved desserts: classic velvety red velvet cake batter and ultra-creamy New York–style cheesecake. Swirled together for a stunning marbled effect, this cheesecake sits on a buttery Oreo cookie crust, offering a delightful mix of tangy, rich, chocolatey, and sweet flavors. Finished with whipped cream, sprinkles, and festive toppings, it’s a centerpiece dessert designed for the holiday season.
Why You’ll Fall in Love with This Recipe
This recipe isn’t just about flavor—it’s about experience. The combination of textures and colors makes it an unforgettable addition to your holiday table. It’s the dessert that gets guests talking, kids pointing, and adults lining up for seconds. The red velvet swirl is a built-in decorative touch, meaning your cheesecake looks stunning without requiring intricate decorating skills. Plus, the Oreo crust adds an unexpected chocolate twist that balances all the creamy richness.
How Does It Taste?
Imagine the tangy creaminess of cheesecake hugging the tender, cocoa-infused sweetness of red velvet—then add the crunch-meets-buttery finish of an Oreo crust. That’s this cheesecake in a nutshell. Each forkful melts in your mouth, giving you hits of chocolate and vanilla, tang from the cream cheese, and smooth richness that feels indulgent but not overwhelming. The red velvet flavor is present but not overpowering, making it a perfectly balanced holiday dessert.
Health & Ingredient Benefits
While this is firmly a dessert, many of its ingredients bring benefits beyond flavor. Cream cheese provides a small dose of protein and calcium. Cocoa naturally contains antioxidants. Eggs add structure and essential nutrients, while the red velvet layer requires less cocoa than full-chocolate desserts, making it slightly lighter but still deeply flavorful. Choosing high-quality vanilla and real butter enhances the taste and richness without relying on artificial flavors.

Ingredients You’ll Need
For the Oreo Crust:
-
2 cups Oreo cookie crumbs
-
5 tablespoons melted butter
For the Cheesecake Filling:
-
24 oz (3 blocks) cream cheese, softened
-
1 cup granulated sugar
-
1 cup sour cream
-
1 tablespoon vanilla extract
-
4 large eggs
For the Red Velvet Swirl:
-
¾ cup granulated sugar
-
½ cup vegetable oil
-
3 tablespoons unsweetened cocoa powder
-
1 teaspoon vanilla extract
-
1 teaspoon white vinegar
-
½ cup buttermilk
-
1 cup all-purpose flour
-
½ teaspoon baking soda
-
Red food coloring (as needed for vibrant red)
For Garnish (optional but highly recommended):
-
Whipped cream
-
Festive sprinkles
-
Oreo cookies
Tools You’ll Need
-
9-inch springform pan
-
Electric mixer or stand mixer
-
Mixing bowls
-
Rubber spatula
-
Measuring cups and spoons
-
Parchment paper
-
Baking sheet
-
Cooling rack
Optional Substitutions & Additions
-
Replace Oreo crust with graham cracker crust for a lighter finish.
-
Add mini chocolate chips to the red velvet batter for texture.
-
Swap sour cream for Greek yogurt for a tangier flavor.
-
Fold in white chocolate chunks to enhance the Christmas theme.
-
Add peppermint extract to the cheesecake batter for a mint-holiday twist.
Christmas Magic: Why Red Velvet Is Perfect for the Holidays
Red velvet isn’t just a flavor—it’s a visual celebration. Its ruby red color symbolizes warmth, love, and holiday cheer. Paired with the snowy contrast of cheesecake, it creates a dessert that feels like a festive artwork. Even the Oreo crust echoes winter nights with its deep, dark color, making this cheesecake a beautifully themed treat.
How to Make
-
Prepare the Crust:
Preheat your oven to 325°F (163°C). Mix Oreo crumbs with melted butter until evenly coated. Press into the bottom of your springform pan and bake for 8 minutes. Let cool. -
Make the Cheesecake Batter:
Beat softened cream cheese until smooth. Add sugar, mixing until creamy. Add sour cream and vanilla, then eggs one at a time, blending gently to avoid overmixing. -
Prepare the Red Velvet Batter:
Whisk together oil, sugar, cocoa powder, buttermilk, vinegar, vanilla, flour, and baking soda. Add enough red food coloring for a deep Christmas red. -
Swirl Them Together:
Pour half the cheesecake batter over the crust. Dollop spoonfuls of red velvet batter. Add remaining cheesecake batter, then more red velvet. Swirl with a knife for a marbled effect. -
Bake:
Place the pan on a baking sheet. Bake 55–65 minutes until the center is slightly jiggly. Turn oven off and let cheesecake rest inside for 1 hour. -
Chill:
Once cooled, refrigerate at least 4 hours (overnight preferred). -
Decorate:
Add whipped cream, sprinkles, and Oreo cookies before serving.
What to Serve With
-
Hot cocoa topped with marshmallows
-
Peppermint lattes
-
Mulled wine or spiced cider
-
Fresh berries
-
A simple vanilla bean ice cream scoop
Tips for Success
-
Use room-temperature cream cheese for the silkiest texture.
-
Don’t overmix the batter—this prevents cracking.
-
Bring all cold ingredients to room temperature before starting.
-
Bake slowly and cool slowly to avoid sinking or cracks.
-
Always chill thoroughly before slicing for clean, defined swirls.
Common Mistakes to Avoid
-
Skipping the crust bake—this causes sogginess.
-
Overmixing eggs into batter, which introduces air and cracks.
-
Using cold cream cheese, resulting in lumps.
-
Cutting before fully chilled.
-
Adding too much food coloring (a little goes a long way).
How to Store & Reheat
-
Refrigerate: Store covered for up to 5 days.
-
Freeze: Wrap tightly and freeze up to 3 months. Thaw overnight in fridge.
-
Reheat: Cheesecake is best served chilled; do not reheat.
Frequently Asked Questions
Can I make this ahead of time?
Yes! Cheesecake tastes best when chilled overnight.
Can I use different cookies for the crust?
Absolutely—gingersnaps or chocolate grahams both work beautifully.
How do I prevent cracks?
Avoid overbaking and allow the cheesecake to cool gradually.
Can I use gel food coloring?
Yes. Gel coloring provides vibrant red without thinning the batter.
Nutritional Info (approximate per serving)
Calories: 520
Fat: 34g
Carbohydrates: 45g
Protein: 8g
Sugar: 38g
Fiber: 1g
Conclusion
Christmas Red Velvet Cheesecake With Oreo Crust isn’t just a dessert—it’s a moment of holiday magic on a plate. The rich swirls, the festive colors, and the creamy-meets-chocolatey flavor make it an unforgettable centerpiece for your celebrations. Bring this cheesecake to your holiday table, and you’ll create a memory everyone savors long after the last bite.

Christmas Red Velvet Cheesecake Recipe – Festive & Delicious
- Total Time: 6 hours (including chilling)
- Yield: 12 servings 1x
- Diet: Vegetarian
Description
A festive marbled cheesecake featuring creamy vanilla cheesecake, vibrant red velvet batter, and a chocolatey Oreo crust. Perfect for Christmas gatherings.
Ingredients
Oreo Crust:
2 cups Oreo crumbs
5 tablespoons melted butter
Cheesecake Filling:
24 oz cream cheese, softened
1 cup granulated sugar
1 cup sour cream
1 tablespoon vanilla extract
4 large eggs
Red Velvet Swirl:
¾ cup granulated sugar
½ cup vegetable oil
3 tablespoons unsweetened cocoa powder
1 teaspoon vanilla extract
1 teaspoon white vinegar
½ cup buttermilk
1 cup all-purpose flour
½ teaspoon baking soda
Red food coloring
Garnish:
Whipped cream
Sprinkles
Oreo cookies
Instructions
1. Preheat oven to 325°F (163°C). Mix Oreo crumbs with melted butter and press into a springform pan. Bake 8 minutes and cool.
2. Beat cream cheese until smooth. Add sugar, sour cream, and vanilla. Add eggs one at a time without overmixing.
3. Prepare red velvet batter by whisking sugar, oil, cocoa, buttermilk, vinegar, vanilla, flour, baking soda, and food coloring.
4. Pour half the cheesecake batter over crust. Spoon red velvet batter on top. Add remaining cheesecake batter and swirl with a knife.
5. Bake 55–65 minutes until center is slightly jiggly. Turn oven off and let cheesecake cool inside 1 hour.
6. Chill at least 4 hours or overnight.
7. Top with whipped cream, sprinkles, and Oreo cookies before serving.
Notes
For clean slices, warm your knife under hot water and wipe between cuts. Cheesecake tastes best when chilled overnight.
- Prep Time: 25 minutes
- Cook Time: 1 hour
- Category: Dessert
- Method: Baked
- Cuisine: American
Keywords: Christmas cheesecake, red velvet cheesecake, Oreo crust cheesecake, holiday dessert, festive cheesecake