
Chocolate Pizzelles With Cannoli Filling – are you ready to embark on a culinary journey that marries two iconic Italian desserts into one unforgettable treat? I know I am! Imagine the delicate crispness of a traditional pizzelle, infused with rich cocoa, now cradling a luscious, creamy cannoli filling. This isn’t just a dessert; it’s an experience, a delightful fusion that will undoubtedly become the star of your next gathering or a treasured secret indulgence.
The pizzelle, with its intricate snowflake-like patterns, holds a cherished place in Italian-American kitchens, often made during holidays like Christmas and Easter, symbolizing good fortune and celebration. Meanwhile, the creamy, ricotta-based cannoli filling, sometimes studded with mini chocolate chips or candied orange peel, is a beloved Sicilian staple. Combining these two elements transforms simple ingredients into something truly extraordinary. People adore this dish not only for its stunning presentation and unique twist on classics but for the harmonious interplay of textures: the delightful snap of the chocolate pizzelle giving way to the smooth, sweet embrace of the cannoli filling. It’s a sophisticated yet comforting dessert that perfectly balances rich flavors without being overly heavy. Trust me, once you taste these Chocolate Pizzelles With Cannoli Filling, you’ll understand why this innovative creation is rapidly gaining fans and becoming a new favorite for special occasions and everyday cravings alike. I’m so excited for you to try it!

Ingredients:
- For the Chocolate Pizzelles:
- 3 large eggs, at room temperature
- ¾ cup (150g) granulated sugar
- ½ cup (113g) unsalted butter, melted and cooled slightly
- 1 teaspoon pure vanilla extract
- 1 ¾ cups (210g) all-purpose flour
- ½ cup (45g) unsweetened cocoa powder, preferably Dutch-processed
- 2 teaspoons baking powder
- ¼ teaspoon salt
- Optional: Confectioners’ sugar for dusting (if not filling immediately)
- For the Cannoli Filling:
- 2 pounds (900g) whole milk ricotta cheese, preferably fresh, drained very well
- ¾ cup (150g) confectioners’ sugar (powdered sugar), sifted
- 1 teaspoon pure vanilla extract
- ½ teaspoon ground cinnamon (optional, but highly recommended)
- ¼ cup (60ml) heavy cream (optional, for a lighter, whipped texture)
- ½ cup (85g) mini chocolate chips or finely chopped dark chocolate
- 2 tablespoons candied orange peel, finely diced (optional, for traditional flavor)
Preparing the Chocolate Pizzelle Batter
- Prepare Your Ricotta (Ahead of Time): This is perhaps the most crucial step for a perfect cannoli filling. If you’re using standard store-bought ricotta, which often contains a lot of water, you’ll need to drain it thoroughly. Place the ricotta in a fine-mesh sieve lined with cheesecloth or a coffee filter. Set this sieve over a bowl and refrigerate for at least 4-6 hours, or even better, overnight. I often press a plate on top with a heavy can to help expedite the process. Don’t skip this step! A watery ricotta will lead to a runny filling. For the best results, look for fresh, whole milk ricotta from an Italian deli or specialty store, which tends to be thicker and requires less draining.
- Melt the Butter: In a small microwave-safe bowl or saucepan, gently melt the unsalted butter. Once melted, set it aside to cool slightly. It should be warm to the touch, not hot, when you add it to the other ingredients. This prevents it from scrambling the eggs.
- Whisk Wet Ingredients: In a large mixing bowl, crack the three large eggs. Add the granulated sugar and whisk vigorously together until the mixture is light in color and slightly fluffy, about 2-3 minutes with a hand whisk or electric mixer. You want the sugar to begin dissolving into the eggs. Stir in the slightly cooled melted butter and the pure vanilla extract until everything is well combined and glossy.
- Sift Dry Ingredients: In a separate medium-sized bowl, whisk together the all-purpose flour, unsweetened cocoa powder, baking powder, and salt. Sifting is important here, especially for the cocoa powder, to ensure there are no lumps and that the leavening is evenly distributed. This makes for a smoother batter and a more uniform pizzelle.
- Combine Wet and Dry: Gradually add the dry ingredient mixture to the wet ingredient mixture, mixing on low speed with an electric mixer or by hand with a spatula until just combined. Be careful not to overmix the batter. Overmixing can develop the gluten in the flour too much, leading to tough pizzelles rather than the delicate, crisp texture we are aiming for. The batter will be thick, almost like a soft cookie dough.
- Rest the Batter: Cover the bowl with plastic wrap and let the batter rest at room temperature for at least 30 minutes, or even up to an hour. I find this resting period helps the flour fully hydrate and allows the flavors to meld, often resulting in a more tender and better-textured pizzelle. You can also refrigerate it for a few hours if you need to prepare it in advance, but let it come closer to room temperature before baking for easier handling.
Making the Velvety Cannoli Filling
- Process the Ricotta: Once your ricotta is thoroughly drained, transfer it to the bowl of a food processor. This step is key for achieving that incredibly smooth, restaurant-quality cannoli filling. Process the ricotta for 2-3 minutes, scraping down the sides occasionally, until it is completely smooth and creamy, with no grainy texture remaining. If you don’t have a food processor, you can push the ricotta through a fine-mesh sieve with a spatula for a similar effect, though it requires more effort.
- Combine with Sweeteners and Flavorings: Transfer the smoothed ricotta to a clean mixing bowl. Add the sifted confectioners’ sugar, pure vanilla extract, and optional ground cinnamon. If you’re opting for the extra richness and lighter texture, add the heavy cream here as well. Mix everything together with a spatula or a hand mixer on low speed until just combined and smooth. Taste and adjust sweetness if desired; some prefer it a little sweeter, others less so.
- Fold in Inclusions: Gently fold in the mini chocolate chips (or finely chopped dark chocolate) and the optional finely diced candied orange peel. The candied orange peel adds a lovely traditional zing that complements the chocolate beautifully, but it’s not everyone’s cup of tea, so feel free to omit it.
- Chill the Filling: Cover the bowl with plastic wrap and refrigerate the cannoli filling for at least 1-2 hours, or preferably longer, to allow the flavors to meld and the filling to firm up. This also makes it much easier to pipe or spread later.
Baking the Delicate Chocolate Pizzelles
- Preheat Your Pizzelle Iron: Follow the manufacturer’s instructions for preheating your pizzelle iron. Most irons have a light that indicates when it’s ready. If your iron requires seasoning or greasing, do so now with a light coating of cooking spray or vegetable oil. Even if it’s non-stick, a very light spray can sometimes help the first few come off perfectly. Ensure the iron is fully preheated before you start baking.
- Portion the Batter: Once the iron is hot, place approximately 1 tablespoon (or a slightly rounded tablespoon, depending on the size of your iron’s grid and your desired pizzelle thickness) of chocolate pizzelle batter in the center of each grid pattern. I find a small cookie scoop or a measuring spoon works best for consistent portions.
- Close and Cook: Firmly close the pizzelle iron. Depending on your iron and desired crispness, the pizzelles will cook for about 30-60 seconds. Some irons have a timer or an indicator light that signals when they’re done. Watch carefully – you’re looking for a beautifully golden-brown color, and for the steam to stop escaping from the sides. The chocolate makes them harder to judge by color alone, so relying on timing and firmness is key.
- Remove and Cool: Carefully open the iron and, using a thin spatula or knife, gently lift the hot pizzelles off the grid. They will be very delicate and pliable when hot. Immediately transfer them to a wire rack to cool completely. As they cool, they will crisp up beautifully. If they remain soft after cooling, they might need a little more cooking time on your next batch.
- Repeat the Process: Continue baking the remaining batter, ensuring the iron stays at the correct temperature. If the iron starts to get too hot, your pizzelles might burn. If it’s not hot enough, they might be soft or take too long to crisp. You’ll quickly get a feel for your specific iron’s nuances.
- Store Unfilled Pizzelles: Once completely cooled, the pizzelles can be stored in an airtight container at room temperature for several days. If they start to lose their crispness, you can briefly reheat them in a toaster oven or even back on the pizzelle iron for a few seconds to refresh them, but this is best done right before serving.
-
Troubleshooting Tips:
- Sticking: If pizzelles are sticking, try increasing the amount of butter in your batter by a tablespoon, or ensure your iron is adequately greased.
- Not Crisp: This usually means they haven’t cooked long enough. Increase the cooking time by 5-10 seconds per pizzelle.
- Too Thick: You might be adding too much batter. Reduce the amount slightly.
- Too Thin/Break Apart: This could be too little batter, or the batter might be too thin. If the batter is too thin, try adding a tablespoon or two more flour.
Assembling the Chocolate Pizzelles with Cannoli Filling
- Prepare for Filling: Retrieve your chilled cannoli filling from the refrigerator. Give it a good stir to ensure it’s still smooth and ready to go.
- Choose Your Method: You have a couple of options for filling. For a neat, professional look, transfer the cannoli filling to a piping bag fitted with a large star tip or a plain round tip. If you don’t have a piping bag, a sturdy Ziploc bag with a corner snipped off will work just fine. Alternatively, you can simply use a small spoon or an offset spatula for a more rustic approach.
-
Fill the Pizzelles:
- For individual pizzelle sandwiches: Take one chocolate pizzelle, pipe or spoon a generous dollop of cannoli filling onto the flat side of half of the pizzelle. Then, carefully place another chocolate pizzelle on top, gently pressing down to create a “sandwich.” I love the look of the filling peeking out slightly from the sides.
- For single open-faced pizzelles: If you prefer to serve them open-faced, simply spread a layer of cannoli filling across the entire surface of one chocolate pizzelle. This is a great option if your pizzelles are particularly delicate and you want to avoid breaking them when creating a sandwich.
- Garnish (Optional): For an extra touch of elegance and flavor, you can garnish the filled pizzelles. A sprinkle of additional mini chocolate chips, a dusting of cocoa powder, or a very fine grating of dark chocolate over the top can make them look even more appealing. Sometimes, I even add a tiny piece of candied orange peel to the very top if I used it in the filling.
- Serve Immediately or Chill: While pizzelles are at their crispiest when freshly baked, the cannoli filling is best when chilled. For optimal texture, I recommend assembling the pizzelles no more than 1-2 hours before serving. The longer the filling sits on the pizzelles, the softer they will become. If you need to make them further in advance, you can keep the pizzelles and filling separate and assemble just before your guests arrive. However, if you don’t mind a slightly softer pizzelle, the assembled treats can be stored in an airtight container in the refrigerator for up to 24 hours. The flavors do meld wonderfully, but you lose some of that initial crispness.
- Enjoy Your Creations: These Chocolate Pizzelles With Cannoli Filling are an absolute delight – a perfect blend of crisp, rich chocolate and creamy, sweet cannoli goodness. They are always a hit at gatherings and make for a truly special dessert.

Conclusion:
If there’s one recipe I’m truly passionate about sharing, it’s this one. We’ve embarked on a delightful journey creating something truly special, and I genuinely believe that once you experience the magic of these treats, you’ll understand exactly why they’re a must-try in every sense of the word. What makes this recipe an absolute standout is the ingenious marriage of textures and flavors. You have the delicate, crisp snap of a perfectly cooked chocolate pizzelle, a wafer so light it practically melts on your tongue, yet robust enough to hold its own. Then, in swoops the luscious, creamy cannoli filling – a cool, sweet, and subtly spiced ricotta blend that provides the most heavenly contrast. It’s a symphony of crunch and creaminess, a dance between rich cocoa and sweet cheese, elevated by hints of citrus and maybe a whisper of cinnamon or vanilla. This isn’t just another dessert; it’s an elegant showstopper that consistently garners rave reviews and leaves a lasting impression on anyone fortunate enough to taste it.
There’s something uniquely satisfying about presenting a platter of these beauties. They look sophisticated, they taste incredible, and they carry a certain handmade charm that speaks volumes. For me, the true joy lies not only in the eating but in the process of creating such a beloved treat. The aroma of chocolate wafting from the pizzelle iron, followed by the careful mixing of the ricotta filling, culminating in the joyful act of piping each delicate shell – it’s a culinary experience that feeds the soul as much as it delights the palate. This recipe for Chocolate Pizzelles With Cannoli Filling offers an unparalleled dessert experience, marrying the comforting tradition of Italian pizzelles with the iconic, rich flavors of cannoli, creating something greater than the sum of its parts. It truly is a testament to how simple, quality ingredients can be transformed into something extraordinary.
Now, let’s talk about how to enjoy these masterpieces and make them truly your own. For serving, I absolutely adore them as a sophisticated after-dinner treat with a strong espresso or a robust cup of coffee. The slight bitterness of the coffee perfectly cuts through the sweetness of the filling, creating a harmonious balance. They are also phenomenal for parties and gatherings; arranging them artfully on a tiered stand instantly elevates your dessert table. Imagine them gracing your holiday spread or being passed around at a celebratory brunch – they’re guaranteed to be the star. If you’re planning ahead, you can make the pizzelles a few days in advance and store them in an airtight container, and the cannoli filling can be prepared a day ahead. Just assemble them right before serving to maintain that delightful crispness of the pizzelle. Trust me, the minimal effort of last-minute assembly is well worth it for the ultimate fresh taste and texture.
One of the most exciting aspects of any recipe, for me, is the opportunity for variation and personal touches. While the classic version is utterly divine, don’t hesitate to experiment! For the pizzelles, you could try a mix of dark and milk chocolate, or even drizzle them with white chocolate once cooled for an extra layer of sweetness and visual appeal. The cannoli filling itself is a playground for creativity. Consider adding a splash of your favorite liqueur – perhaps amaretto for an almond nuance, or a hint of orange liqueur for a brighter citrus note. A sprinkle of finely chopped pistachios or candied orange peel folded into the filling would introduce wonderful texture and flavor contrasts. You could also experiment with different chocolate chips inside the filling, like mini dark chocolate chips or even a mix of milk and white. For presentation, you can even mold warm pizzelles over a small bowl or a cannoli form to create little cups or cones, ready to be filled with the creamy goodness. The possibilities are truly endless, allowing you to tailor this incredible dessert precisely to your taste and occasion.
So, please, I wholeheartedly encourage you to roll up your sleeves and give this recipe a try. I know it might seem like a few steps, but each one is incredibly rewarding, and the end result is absolutely worth every moment. This isn’t just about following instructions; it’s about creating a memory, sharing joy, and indulging in something truly spectacular. I genuinely believe that once you taste the exquisite combination of these light, chocolatey wafers and the rich, creamy cannoli filling, it will become a cherished recipe in your own culinary repertoire. I am so excited for you to experience this delight! And once you do, please don’t keep it to yourself. I would be absolutely thrilled to hear about your experience in the comments below. Did you try any variations? What did your friends and family think? Share your successes, your little tweaks, and your serving ideas. Let’s build a community around this truly irresistible dessert. Happy baking, and happy tasting!
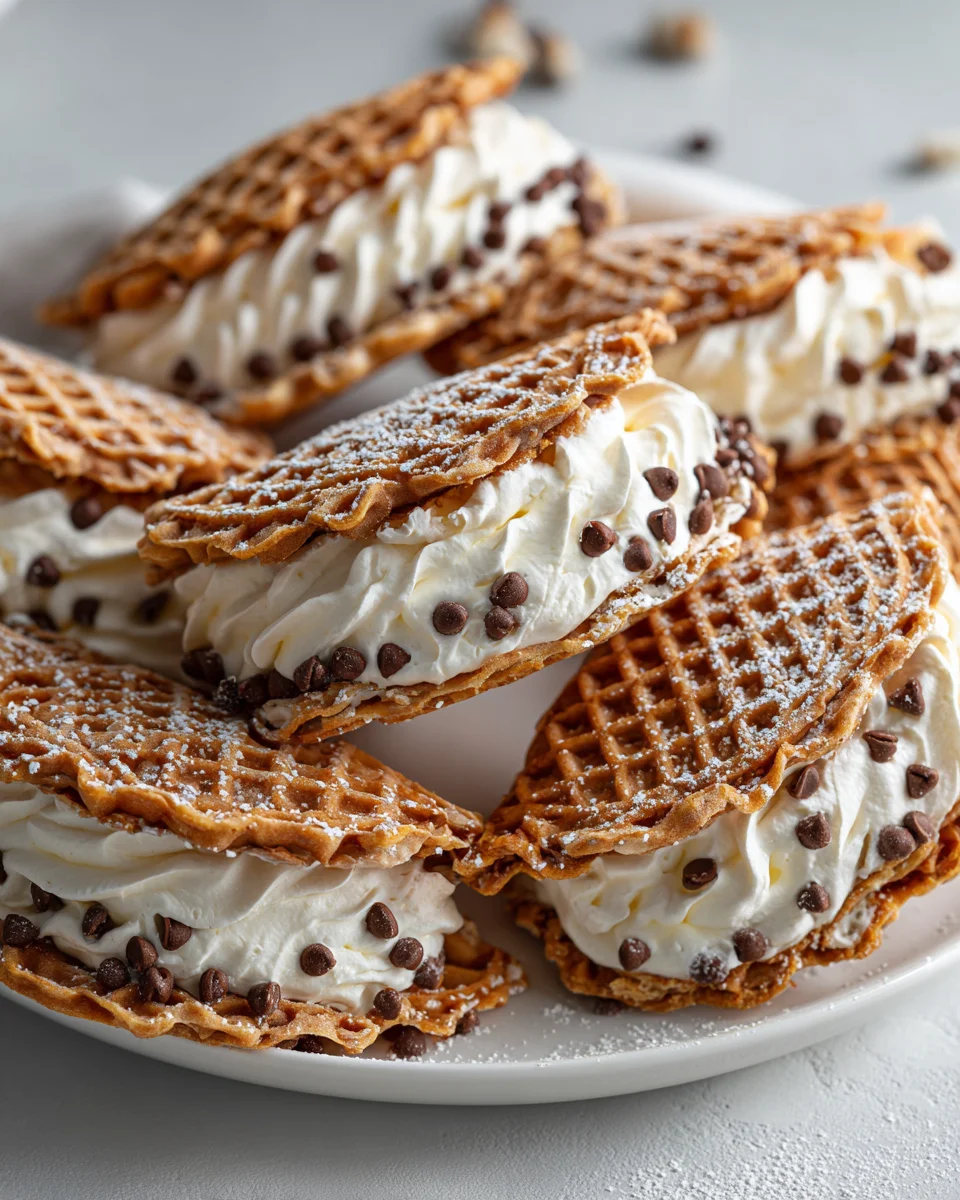
Chocolate Pizzelles With Cannoli Filling
These delightful treats feature crisp chocolate pizzelles generously filled with a sweet and creamy, cannoli-style cream cheese filling, creating a harmonious blend of textures and flavors that will impress at any gathering.
Ingredients
-
8 oz Philadelphia Cream Cheese, softened
-
16 chocolate pizzelles
-
4 oz heavy whipping cream
-
1 1/4 cup powdered sugar
-
1 cup semi-sweet chocolate chips
-
1/2 tsp ground cinnamon
-
1 tsp vanilla extract
Instructions
-
Step 1
{‘@type’: ‘HowToStep’, ‘name’: ‘Prepare the Creamy Filling’, ‘text’: ‘In a large mixing bowl, beat the softened Philadelphia Cream Cheese until it is smooth and creamy. Add 1 1/4 cup of the powdered sugar, vanilla extract, and ground cinnamon. Mix on low speed until all ingredients are well combined and the mixture is smooth. In a separate, clean bowl, whip the heavy cream until soft peaks form. Gently fold the whipped cream into the cream cheese mixture until just combined. Finally, fold in the semi-sweet chocolate chips. Cover the bowl with plastic wrap and refrigerate the creamy filling for at least 1-2 hours to allow the flavors to meld and the filling to firm up, which will make it easier to pipe or spread.’, ‘supply’: [‘Philadelphia Cream Cheese’, ‘Powdered sugar’, ‘Vanilla extract’, ‘Ground cinnamon’, ‘Heavy whipping cream’, ‘Semi-sweet chocolate chips’]} -
Step 2
{‘@type’: ‘HowToStep’, ‘name’: ‘Assemble the Chocolate Pizzelles with Filling’, ‘text’: “Retrieve your chilled creamy filling from the refrigerator. For a neat presentation, transfer the filling to a piping bag fitted with a large star or plain round tip (or use a sturdy Ziploc bag with a snipped corner). Take one chocolate pizzelle, pipe or spoon a generous dollop of the creamy filling onto the flat side of half of the pizzelle. Carefully place another chocolate pizzelle on top, gently pressing down to create a ‘sandwich’, allowing some filling to peek out from the sides. If you prefer, you can also spread a layer of filling across the entire surface of a single chocolate pizzelle for an open-faced treat.”, ‘supply’: [’16 chocolate pizzelles’, ‘Creamy filling’]} -
Step 3
{‘@type’: ‘HowToStep’, ‘name’: ‘Garnish and Serve’, ‘text’: “Optionally, for an extra touch, dust the assembled pizzelles with a small amount of additional powdered sugar (if desired, from the ingredient list’s ‘plus a teaspoon for dusting’) or sprinkle with a few extra mini chocolate chips. For the best texture, assemble the pizzelles no more than 1-2 hours before serving, as the pizzelles will soften over time when in contact with the filling. If preparing further in advance, store the pizzelles and filling separately and assemble just before your guests arrive. Enjoy your delicious Chocolate Pizzelles with Creamy Filling!”, ‘supply’: [‘Powdered sugar (optional, for dusting)’]}
Important Information
Nutrition Facts (Per Serving)
It is important to consider this information as approximate and not to use it as definitive health advice.
Allergy Information
Please check ingredients for potential allergens and consult a health professional if in doubt.