
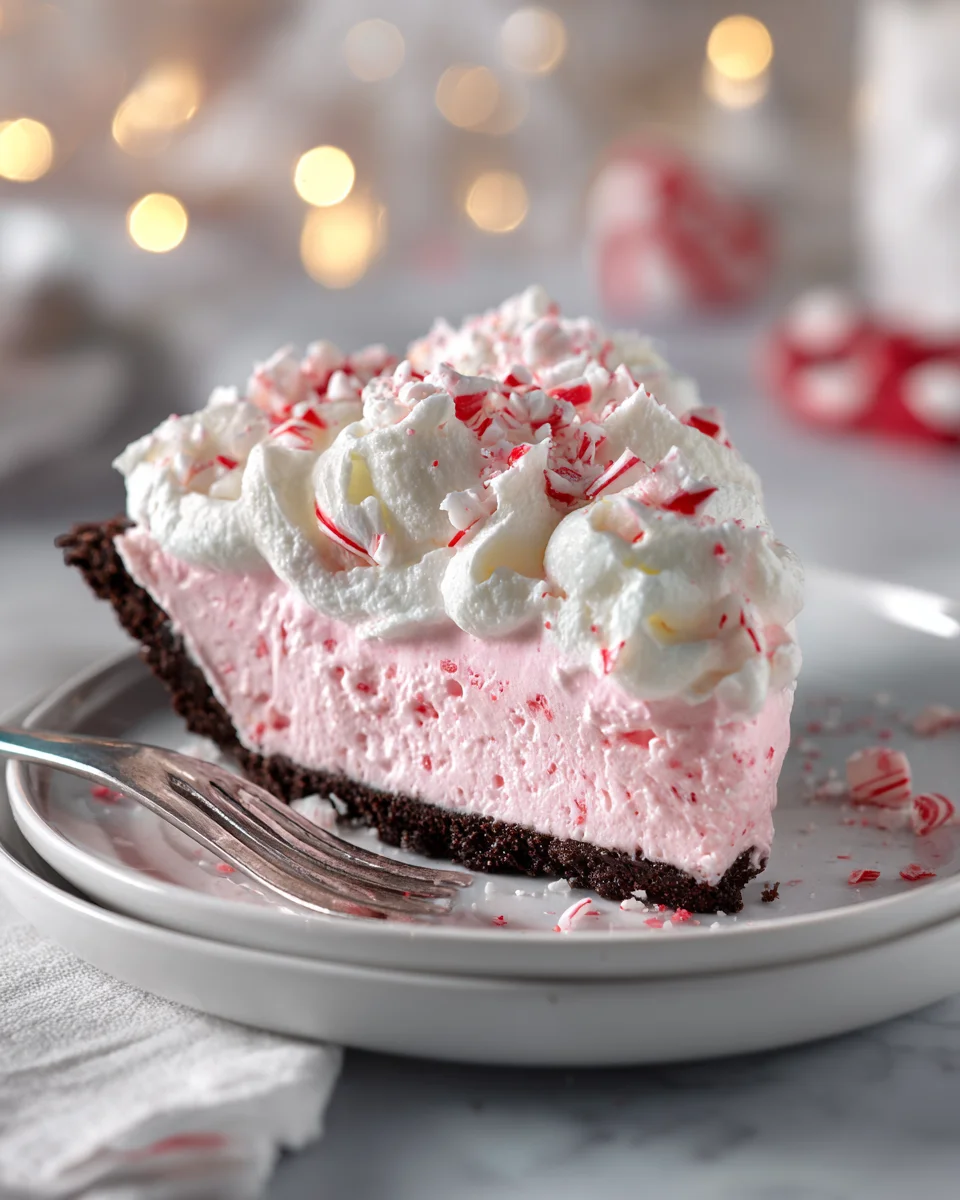
Easy Christmas Peppermint Pie is more than just a dessert; it’s a slice of pure holiday magic that will transport you straight to a winter wonderland. Imagine a creamy, cool, and refreshingly minty filling nestled in a crisp crust, adorned with festive crushed candy canes. For many of us, the very scent of peppermint conjures cherished memories of Christmas mornings and festive gatherings. While the precise origins of peppermint pie might be a modern twist on classic holiday flavors, the tradition of incorporating invigorating peppermint into our winter celebrations dates back centuries, with candy canes themselves becoming an iconic symbol of the season.
This delightful treat captures the essence of that timeless joy, offering a vibrant burst of flavor that perfectly complements the rich, warm dishes typically served during the holidays. What makes this particular Easy Christmas Peppermint Pie so beloved is its perfect balance: a refreshing coolness that cuts through the richness of a holiday meal, a velvety smooth texture, and an undeniable festive appeal that makes it a showstopper on any dessert table. And the best part? Its simplicity means you can whip up this crowd-pleaser without any stress, leaving you more time to enjoy the true magic of the season.

Ingredients:
- For the Chocolate Cookie Crust:
- 1 ½ cups (approximately 18-20 whole cookies) finely crushed chocolate sandwich cookies (like Oreos), filling included
- 6 tablespoons unsalted butter, melted
- For the Peppermint Cream Filling:
- 1 (8-ounce) package full-fat cream cheese, softened at room temperature
- ¾ cup powdered sugar (also known as confectioners’ sugar), sifted
- 1 teaspoon pure peppermint extract (ensure it’s not spearmint)
- 2 drops red or pink gel food coloring (optional, for festive color)
- 1 ½ cups heavy cream (also known as heavy whipping cream), very cold
- For the Garnish:
- ½ cup crushed candy canes (about 4-5 standard candy canes)
- Additional whipped cream or fresh mint sprigs (optional)
Equipment You’ll Need:
Before we embark on creating this delightfully Easy Christmas Peppermint Pie, it’s always a good idea to gather all your tools. This will make the process smooth and enjoyable, ensuring you can focus on the fun of baking (or rather, no-baking!). You’ll want to have handy: a 9-inch pie plate (preferably glass or ceramic for even chilling), a food processor or a sturdy plastic bag and a rolling pin for crushing cookies and candy canes, a large mixing bowl, a medium mixing bowl, an electric mixer (stand mixer with whisk attachment or a handheld mixer are both perfect), a rubber spatula, a small microwave-safe bowl for melting butter, measuring cups and spoons, and a wire whisk (if doing any hand-whipping).
Getting Started: Preparing Your Workspace for Easy Christmas Peppermint Pie
Alright, my friends, let’s get into the festive spirit and prepare for some holiday magic! One of the secrets to a truly easy and enjoyable cooking experience, especially when making something as delightful as our Easy Christmas Peppermint Pie, is to have everything ready to go. I always start by clearing my kitchen counters, making sure there’s plenty of space to work. Take out all your ingredients and let the cream cheese sit at room temperature for at least 30-60 minutes. Softened cream cheese is absolutely critical for a smooth, lump-free filling. Trust me on this one; nobody wants lumpy pie filling!
While your cream cheese is getting cozy on the counter, you can also take a moment to prepare your candy canes for the garnish. You can either place them in a sturdy freezer bag and gently crush them with a rolling pin or the flat side of a meat mallet, or if you have a small food processor, a few pulses will do the trick. Just be careful not to turn them into fine dust; we want some lovely little shards for texture and visual appeal. Set these aside in a small bowl. This simple step now saves you time and stress later when your pie is chilling.
Lastly, make sure your heavy cream is as cold as possible. Sometimes I even pop my mixing bowl and whisk attachment into the freezer for 10-15 minutes before whipping the cream. This helps achieve those beautiful, stiff peaks that are essential for a light and airy pie filling. A little preparation goes a long way to making this Easy Christmas Peppermint Pie truly effortless.
Phase 1: Crafting the Perfect Chocolate Cookie Crust
The foundation of any great pie is its crust, and for our Easy Christmas Peppermint Pie, we’re going with a rich, dark chocolate cookie crust that complements the cool peppermint perfectly. This step is incredibly simple but makes all the difference in texture and flavor.
- Crush the Cookies: First, you’ll need to finely crush your chocolate sandwich cookies. I find the easiest and most efficient way to do this is in a food processor. Simply toss the cookies (yes, with the cream filling!) into the processor and pulse until they resemble fine crumbs, almost like coarse sand. If you don’t have a food processor, no worries! Place the cookies in a heavy-duty zip-top bag, seal it, and use a rolling pin to crush them. Make sure to get them as fine as possible; larger chunks can make the crust difficult to press and prone to crumbling. Aim for that perfect crumbly texture – you should have exactly 1 ½ cups of these delightful crumbs.
- Melt the Butter: In a small, microwave-safe bowl, melt your 6 tablespoons of unsalted butter. You can do this in 15-20 second intervals, stirring in between, until it’s completely liquid. Be careful not to overheat it to the point of browning, as we just want it melted and warm.
- Combine and Press: Transfer your finely crushed cookie crumbs into a medium mixing bowl. Pour the melted butter over the crumbs. Using a rubber spatula or your clean hands (which, let’s be honest, is half the fun of baking!), mix the butter and crumbs together until they are thoroughly combined and the crumbs are evenly moistened. They should have the consistency of wet sand and hold together when squeezed.
- Form the Crust: Now, transfer this buttery crumb mixture into your 9-inch pie plate. Using the bottom of a flat glass or a measuring cup, or even your knuckles, firmly press the mixture evenly across the bottom and up the sides of the pie plate. It’s important to press it down very firmly to ensure the crust holds its shape when sliced. Pay extra attention to the edges to make sure they are well-formed and sturdy. This firm pressing is key for a crust that won’t fall apart!
- Chill for Stability: Once your crust is perfectly formed, pop it into the refrigerator for at least 30 minutes. This chilling time is vital; it allows the butter to solidify and bind the crumbs together, creating a stable base for our luscious peppermint filling. This step ensures your Easy Christmas Peppermint Pie has a structurally sound and delicious crust.
Phase 2: Whipping Up the Dreamy Peppermint Filling
This is where the magic truly happens for our Easy Christmas Peppermint Pie – creating the light, airy, and intensely pepperminty filling that screams holiday joy. The key here is proper technique and cold ingredients for that perfect whipped cream texture.
- Prepare the Cream Cheese Mixture: In your large mixing bowl, using an electric mixer, beat the softened cream cheese on medium speed until it is completely smooth and creamy, with no lumps remaining. This might take 2-3 minutes. Scrape down the sides of the bowl as needed to ensure everything is incorporated.
- Sweeten and Flavor: Add the sifted powdered sugar to the cream cheese. Beat on low speed first to prevent a cloud of sugar from flying everywhere, then increase to medium-high speed and beat until well combined and fluffy, about 2 more minutes. Next, add the pure peppermint extract. Start with 1 teaspoon; you can always add a tiny bit more later if you desire a stronger peppermint flavor, but be cautious, as peppermint can quickly become overpowering. Beat until just combined.
- Add Festive Color (Optional): If you’re aiming for that classic pink Christmas peppermint pie look, now is the time to add a couple of drops of red or pink gel food coloring. Mix on low speed until the desired color is achieved. Remember, a little goes a long way, especially with gel colors!
- Whip the Heavy Cream: In a separate, very clean and cold medium mixing bowl (remember that trick of chilling the bowl and whisk?), pour in your very cold heavy cream. Using your electric mixer with the whisk attachment, beat the heavy cream on medium-high speed until stiff peaks form. This means that when you lift the whisk, the cream stands up straight and holds its shape. Be careful not to overbeat, or you’ll end up with butter! This usually takes about 3-5 minutes, depending on your mixer. This step is crucial for the light and airy texture of your Easy Christmas Peppermint Pie.
- Gently Fold Them Together: Now for the delicate part! Take about a third of your whipped cream and gently fold it into the cream cheese mixture using your rubber spatula. This lightens the cream cheese base. Then, add the remaining whipped cream and fold it in very gently until no streaks of cream cheese or whipped cream remain. The key word here is “gently” – we want to preserve all that lovely air you just incorporated into the whipped cream. Overmixing will deflate the mixture and result in a dense filling.
- Fill the Crust: Carefully spoon or pour the creamy peppermint filling into your chilled chocolate cookie crust. Use your spatula to gently spread the filling evenly, creating a smooth top. You want it to look as inviting as it tastes!
Phase 3: The Grand Finale – Chilling and Decorating Your Easy Christmas Peppermint Pie
The final steps are all about patience and presentation. Chilling is absolutely essential to allow this no-bake peppermint pie to set up beautifully, ensuring clean slices and a delightful texture. And the decoration? That’s where the festive “Christmas” really comes into play!
- The Critical Chill: Once your pie is assembled with its dreamy filling, cover it loosely with plastic wrap (try to avoid letting the plastic touch the filling directly) and place it in the refrigerator. This Easy Christmas Peppermint Pie needs to chill for a minimum of 4 hours, but ideally, for best results, overnight. This prolonged chilling time allows the cream cheese and whipped cream to firm up and bind together perfectly, making sure your slices are neat and the pie holds its shape. Do not rush this step! It’s the secret to a perfectly set no-bake pie.
- Prepare for Garnish: If you haven’t already, now is the time to finalize your candy cane crushing. You can also prepare any additional whipped cream for topping, if you’re not using store-bought. For fresh whipped cream, simply beat 1 cup of cold heavy cream with 1-2 tablespoons of powdered sugar and a ¼ teaspoon of vanilla extract until soft peaks form. Keep it chilled until just before serving.
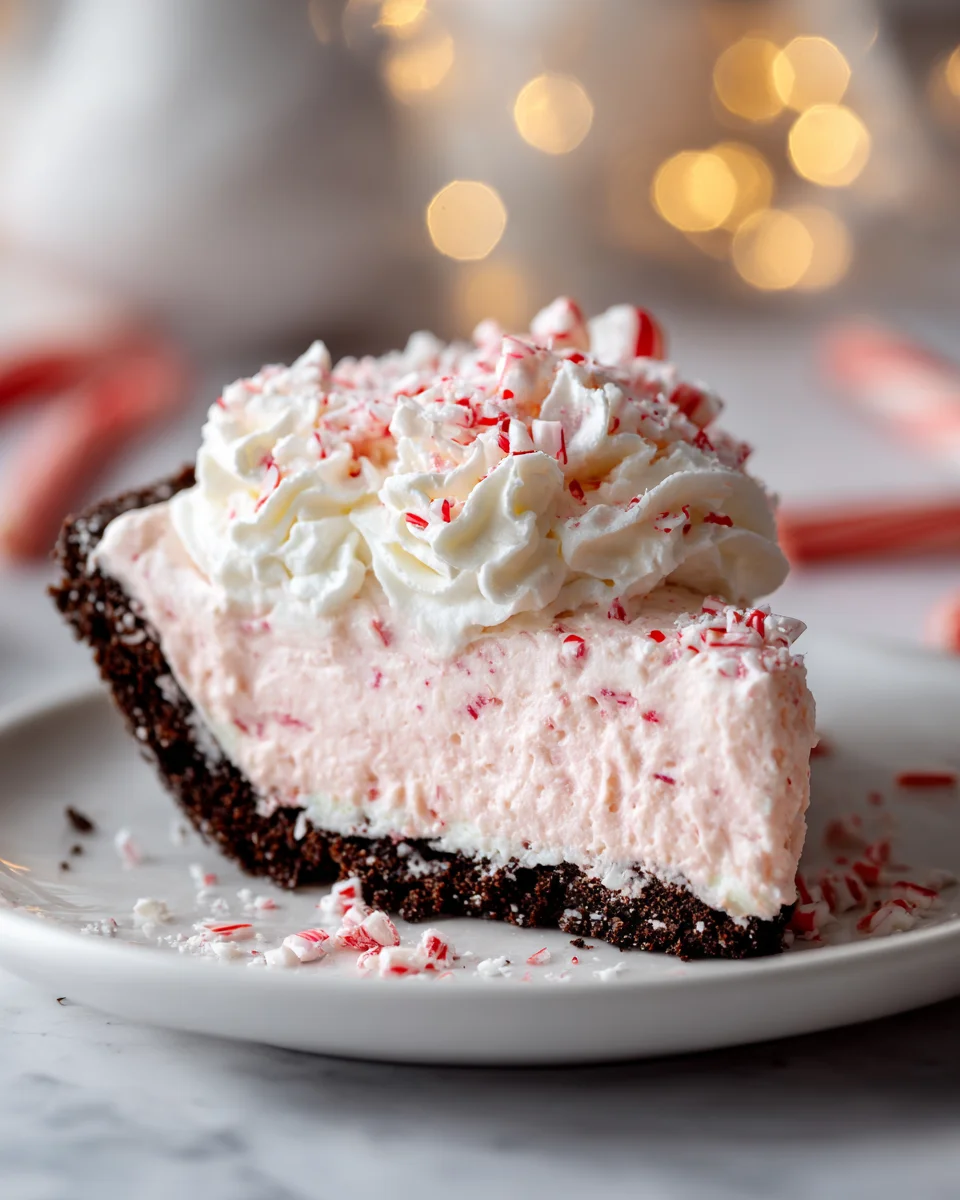
- Decorate with Festive Flair: Just before serving, remove your thoroughly chilled Easy Christmas Peppermint Pie from the refrigerator. Now for the fun part! If you’re adding an extra layer of whipped cream, spread it gently over the top of the pie or pipe decorative swirls. Then, generously sprinkle your crushed candy canes over the top. The vibrant red and white against the creamy pink (or white, if you skipped the food coloring) filling and dark chocolate crust is absolutely stunning and instantly says “Christmas!” You can also add a few fresh mint sprigs for an extra pop of green and a fresh aroma.
Tips for Success, Storage, and Variations for Your Easy Christmas Peppermint Pie
Making this Easy Christmas Peppermint Pie is already a breeze, but a few extra tips can elevate your experience and ensure picture-perfect results every time. Plus, knowing how to store it and explore variations will make this recipe a staple in your holiday repertoire.
Mastering the No-Bake Peppermint Pie:
Softened Cream Cheese is Non-Negotiable: I cannot stress this enough! Cold cream cheese will result in lumps, no matter how long you beat it. Plan ahead and let it come to room temperature. This guarantees a silky-smooth, homogeneous filling for your Easy Christmas Peppermint Pie.
Don’t Over-Whip the Cream: While you want stiff peaks for your heavy cream, be vigilant. Over-whipped cream can quickly turn grainy or even into butter. Stop as soon as those peaks hold their shape. The cold bowl and whisk trick really does help achieve perfect whipped cream every time.
Gentle Folding is Key: When combining the whipped cream with the cream cheese mixture, think “light and airy.” Use a rubber spatula and a gentle, upward folding motion to preserve the air in the whipped cream. This is what gives the pie its delightful, melt-in-your-mouth texture.
Patience with Chilling: The minimum 4 hours of chilling isn’t a suggestion; it’s a requirement for a properly set pie. An overnight chill is truly ideal, especially if you want those clean, beautiful slices. Resist the urge to cut into it too soon!
Achieving the Perfect Peppermint Balance: Peppermint extract can be potent. Start with the recommended amount, taste a tiny bit of the filling, and then add more in tiny increments (e.g., ¼ teaspoon at a time) if you prefer a stronger flavor. It’s easier to add more than to correct an overpowering peppermint taste.
Storage Information:
This Easy Christmas Peppermint Pie is a fantastic make-ahead dessert! Once assembled and chilled, cover it loosely with plastic wrap (to avoid crushing any top decorations) and store it in the refrigerator for up to 3-4 days. The crust might soften slightly over time, but the flavor will remain wonderful. I honestly find that the flavors meld and deepen a bit after a day or two in the fridge, making it even more delicious.
For longer storage, you can freeze individual slices or the whole pie (well-wrapped in plastic wrap and then foil) for up to 1 month. Thaw in the refrigerator overnight before serving. The texture might be slightly different after freezing and thawing, but it will still be a delightful treat, perfect for enjoying a bit of Christmas cheer even after the holidays have passed.
Exciting Variations to Explore:
Crust Alternatives: While the chocolate cookie crust is a classic for this Easy Christmas Peppermint Pie, don’t limit yourself! A graham cracker crust provides a sweeter, buttery base, or for something truly unique, try a pretzel crust for a salty-sweet contrast that is absolutely divine with the creamy peppermint.
Add Chocolate Chips: For a “peppermint bark” inspired pie, fold ½ cup of mini chocolate chips (dark or semi-sweet work best) into the peppermint filling before spreading it into the crust. This adds an extra layer of texture and a beloved flavor pairing.
Chocolate Drizzle: Instead of, or in addition to, candy canes, melt some dark chocolate and drizzle it artfully over the top of the pie just before serving. The visual appeal is stunning, and the chocolate adds another dimension of flavor. A simple ganache (equal parts heavy cream and chocolate, heated until melted and smooth) works wonderfully.
Mint Chocolate Cookie Crumble: For a double dose of mint and chocolate, consider using mint-flavored chocolate sandwich cookies for the crust instead of regular ones. This amps up the festive feel and adds another layer of deliciousness to your Easy Christmas Peppermint Pie.
Spice It Up (Gently!): For an interesting twist, you could experiment with a tiny pinch of cinnamon or a very small amount of almond extract in the filling. These would add a subtle warmth without overpowering the star peppermint flavor, making your Easy Christmas Peppermint Pie truly unique.
Whether you stick to the classic recipe or try one of these delightful variations, this Easy Christmas Peppermint Pie is guaranteed to be a showstopper at any holiday gathering. Its vibrant flavors, creamy texture, and festive look make it the quintessential holiday dessert. Enjoy the process, and most importantly, enjoy the delicious results!
Conclusion:
So, there you have it! We’ve journeyed together through the delightful process of creating what I truly believe will become a staple in your holiday dessert repertoire. This isn’t just another pie; it’s a vibrant, refreshing, and incredibly satisfying treat that perfectly encapsulates the joy and festive spirit of the season. What truly sets this recipe apart, in my humble opinion, is its magnificent blend of simplicity and show-stopping appeal. You get all the “wow” factor without any of the stress, which, let’s be honest, is exactly what we need when the holiday season gears up and our to-do lists grow longer than Santa’s naughty-or-nice scroll. The cool, minty filling paired with that rich, chocolatey crust creates a symphony of flavors and textures that is utterly irresistible, leaving everyone at your table asking for another slice and, more importantly, for the recipe!
I cannot overstate how much I adore this particular dessert for its ability to brighten any festive spread. It’s a guaranteed crowd-pleaser, providing a wonderfully light and invigorating contrast to the typically rich and heavy fare often served during winter celebrations. Imagine the vibrant splash of color it brings to your dessert table, standing out beautifully amongst the traditional cookies and fruitcakes. This pie isn’t just a dessert; it’s a conversation starter, a palate cleanser, and a moment of pure, unadulterated holiday bliss. It’s the kind of dish that gets passed down through generations, cherished not just for its incredible taste, but for the ease with which it can be brought to life, allowing you more precious time to spend with loved ones rather than slaving away in the kitchen. That, to me, is the true magic of this particular creation.
Making it Your Own: Serving Suggestions and Delicious Variations
While this pie is absolutely phenomenal as is, I always encourage you to get creative in the kitchen and make it uniquely yours! For a classic presentation that never fails to impress, I love serving each slice with a generous dollop of freshly whipped cream, perhaps sweetened with a touch of vanilla extract. For an extra festive touch, a sprinkle of finely crushed candy canes or delicate chocolate shavings over the whipped cream adds both visual appeal and an extra layer of texture and flavor. If you’re hosting a gathering, consider pairing this refreshing pie with a steaming mug of hot chocolate or a perfectly brewed coffee; the warmth of the beverage provides a lovely counterpoint to the pie’s cool, creamy texture.
Feeling adventurous? Here are a few variations I’ve explored and loved. You could try adding a thin layer of melted dark chocolate over the crust before adding the peppermint filling – allow it to set completely – for an even richer, more intense chocolate experience. Another idea is to experiment with your crust; while the chocolate wafer crust is divine, an Oreo crust or even a simple graham cracker crust can offer a different textural dimension. For those who adore mint, you might even stir in a tiny drop more peppermint extract into the filling, though always taste as you go to ensure it doesn’t become overpowering. And if you’re looking for a non-dairy option, simply substitute the whipped cream with a coconut cream topping – it works beautifully! The possibilities are truly endless, and each tweak offers a chance to personalize this wonderful dessert to your family’s specific tastes.
Your Turn: Embrace the Joy of Baking!
Now that you have all the tips and tricks, it’s truly your turn to bring this magnificent creation to life! I genuinely hope you feel inspired to dive into your kitchen this holiday season and whip up this sensational Easy Christmas Peppermint Pie. It’s a testament to the fact that incredibly delicious and impressive desserts don’t have to be complicated or time-consuming. Imagine the smiles it will bring to your family’s faces, the oohs and aahs from your guests, and the sheer satisfaction you’ll feel knowing you’ve created something so special with such ease. I promise, the reward far outweighs the minimal effort involved.
Once you’ve experienced the magic of this pie, please, please, please share your triumphs with me! I absolutely adore seeing your culinary creations. Whether it’s a photo of your perfectly sliced pie, a comment about a variation you tried, or just a quick note about how much your loved ones enjoyed it, your feedback truly brightens my day and inspires me to keep sharing these delightful recipes. Don’t be shy – tag me on social media (if this were a real blog, I’d give you a handle!) or simply drop a comment below. Let’s make this holiday season the most delicious one yet, one irresistible slice of peppermint pie at a time. Happy baking, my friends!
Easy Christmas Peppermint Pie
This cool and creamy peppermint pie is perfect with a hot cup of coffee, cocoa, or even a peppermint mocha if you’re really feeling festive!
Ingredients
-
1 ½ cups finely crushed chocolate sandwich cookies (18-20 cookies)
-
6 tablespoons unsalted butter, melted
-
1 (8-ounce) package full-fat cream cheese, softened
-
¾ cup powdered sugar, sifted
-
1 teaspoon pure peppermint extract
-
2 drops red or pink gel food coloring (optional)
-
1 ½ cups heavy cream, very cold
-
½ cup crushed candy canes (about 4-5 standard candy canes)
-
Additional whipped cream or fresh mint sprigs (optional, for garnish)
Instructions
-
Step 1
Finely crush chocolate sandwich cookies (with filling) using a food processor or a zip-top bag and rolling pin until fine crumbs are formed (approx. 1 ½ cups). -
Step 2
Melt 6 tablespoons unsalted butter in a microwave-safe bowl. Pour over crushed cookie crumbs and mix thoroughly with a spatula or hands until evenly moistened. -
Step 3
Transfer the mixture to a 9-inch pie plate. Firmly press the crumbs evenly across the bottom and up the sides of the pie plate. Chill in the refrigerator for at least 30 minutes to set. -
Step 4
In a large mixing bowl, beat the softened cream cheese with an electric mixer on medium speed until completely smooth and lump-free (2-3 minutes). -
Step 5
Add ¾ cup sifted powdered sugar to the cream cheese; beat on low then medium-high until well combined and fluffy (2 minutes). Stir in 1 teaspoon pure peppermint extract until just combined. Optionally, mix in 2 drops of red or pink gel food coloring for a festive color. -
Step 6
In a separate, very cold medium mixing bowl, pour in 1 ½ cups very cold heavy cream. Beat with an electric mixer on medium-high speed until stiff peaks form (3-5 minutes), being careful not to overbeat. -
Step 7
Gently fold about a third of the whipped cream into the cream cheese mixture to lighten it. Then, add the remaining whipped cream and fold very gently until no streaks remain, preserving the airiness. -
Step 8
Carefully spoon the peppermint filling into the chilled chocolate cookie crust and spread evenly. Cover loosely with plastic wrap and refrigerate for a minimum of 4 hours, or ideally overnight, for best setting results. -
Step 9
Just before serving, remove the thoroughly chilled pie from the refrigerator. Generously sprinkle ½ cup crushed candy canes over the top. Optionally, add additional whipped cream or fresh mint sprigs for garnish. Slice and serve cold.
Important Information
Nutrition Facts (Per Serving)
It is important to consider this information as approximate and not to use it as definitive health advice.
Allergy Information
Please check ingredients for potential allergens and consult a health professional if in doubt.