
Crescent Roll Cheesecake Bars are an absolute game-changer in the world of easy, show-stopping desserts. If you’ve ever yearned for that perfect balance of flaky pastry and rich, creamy cheesecake without spending hours in the kitchen, then prepare to be utterly delighted! I’ve found that this remarkable dish captures the hearts of everyone who tries it, becoming an instant favorite for potlucks, brunches, or simply an indulgent treat at home.
While cheesecake itself boasts an ancient lineage dating back to Greek times, and the humble crescent roll finds its ancestors in 17th-century Austrian bakeries, the ingenious combination of the two is a more modern culinary marvel. It’s a testament to the magic that happens when simple, beloved ingredients come together to create something truly extraordinary. People adore these bars not just for their stunning appearance, but for the delightful contrast of textures: a buttery, golden-brown crust and a melt-in-your-mouth, tangy cream cheese filling that simply sings with every bite.
What makes these Crescent Roll Cheesecake Bars truly irresistible is their incredible convenience paired with gourmet results. They offer the sophisticated flavor profile of a classic cheesecake but with a fraction of the effort, making them the ultimate dessert solution for busy hosts or anyone craving a sweet escape.

Ingredients:
-
For the Crust:
- Two (2) 8-ounce cans refrigerated crescent roll dough (such as Pillsbury Grands! Crescent Dinner Rolls) – ensure they are the larger “Grands!” size for better coverage.
- 1/2 cup (1 stick) unsalted butter, melted – I prefer unsalted so I can control the salt content in the entire recipe, but salted works in a pinch if that’s all you have on hand.
- 1/4 cup granulated sugar – this adds a touch of sweetness to our buttery, flaky crust.
-
For the Cheesecake Filling:
- Two (2) 8-ounce packages cream cheese, softened to room temperature – this is absolutely crucial for a smooth, lump-free filling. I usually leave mine out on the counter for at least an hour, or even two, before I plan to start baking.
- 1 cup granulated sugar – for that classic cheesecake sweetness.
- 1 large egg – acts as a binder and helps set the cheesecake, giving it that wonderfully creamy texture.
- 1 teaspoon pure vanilla extract – use a good quality extract here; it makes a world of difference in the overall flavor profile.
- 1/4 cup milk (whole milk or 2% works best) – adds a little extra moisture and helps achieve that perfect, luscious consistency.
-
Optional Garnish/Topping (after baking):
- Powdered sugar for dusting – gives a beautiful finish and an extra touch of sweetness.
- Fresh berries (strawberries, blueberries, raspberries) – for a vibrant pop of color and freshness.
- A drizzle of chocolate sauce or caramel sauce – if you’re feeling extra indulgent!
- Prepping the Pan & Crust for your Crescent Roll Cheesecake Bars
- Preheat Your Oven: First things first, let’s get that oven ready! Preheat your oven to a delightful 375°F (190°C). This ensures that your crescent roll crust bakes up perfectly golden and flaky from the start. While the oven is heating, you can begin preparing your baking dish.
- Prepare Your Baking Dish: Grab a 9×13-inch baking dish. Trust me, this size is perfect for creating just the right thickness for your Crescent Roll Cheesecake Bars. To prevent sticking and make for easy removal, spray the dish generously with non-stick cooking spray. You can also line it with parchment paper, leaving an overhang on the sides – this acts like little handles, allowing you to lift the entire batch of bars out of the pan once they’re cooled. This is my preferred method for pristine bars!
- First Layer of Crescent Dough: Now, for the star of the crust! Unroll one can of your crescent roll dough. You’ll notice it’s perforated into triangles. You’ll want to lay these triangles out flat in the bottom of your prepared baking dish. Don’t worry about the perforations for now; we’ll fix that. Carefully press the dough together at all the seams and perforations to form a single, continuous sheet of dough that covers the entire bottom of the pan. It doesn’t have to be absolutely perfect, but try to get it as seamless as possible to create a sturdy base for our delicious filling.
- Butter and Sugar Layer: In a small, microwave-safe bowl, melt your 1/2 cup of unsalted butter. Once melted, pour this warm, golden butter evenly over the first layer of crescent dough in the pan. Next, sprinkle the 1/4 cup of granulated sugar over the butter. This step might seem simple, but it’s what gives our crust that irresistible buttery, slightly sweet flavor that perfectly complements the creamy cheesecake.
- Second Layer of Crescent Dough: Take your second can of crescent roll dough and unroll it. Just like the first, lay these triangles out on top of the butter and sugar mixture. Again, gently press the seams and perforations together to form a solid top layer. This creates a wonderfully flaky, layered crust that encapsulates all that buttery goodness. Be careful not to press too hard and disturb the butter and sugar layer underneath.
- Crafting the Creamy Cheesecake Filling for your Crescent Roll Cheesecake Bars
- Soften Your Cream Cheese (If Not Already): If you didn’t manage to soften your cream cheese beforehand, now’s the time to do it. You can do this quickly by unwrapping the blocks and microwaving them on low power (30% or so) in 15-second intervals, flipping them each time, until they are soft to the touch but not melted. This step is paramount for a perfectly smooth cheesecake filling without any lumps.
- Combine Wet Ingredients: In a large mixing bowl, using an electric mixer (either a stand mixer with the paddle attachment or a hand mixer), beat your softened cream cheese on medium speed until it is light, fluffy, and completely smooth. This usually takes about 2-3 minutes. Make sure to scrape down the sides of the bowl occasionally with a rubber spatula to ensure everything is incorporated.
- Add Sugar and Egg: Once your cream cheese is wonderfully smooth, gradually add the 1 cup of granulated sugar to the bowl, continuing to beat on medium speed. Mix until the sugar is fully incorporated and the mixture is creamy, about 1-2 minutes. Then, crack in your large egg. Beat just until the egg is combined, being careful not to overmix, as overmixing can sometimes lead to cracks in your cheesecake. Scrape down the bowl one more time.
- Introduce Vanilla and Milk: Finally, pour in the 1 teaspoon of pure vanilla extract and the 1/4 cup of milk. Beat on low speed until everything is just combined and the mixture is smooth and luxurious. You should have a thick, pourable, utterly delicious-looking cheesecake batter. Take a moment to admire the silky texture – this is the foundation of your amazing Crescent Roll Cheesecake Bars!
- Assembling and Baking Your Irresistible Crescent Roll Cheesecake Bars
- Pour the Filling: Carefully pour the prepared cheesecake filling evenly over the top layer of crescent dough in your baking dish. Use your rubber spatula to spread the filling right to the edges of the pan, ensuring every bite of your Crescent Roll Cheesecake Bars has that perfect creamy center.
- Time to Bake!: Gently place the baking dish into your preheated 375°F (190°C) oven. Bake for approximately 30-35 minutes. Now, baking times can vary slightly depending on your oven, so keep an eye on it.
- Checking for Doneness: You’ll know your Crescent Roll Cheesecake Bars are done when the edges of the crescent dough are golden brown and puffed up, and the cheesecake filling is set. The center of the cheesecake might have a slight jiggle to it when you gently shake the pan, but it shouldn’t be liquidy. If it looks too dark on top but still jiggly, you can loosely tent it with aluminum foil for the last 5-10 minutes of baking.
- Cooling, Chilling, and Serving Your Delicious Crescent Roll Cheesecake Bars
- Initial Cooling (Countertop): Once baked to perfection, carefully remove the baking dish from the oven. Resist the urge to dive in immediately! Allow the Crescent Roll Cheesecake Bars to cool on a wire rack at room temperature for at least 30-60 minutes. During this time, the cheesecake will continue to set and firm up, and the initial intense heat will dissipate.
- Crucial Chilling (Refrigerator): This next step is perhaps the most important for achieving that classic cheesecake texture. Once mostly cooled on the counter, transfer the baking dish to the refrigerator. Chill the bars for a minimum of 2-4 hours, or ideally, overnight. Chilling is essential not only for the cheesecake to fully set and develop its rich flavor but also for easy, clean slicing. If you try to cut them warm, they will likely be a delicious, but messy, pile of goodness.
- Slicing Your Bars: Once thoroughly chilled, use those parchment paper “handles” if you opted for them, to lift the entire slab of Crescent Roll Cheesecake Bars out of the baking dish and onto a cutting board. If you didn’t use parchment, you can cut directly in the pan. Using a sharp knife, cut the large slab into individual bars. I typically aim for 12-16 bars, depending on how generous I’m feeling and who I’m serving. For the cleanest cuts, wipe your knife clean with a damp cloth between each slice.
- Optional Garnish and Serving: Now for the fun part – presentation! Before serving, you can lightly dust the Crescent Roll Cheesecake Bars with powdered sugar using a fine-mesh sieve. This adds a beautiful, elegant touch. For an extra burst of freshness and color, arrange some fresh berries (strawberries, blueberries, raspberries) on top or alongside each bar. A drizzle of chocolate or caramel sauce can elevate them further for a truly decadent treat.
- Storing Leftovers: Any leftover Crescent Roll Cheesecake Bars should be stored in an airtight container in the refrigerator. They will keep beautifully for up to 3-4 days, making them perfect for meal prepping a week of delightful desserts or for unexpected guests.

Conclusion:
If there’s one recipe I implore you to embrace and add to your baking repertoire, it’s this one. I truly believe these aren’t just any dessert; they’re a culinary revelation, offering an unparalleled blend of convenience, charm, and absolutely irresistible flavor. Seriously, the effortless preparation belies the spectacular results, making it an absolute game-changer for anyone who loves to bake but perhaps doesn’t always have hours to spend in the kitchen. The delicate, flaky layers of crescent roll dough provide the perfect golden-brown crust, a delightful contrast to the incredibly rich, tangy, and smooth cheesecake filling that crowns it. It’s a texture and taste sensation that simply must be experienced firsthand. These Crescent Roll Cheesecake Bars have become a beloved staple in my home, cherished for their ability to impress guests while requiring minimal fuss, truly embodying the spirit of elegant simplicity.
The versatility of these bars is another reason why I champion them so enthusiastically. They are perfectly suited for almost any occasion. Imagine serving them warm, fresh from the oven, with just a dusting of powdered sugar on a chilly evening—a comforting hug in dessert form. Or, picture them chilled, cut into neat squares, gracing a beautiful platter at a brunch or a summer picnic. I’ve found that a simple accompaniment of fresh berries, perhaps a handful of plump raspberries or sliced strawberries, elevates the presentation and adds a lovely touch of freshness, cutting through the richness beautifully. For an extra touch of decadence, a delicate drizzle of melted chocolate or a dollop of homemade whipped cream can transform them into a truly gourmet experience. Even a scoop of high-quality vanilla bean ice cream melting slowly alongside a warm bar is an indulgence I highly recommend; the temperature contrast is simply divine.
Endless Possibilities with Flavor Variations
And let’s talk about variations – this is where the fun really begins! This base recipe is incredibly forgiving and truly invites experimentation. For a fruity twist, consider swirling a tablespoon or two of your favorite fruit preserves—raspberry, strawberry, or apricot—into the cheesecake mixture before baking. The vibrant streaks of fruit add both visual appeal and a delightful burst of additional flavor. If you’re a chocolate lover (and who isn’t?), scattering a handful of mini chocolate chips into the cream cheese filling, or even drizzling melted dark chocolate over the cooled bars, will take them to a new level of deliciousness. For those who enjoy a bit of crunch, a sprinkle of finely chopped pecans or walnuts over the bottom crescent layer before adding the cheesecake filling, or toasted on top after baking, introduces a wonderful textural element. I’ve also enjoyed adding a touch of lemon zest to the cheesecake mixture for a brighter, more citrusy note, particularly refreshing in warmer months. Or, for a cozy, autumnal feel, a pinch of cinnamon or nutmeg can work wonders, infusing the bars with a comforting warmth. The possibilities truly feel endless, and each variation you try opens up a new favorite.
Your Turn to Create and Share!
Now, it’s your turn to experience the magic! Gather your ingredients, preheat that oven, and prepare to be utterly amazed by how effortlessly such a magnificent dessert comes together. I promise you, you don’t need to be a seasoned pastry chef to achieve perfection with these bars; the recipe is straightforward and incredibly rewarding. I absolutely cannot wait to hear about your experience! Did you stick to the classic version, or did you venture into exciting new flavor combinations? How did you serve them? Please, share your culinary creations with me and the entire community! Post your photos, tag us, and let’s all celebrate the joy of effortless, irresistible baking together. Trust me on this: once you try this recipe, you’ll wonder how you ever lived without these delightful, versatile, and simply scrumptious bars in your life. Happy baking, everyone!
Heavenly Crescent Roll Cheesecake Bars
Crescent Roll Cheesecake Bars are an absolute game-changer in the world of easy, show-stopping desserts. This remarkable dish captures the hearts of everyone who tries it, becoming an instant favorite for potlucks, brunches, or simply an indulgent treat at home.
Ingredients
-
2 (8-ounce) cans refrigerated crescent roll dough (such as Pillsbury Grands!)
-
1/2 cup (1 stick) unsalted butter, melted
-
1/4 cup granulated sugar (for crust)
-
2 (8-ounce) packages cream cheese, softened to room temperature
-
1 cup granulated sugar (for filling)
-
1 large egg
-
1 teaspoon pure vanilla extract
-
1/4 cup milk (whole or 2% recommended)
-
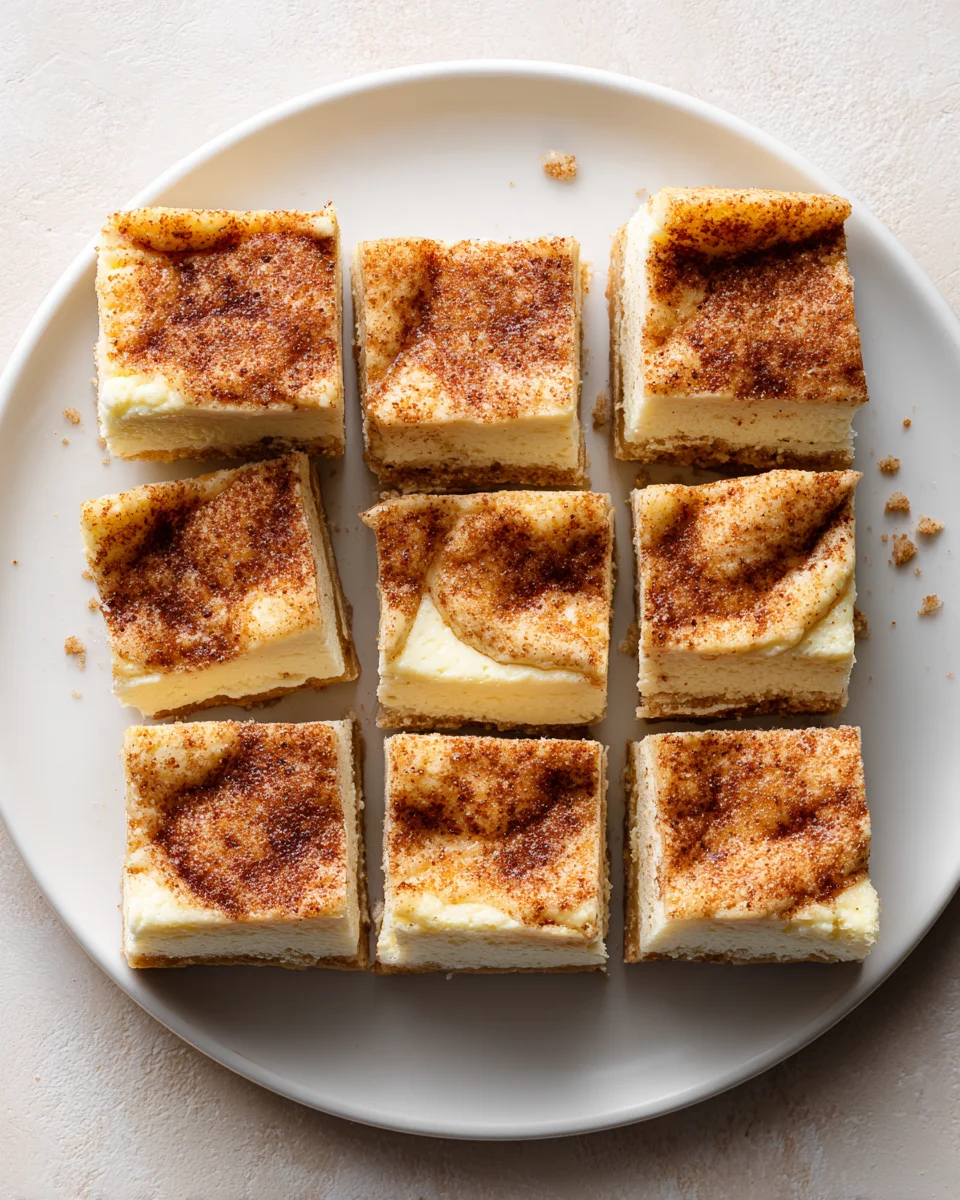
1 teaspoon cinnamon (as requested, optional)
-
Powdered sugar, for dusting (optional garnish)
-
Fresh berries (strawberries, blueberries, raspberries), for garnish (optional)
-
Chocolate sauce or caramel sauce, for drizzling (optional garnish)
Instructions
-
Step 1
Preheat your oven to 375°F (190°C). Prepare a 9×13-inch baking dish by spraying generously with non-stick cooking spray or lining with parchment paper, leaving an overhang on the sides. -
Step 2
Unroll one can of crescent roll dough. Lay the triangles flat in the bottom of your prepared baking dish. Press the dough together at all seams and perforations to form a single, continuous sheet covering the entire bottom of the pan. -
Step 3
In a small, microwave-safe bowl, melt 1/2 cup of unsalted butter. Pour this warm, melted butter evenly over the first layer of crescent dough. Sprinkle 1/4 cup of granulated sugar over the butter. -
Step 4
Unroll the second can of crescent roll dough. Lay these triangles out on top of the butter and sugar mixture. Gently press the seams and perforations together to form a solid top layer, being careful not to disturb the layer underneath. -
Step 5
Ensure your two (2) 8-ounce packages of cream cheese are softened to room temperature (microwave briefly on low if needed). In a large mixing bowl, using an electric mixer, beat the softened cream cheese on medium speed until light, fluffy, and completely smooth (2-3 minutes), scraping down the sides occasionally. -
Step 6
Gradually add 1 cup of granulated sugar to the cream cheese, continuing to beat on medium speed until fully incorporated and creamy (1-2 minutes). Crack in 1 large egg and beat just until combined, being careful not to overmix. Scrape down the bowl. -
Step 7
Pour in 1 teaspoon of pure vanilla extract and 1/4 cup of milk. Beat on low speed until everything is just combined and the mixture is smooth and luxurious. -
Step 8
Carefully pour the prepared cheesecake filling evenly over the top layer of crescent dough in your baking dish, spreading to the edges. Gently place the baking dish into your preheated 375°F (190°C) oven and bake for approximately 30-35 minutes. -
Step 9
The bars are done when the edges of the crescent dough are golden brown and puffed, and the cheesecake filling is set with a slight jiggle in the center. If it looks too dark on top but still jiggly, loosely tent with aluminum foil for the last 5-10 minutes. -
Step 10
Remove the baking dish from the oven and allow the bars to cool on a wire rack at room temperature for at least 30-60 minutes. Then, transfer the baking dish to the refrigerator and chill for a minimum of 2-4 hours, or ideally, overnight, for the cheesecake to fully set and for easy slicing. -
Step 11
Once thoroughly chilled, use the parchment paper handles (if used) to lift the slab onto a cutting board, or cut directly in the pan. Using a sharp knife, cut into 12-16 individual bars, wiping the knife clean between each slice for the cleanest cuts. Optionally, dust with powdered sugar, arrange fresh berries, or drizzle with chocolate or caramel sauce before serving. -
Step 12
Store any leftover bars in an airtight container in the refrigerator for up to 3-4 days.
Important Information
Nutrition Facts (Per Serving)
It is important to consider this information as approximate and not to use it as definitive health advice.
Allergy Information
Please check ingredients for potential allergens and consult a health professional if in doubt.