
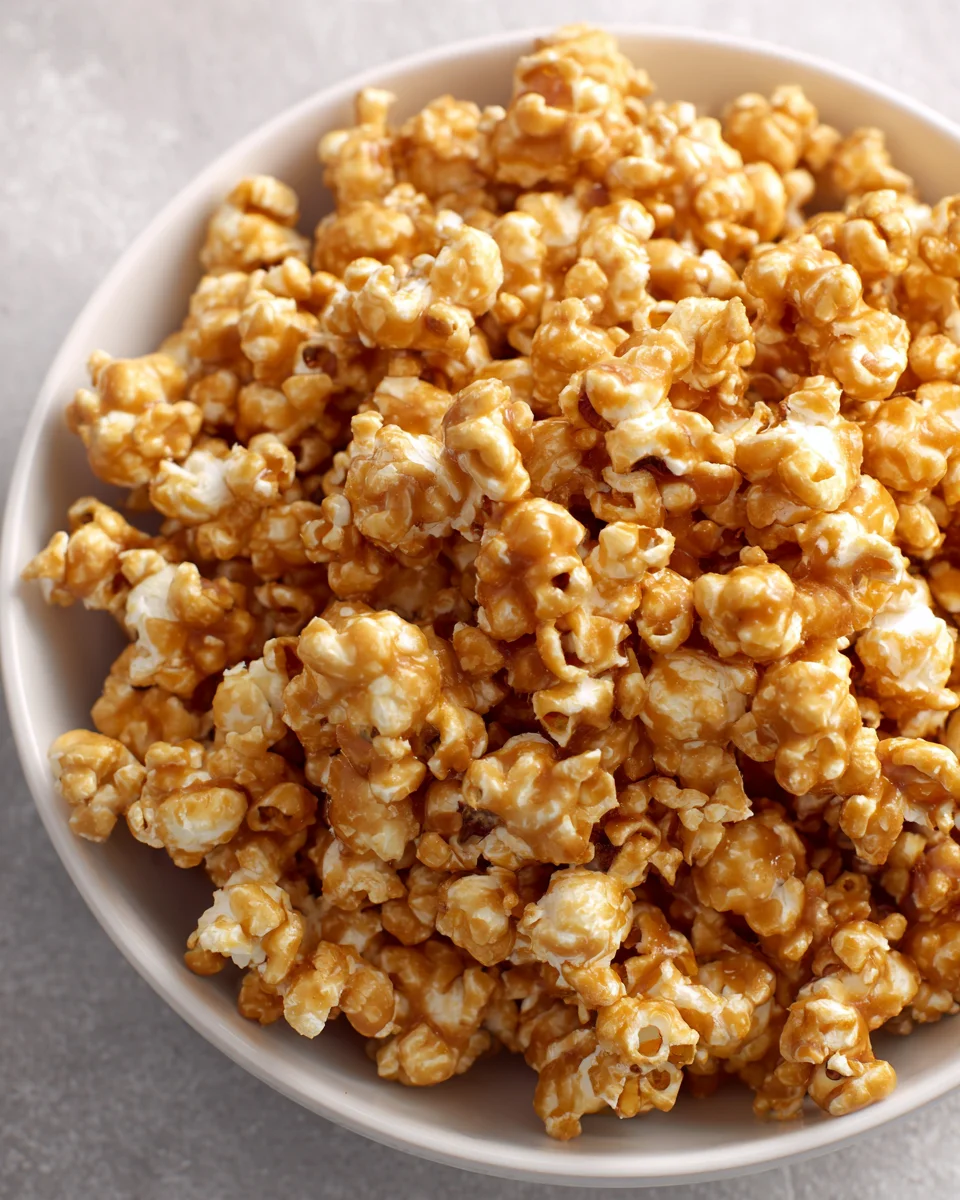
Amish Caramel Corn – that phrase alone conjures images of wholesome goodness and irresistible sweetness, doesn’t it? I’m excited to share with you a recipe that truly embodies the spirit of homemade comfort and nostalgic delight. Imagine biting into perfectly popped kernels, each one generously coated in a rich, buttery caramel that’s both wonderfully crunchy and delightfully chewy. It’s a culinary experience that transcends the ordinary snack, promising a burst of joy with every single bite.
The Amish community, renowned for its commitment to tradition, simplicity, and quality ingredients, has long perfected the art of creating profoundly satisfying homemade treats. Their approach to cooking emphasizes natural flavors and time-honored methods, resulting in dishes that evoke a comforting sense of warmth and authenticity. This particular Amish Caramel Corn recipe is a shining example of that tradition, a testament to how humble ingredients can be transformed into something truly spectacular. People absolutely adore this dish not just for its incredible taste—the perfect harmony of sweet and salty—but also for its satisfying texture and the sheer happiness it brings to any occasion. Whether it’s a holiday gathering, a cozy movie night, or a thoughtful homemade gift, this caramel corn consistently steals the show. Get ready to create some magic in your kitchen!

Ingredients:
- For the Popcorn:
- 1 cup unpopped popcorn kernels (about 16-18 cups popped)
- 3 tablespoons coconut oil or other high smoke point vegetable oil (for popping)
- For the Caramel Sauce:
- 1 cup (2 sticks) unsalted butter
- 2 cups packed light brown sugar
- ½ cup light corn syrup
- 1 teaspoon salt
- ½ teaspoon baking soda
- 1 teaspoon pure vanilla extract
Popping the Popcorn: The Foundation of Perfect Amish Caramel Corn
Alright, let’s dive into making the most irresistible batch of Amish Caramel Corn you’ve ever tasted! Our first step, and a crucial one, is preparing the popcorn itself. You want light, fluffy, and unsalted popcorn as your canvas for that glorious caramel. I always recommend popping your own kernels rather than using microwave popcorn, as it gives you better control over the texture and avoids unwanted additives.
- To begin, grab a very large mixing bowl – I’m talking one of those extra-large ones that seem almost too big, but trust me, you’ll need the space later. This bowl should be heat-proof, as it will be holding freshly popped corn and later, hot caramel.
- Heat 3 tablespoons of coconut oil (or your preferred popping oil like canola or vegetable oil) in a large, heavy-bottomed pot with a lid over medium-high heat. If you have an air popper, that works wonderfully too, just follow the manufacturer’s instructions to yield about 16-18 cups of popped corn. If you’re using a stovetop method, add 2-3 kernels to the hot oil. Once those test kernels pop, you know your oil is at the perfect temperature.
- Add your 1 cup of unpopped popcorn kernels to the hot oil, ensuring they form a single layer as much as possible. Cover the pot, leaving the lid slightly ajar to allow steam to escape. Gently shake the pot frequently to prevent burning and ensure even popping.
- Listen closely! When the popping slows to several seconds between pops, remove the pot from the heat. Don’t wait until it’s completely silent, or you risk burning some kernels. It’s better to have a few unpopped kernels than a batch of burnt popcorn.
- Immediately transfer all the popped corn to your extra-large heat-proof mixing bowl. Make sure to pick out any unpopped kernels (“old maids”) at this stage, as they can be quite a surprise when you bite into the finished Amish Caramel Corn. We want smooth sailing for our teeth! You should have approximately 16 to 18 cups of beautifully popped, unseasoned popcorn. Set this aside while we work on the star of the show: the caramel.
Crafting the Velvety Caramel Sauce: The Heart of Amish Caramel Corn
Now for the truly magical part – making the rich, buttery caramel sauce that transforms simple popcorn into exquisite Amish Caramel Corn. This step requires a little patience and a keen eye, but the results are absolutely worth it. A candy thermometer is highly recommended here; it’s your best friend for achieving the perfect consistency.
- In a heavy-bottomed 3-quart saucepan (or larger, to prevent boil-overs), combine the 1 cup (2 sticks) of unsalted butter, 2 cups of packed light brown sugar, ½ cup of light corn syrup, and 1 teaspoon of salt. I always use light corn syrup for its neutral flavor, which allows the butter and brown sugar to really shine.
- Place the saucepan over medium heat. Stir the mixture constantly with a sturdy whisk or wooden spoon until the butter is completely melted and the sugar is dissolved. This constant stirring is key to preventing the sugar from scorching at the bottom of the pan. You’ll notice the mixture becoming smooth and uniform.
- Once everything is well combined and the mixture comes to a gentle boil, stop stirring. Insert your candy thermometer, making sure the tip doesn’t touch the bottom of the pan. Let the caramel boil steadily without stirring until it reaches precisely 245°F (118°C). This is the “firm ball” stage on a candy thermometer. Reaching this specific temperature is absolutely critical for the caramel to set properly and give your Amish Caramel Corn its signature crisp yet chewy texture. If you don’t reach this temperature, your caramel will be too soft and sticky; if you go much higher, it can become brittle or even burn. This usually takes about 5-8 minutes once it starts boiling, depending on your stovetop.
- As soon as the caramel hits 245°F, immediately remove the saucepan from the heat. Don’t let it linger on the burner, as residual heat can continue cooking it. Quickly stir in the ½ teaspoon of baking soda and 1 teaspoon of pure vanilla extract. Be prepared for a delightful transformation! The mixture will foam up dramatically and lighten in color. This is exactly what you want – the baking soda reacts with the acid in the brown sugar and corn syrup, creating tiny air bubbles that make the caramel tender and less dense, contributing to that perfect crunch without being overly hard. The vanilla, of course, adds a wonderful aromatic depth. Stir just until the baking soda and vanilla are fully incorporated; don’t overmix.
Combining and Coating: Infusing Flavor into Your Amish Caramel Corn
Now that we have our golden caramel masterpiece, it’s time to marry it with our fluffy popcorn. This step is a bit messy, but wonderfully satisfying as you watch every kernel get lovingly coated in that sweet, buttery goodness.
- Working quickly, pour the hot caramel sauce evenly over the popped popcorn in your extra-large mixing bowl. Make sure to scrape every last bit of that precious caramel from the saucepan!
- Using a large, sturdy spoon or spatula (preferably heat-resistant), gently fold and stir the popcorn, tossing it continuously to coat all the kernels as evenly as possible. This might take a few minutes, and some popcorn might stick together, which is perfectly fine. The goal is to get as much caramel on as much popcorn as possible. If you find it hard to coat everything, you can divide the popcorn into two smaller bowls, pour half the caramel over each, and then stir them individually before combining them again. This ensures a more uniform coating for your Amish Caramel Corn.
Baking to Perfection: Achieving that Signature Amish Caramel Corn Crunch
This is where our Amish Caramel Corn truly comes into its own, transforming from a sticky mess into wonderfully crisp, addictive clusters. The baking process helps to dry out the caramel, firm it up, and deepen its flavor. Don’t skip this step – it’s crucial for achieving that delightful crunch!
- Preheat your oven to a low 250°F (120°C). While it’s preheating, line two large baking sheets with parchment paper or silicone baking mats. This is absolutely essential for easy cleanup and to prevent the caramel corn from sticking. Parchment paper works wonders here.
- Divide the coated popcorn evenly between the two prepared baking sheets, spreading it out into a single layer as much as possible. Don’t pile it up too high; the more surface area exposed, the better it will dry and crisp up.
- Place the baking sheets in the preheated oven. Bake for a total of 1 hour, but here’s the critical part: you need to stir the caramel corn every 15 minutes. Set a timer! Every quarter-hour, take the baking sheets out of the oven, use a spatula to stir and redistribute the caramel corn, breaking up any large clumps, and then return them to the oven. This ensures even baking, prevents burning, and helps every piece develop that perfect crispness and golden-brown hue.
- After an hour of baking and stirring, your Amish Caramel Corn will be looking beautifully golden and smelling absolutely divine. The caramel will appear drier and less sticky. Remove the baking sheets from the oven.
Cooling and Breaking Apart: The Final Touches on Your Amish Caramel Corn
The waiting is always the hardest part, but allowing your Amish Caramel Corn to cool completely is vital for it to achieve its ultimate crunch and for the caramel to fully set. Resist the urge to dive in immediately!
- Immediately after removing the caramel corn from the oven, transfer it to a large sheet of parchment paper or wax paper laid out on a countertop. Spread it out as much as possible to cool. This quick transfer prevents it from cooling too quickly on the hot baking sheets and potentially sticking.
- Allow the Amish Caramel Corn to cool completely and undisturbed at room temperature. This can take anywhere from 30 minutes to an hour, or even longer depending on your kitchen’s temperature and humidity. As it cools, the caramel will harden and become wonderfully brittle. This cooling process is crucial for achieving the desired crisp texture. I often find myself walking by, inhaling the sweet aroma, and patiently waiting for that perfect crunch.
- Once it’s completely cool and firm, use your hands to break the caramel corn into smaller, manageable pieces. You’ll hear that satisfying snap as the caramel gives way. Now your delectable Amish Caramel Corn is ready to be enjoyed!
- Storage: To keep your Amish Caramel Corn fresh and crunchy, store it in an airtight container at room temperature. It will stay wonderfully crisp for up to 1-2 weeks, though in my experience, it rarely lasts that long! It makes for fantastic gifts, too, if you can bear to part with it. I promise, once you try this recipe, it will become a cherished tradition in your home. The blend of sweet, salty, and crunchy is simply irresistible, and the homemade touch makes it extra special. Enjoy every single bite of this classic treat!

Conclusion:
So there you have it, friends! We’ve journeyed through the simple yet magical steps to create what I truly believe is one of the most delightful treats you’ll ever make: this incredible homemade caramel corn. What makes this particular recipe an absolute showstopper, a genuine must-try in your culinary repertoire? It’s the perfect harmony of textures and flavors that sets it apart. Imagine biting into that wonderfully crisp exterior, immediately followed by a satisfyingly chewy center, each kernel lovingly coated in a rich, buttery, and utterly irresistible caramel glaze. Unlike some overly brittle or sticky versions, this recipe consistently delivers that ideal balance – a crunch that gives way to a tender, melt-in-your-mouth experience. It’s the kind of snack that evokes warm memories of simpler times, a taste of pure comfort and joy. This isn’t just any caramel corn; it’s a revelation. The secret lies in its approachable process and the quality of the ingredients working together to create something truly special. It’s a treat that feels both decadent and comforting, a delightful indulgence that’s surprisingly straightforward to achieve right in your own kitchen. This Amish Caramel Corn is, without a doubt, a testament to the power of simple ingredients creating extraordinary flavor.
But the journey with this glorious caramel corn doesn’t end with the cooling rack! Oh no, the possibilities for enjoying and sharing this delectable creation are almost as endless as the kernels themselves. Of course, it’s absolutely divine enjoyed straight from a large bowl, perhaps during a cozy movie night with loved ones, or as the star attraction at your next gathering. It vanishes remarkably quickly, so be prepared to make a double batch! Beyond simple snacking, consider incorporating it into other treats. Imagine a generous sprinkle over a scoop of vanilla bean ice cream, adding that wonderful crunch and rich caramel note that elevates a simple dessert into something truly gourmet. Or, for a more decadent experience, a swirl of melted dark chocolate over the cooled caramel corn creates an exquisite sweet and slightly bitter contrast. A sprinkle of flaky sea salt just after the chocolate sets takes it to another level of sophisticated deliciousness. For those who love a bit of extra texture and flavor, try folding in a cup of toasted pecans, walnuts, or even salted peanuts right after you’ve coated the popcorn with the caramel and before it bakes. This transforms it into a more substantial, nutty delight. You could even get creative with spices – a touch of ground cinnamon or a tiny pinch of cayenne pepper mixed into the caramel sauce before baking can add a surprisingly delightful warmth or a subtle kick. For a holiday twist, a drop or two of rum extract or almond extract in the caramel can introduce an entirely new layer of aroma and taste. It also makes for an absolutely charming homemade gift; simply portion it into decorative bags or jars tied with a pretty ribbon, and you’ve got a thoughtful, delicious present that everyone will adore. It’s perfect for teachers, neighbors, or as a host gift. Don’t hesitate to experiment and make it uniquely yours!
Now, I know sometimes trying a new recipe, especially one that promises such spectacular results, can feel a little daunting. But I assure you, this recipe is designed for success. Follow the steps, trust the process, and you’ll be rewarded with a batch of caramel corn that will make your kitchen smell incredible and your taste buds sing with joy. There’s a profound satisfaction that comes from creating something so utterly delicious from scratch, something that brings smiles to the faces of everyone who tries it. So please, don’t just read about it; dive in and experience the magic for yourself! Gather your ingredients, put on some cheerful music, and get ready to transform simple popcorn kernels into an extraordinary confectionery masterpiece. I am genuinely so excited for you to try this recipe. And when you do, please, please come back and share your experience with me! What variations did you try? Who did you share it with? Did it become an instant family favorite? Your stories and photos mean the world to me and to our community of home cooks. It’s through sharing our culinary adventures that we inspire each other and keep the joy of cooking alive. This isn’t just about making caramel corn; it’s about creating memories, sharing moments of sweetness, and discovering the simple pleasures of homemade goodness. Give this recipe a go; I promise you won’t regret it. Your taste buds, and anyone lucky enough to share with you, will thank you!
Amish Caramel Corn
Imagine biting into perfectly popped kernels, each one generously coated in a rich, buttery caramel that’s both wonderfully crunchy and delightfully chewy. This Amish Caramel Corn recipe embodies homemade comfort and nostalgic delight, perfected with quality ingredients and time-honored methods.
Ingredients
-
1 cup unpopped popcorn kernels
-
3 tablespoons coconut oil or other high smoke point vegetable oil
-
1 cup unsalted butter
-
2 cups packed light brown sugar
-
½ cup light corn syrup
-
1 teaspoon salt
-
½ teaspoon baking soda
-
1 teaspoon pure vanilla extract
Instructions
-
Step 1
Grab a very large, heat-proof mixing bowl. You will need the space for popped corn and hot caramel later. -
Step 2
Heat 3 tablespoons of coconut oil (or other high smoke point vegetable oil) in a large, heavy-bottomed pot with a lid over medium-high heat. Test oil temperature by popping 2-3 kernels. -
Step 3
Add 1 cup of unpopped popcorn kernels to the hot oil, cover with lid slightly ajar, and shake frequently until popping slows. -
Step 4
Once popping slows, remove the pot from heat immediately to prevent burning. -
Step 5
Transfer popped corn to the large mixing bowl. Remove any unpopped kernels. Set aside. -
Step 6
In a heavy-bottomed 3-quart saucepan, combine 1 cup unsalted butter, 2 cups packed light brown sugar, ½ cup light corn syrup, and 1 teaspoon salt. -
Step 7
Place saucepan over medium heat. Stir constantly until butter is melted and sugar is dissolved, creating a smooth mixture. -
Step 8
Once boiling, stop stirring. Insert a candy thermometer and boil steadily until the mixture reaches precisely 245°F (118°C) – the firm ball stage. This takes about 5-8 minutes. -
Step 9
Immediately remove from heat. Quickly stir in ½ teaspoon baking soda and 1 teaspoon pure vanilla extract until fully incorporated. The mixture will foam and lighten. -
Step 10
Working quickly, pour the hot caramel sauce evenly over the popped popcorn in the large mixing bowl, scraping all caramel from the saucepan. -
Step 11
Using a heat-resistant spoon or spatula, gently fold and stir the popcorn continuously to coat all kernels as evenly as possible. You may divide popcorn to coat if needed. -
Step 12
Preheat oven to 250°F (120°C). Line two large baking sheets with parchment paper or silicone baking mats. -
Step 13
Divide the coated popcorn evenly between the prepared baking sheets, spreading into a single layer. -
Step 14
Bake for 1 hour at 250°F (120°C), stirring and redistributing the caramel corn every 15 minutes to ensure even baking and crispness. -
Step 15
After 1 hour of baking, remove the beautifully golden caramel corn from the oven. -
Step 16
Immediately transfer the hot caramel corn to a large sheet of parchment or wax paper on a countertop, spreading it out to cool. -
Step 17
Allow the caramel corn to cool completely and undisturbed at room temperature for 30 minutes to an hour, until hardened and brittle. -
Step 18
Once completely cool and firm, break the caramel corn into smaller pieces. Store in an airtight container at room temperature for up to 1-2 weeks. Enjoy!
Important Information
Nutrition Facts (Per Serving)
It is important to consider this information as approximate and not to use it as definitive health advice.
Allergy Information
Please check ingredients for potential allergens and consult a health professional if in doubt.