
Frozen Greek Yogurt Peanut Butter Bites With Chocolate Chips are you searching for that perfect guilt-free indulgence that satisfies your sweet tooth while also offering a boost of protein? Look no further! I’m thrilled to share a recipe today that I know you’ll fall in love with, combining wholesome ingredients into a truly delightful frozen treat that makes healthy snacking effortless and enjoyable.
While the exact origin of combining these specific ingredients into a frozen bite might be a modern innovation born from the desire for healthier desserts, Greek yogurt has been a staple for centuries, celebrated for its creamy texture and nutritional benefits. Peanut butter, a beloved pantry item worldwide, adds a comforting richness, and chocolate chips are, of course, the universal symbol of treat-yourself joy. This recipe brings these beloved components together in a harmonious way, creating something fresh and exciting for contemporary palates seeking both flavor and function.
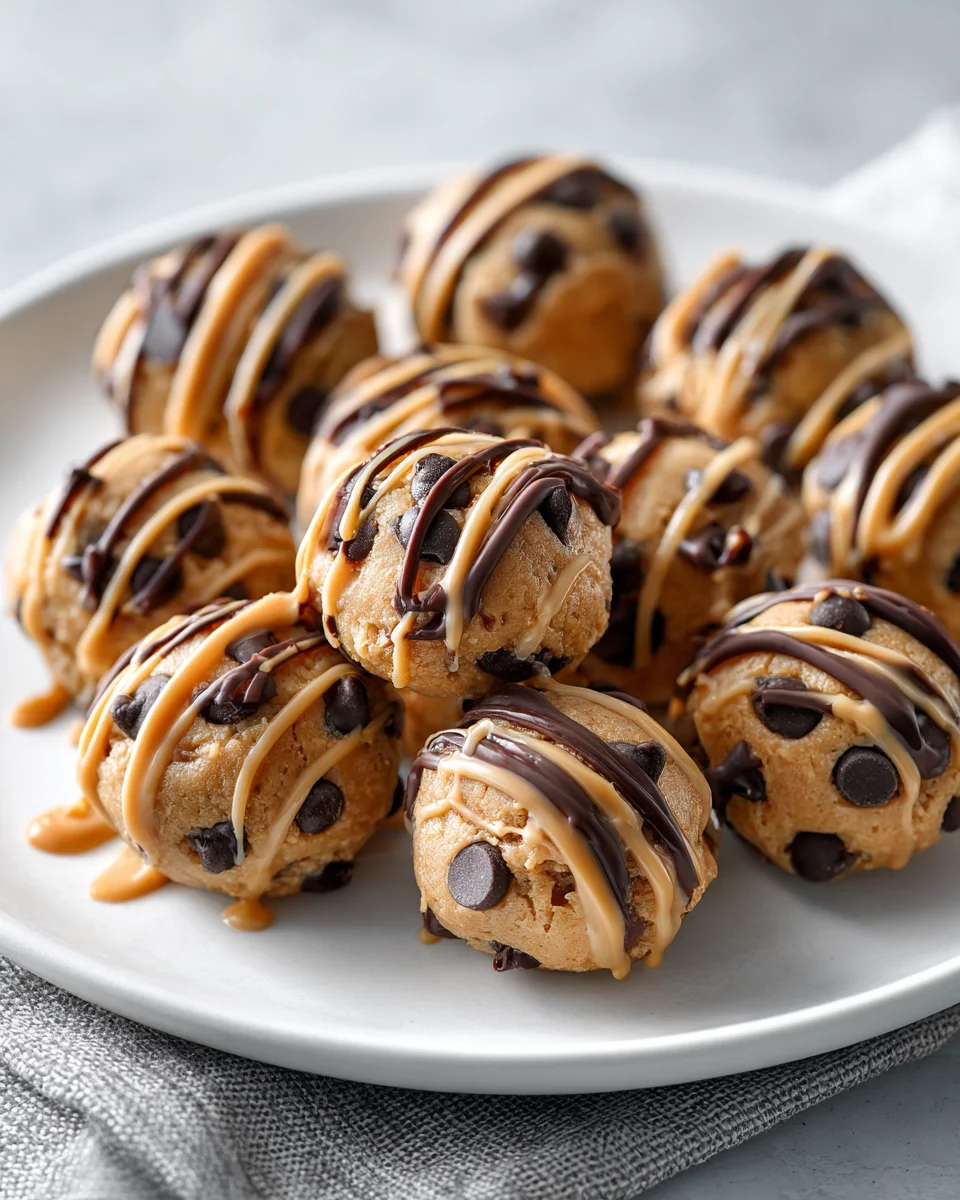
People absolutely adore these bites for their incredible trifecta of taste, texture, and convenience. Imagine a creamy, slightly tangy Greek yogurt base perfectly balanced with the nutty richness of peanut butter, all studded with delightful chocolate chips. They’re not only wonderfully delicious but also surprisingly simple to prepare, making them an ideal make-ahead snack or a sophisticated yet wholesome dessert that can be grabbed straight from the freezer. It’s the perfect way to enjoy a sweet treat without the guilt, offering a satisfying crunch and a burst of flavor in every bite. These Frozen Greek Yogurt Peanut Butter Bites With Chocolate Chips are truly a revelation, proving that healthy can be incredibly delicious.

Ingredients:
- 1 ½ cups (approximately 375g) Full-Fat Plain Greek Yogurt: I always recommend full-fat for these delightful “Frozen Greek Yogurt Peanut Butter Bites With Chocolate Chips” because it yields the creamiest, most satisfying texture. It helps prevent them from becoming too icy and ensures a rich mouthfeel. If you’re looking to cut down on calories, a 2% Greek yogurt could work, but be prepared for a slightly firmer bite. Avoid fat-free if you can, as it tends to get much icier when frozen.
- ½ cup (approximately 128g) Natural Creamy Peanut Butter: Opt for a good quality natural peanut butter where the only ingredients are peanuts and maybe a touch of salt. The natural oils help keep the bites smooth and prevent them from becoming overly hard when frozen. Crunchy peanut butter is an option if you prefer an added textural element, but I find creamy works best for the base mixture. Make sure it’s well-stirred if it has separated.
- ¼ cup (approximately 60ml) Maple Syrup or Honey: This is my preferred sweetener for a natural, subtle sweetness that complements the peanut butter and yogurt beautifully. Maple syrup offers a distinct earthy note, while honey adds a floral touch. You can adjust the amount to your taste; start with ¼ cup and add a little more if you like things sweeter. For a sugar-free option, you could experiment with a sugar-free liquid sweetener, but the texture might vary slightly.
- 1 teaspoon Pure Vanilla Extract: A touch of vanilla elevates all the flavors, adding a wonderful warmth and depth that brings everything together in these “Frozen Greek Yogurt Peanut Butter Bites”. Don’t skip this!
- ½ cup Mini Semi-Sweet Chocolate Chips: I love using mini chocolate chips because they distribute more evenly throughout the bites and provide a perfect chocolatey burst in every single spoonful. Semi-sweet is my go-to, but dark chocolate chips would be fantastic for a richer, less sweet profile, and milk chocolate chips could be used if you prefer something sweeter. You could also chop up a chocolate bar for a more rustic look.
- Pinch of Sea Salt: Just a tiny pinch makes a huge difference! Salt helps to balance the sweetness and really brings out the rich flavors of both the peanut butter and the chocolate. It’s that secret ingredient that makes things taste “just right.”
Preparation is Key: Setting Up for Success
Before we dive into mixing up these incredible “Frozen Greek Yogurt Peanut Butter Bites With Chocolate Chips”, taking a few moments for prep will make the entire process smooth and enjoyable. Trust me, a little organization goes a long way, especially when you’re working with a recipe that involves freezing. I always find that having everything laid out and ready means less stress and more fun in the kitchen!
- Line Your Baking Sheet: First things first, grab a standard baking sheet – usually around 13×18 inches (or similar). Line it completely with either parchment paper or a silicone baking mat. This step is absolutely crucial. The parchment paper or silicone mat will prevent your frozen bites from sticking to the tray, making them incredibly easy to remove once they’re frozen solid. If you skip this, you might find yourself chiseling delicious bites off your baking sheet, which isn’t ideal! I find a silicone mat offers slightly better non-stick properties and is reusable, but good quality parchment paper works perfectly well too. Ensure the paper lays flat and covers the entire surface to avoid any direct contact between the yogurt mixture and the metal tray.
- Gather Your Tools: Make sure you have a large mixing bowl, a sturdy spatula or spoon for mixing, and a tablespoon or a small cookie scoop ready. A cookie scoop (about 1-tablespoon size) is my secret weapon for making consistently sized bites, which not only look better but also freeze and thaw more uniformly. If you don’t have one, two spoons will do the trick – one to scoop, and the other to push the mixture off.
- Measure Out Ingredients: It’s always a good practice to measure all your ingredients before you start mixing. This is often called “mise en place” in the culinary world, and it ensures that once you begin, you can focus purely on the mixing and combining, without scrambling to find or measure something mid-process. Get your Greek yogurt, peanut butter, maple syrup (or honey), vanilla extract, and chocolate chips all measured out and within easy reach. This also helps to double-check that you haven’t forgotten anything essential for your “Frozen Greek Yogurt Peanut Butter Bites”.
Crafting the Delicious Base Mixture
This is where the magic truly begins! Combining the main ingredients to form the creamy, dreamy base for our “Frozen Greek Yogurt Peanut Butter Bites With Chocolate Chips”. The consistency of this mixture is key to how well your bites will freeze and what their final texture will be like. My goal is always a super smooth, uniform blend that promises a burst of flavor in every bite.
- Combine Yogurt and Peanut Butter: In your large mixing bowl, add the full-fat plain Greek yogurt and the natural creamy peanut butter. Now, using your sturdy spatula or spoon, begin to mix these two ingredients together. At first, it might seem a bit stiff or like the peanut butter is resisting, but keep going! Stir vigorously, making sure to scrape down the sides of the bowl as you go. You want to achieve a completely smooth and uniform mixture, free of any streaks of plain yogurt or unmixed peanut butter. This might take a couple of minutes of good, old-fashioned elbow grease. The mixture should be thick and creamy, almost like a very thick frosting. This creamy base is what makes these bites so wonderfully decadent.
- Introduce the Sweetness and Flavor: Once your yogurt and peanut butter are beautifully combined, it’s time to add the maple syrup (or honey), vanilla extract, and that crucial pinch of sea salt. These ingredients are essential for balancing the flavors and elevating the overall taste profile of your “Frozen Greek Yogurt Peanut Butter Bites”. Stir everything together thoroughly. Make sure the sweetener is fully incorporated, as you don’t want pockets of unmixed syrup. The vanilla should perfume the entire mixture, and the salt will subtly enhance all the other flavors. Give it a good taste test at this point! This is your chance to adjust the sweetness if you desire. If you like it a little sweeter, add another tablespoon of maple syrup or honey, mix well, and taste again.
- Gently Fold in the Chocolate Chips: Now for the star studded add-in! Carefully add your mini semi-sweet chocolate chips to the yogurt and peanut butter base. I emphasize “gently fold” here because you don’t want to overmix and crush the chocolate chips, nor do you want them to clump together. Using your spatula, fold them in just until they are evenly distributed throughout the mixture. This means scooping from the bottom of the bowl and folding it over the top, rotating the bowl as you go. The goal is to have chocolate in every bite of your “Frozen Greek Yogurt Peanut Butter Bites With Chocolate Chips” without having to dig for it! Overmixing can sometimes cause the chocolate to melt slightly into the mixture, especially if your kitchen is warm, so a gentle hand is best.
Forming and Freezing Your Delicious Bites
Once your creamy, chocolate-chip-studded base is ready, the next exciting step is to transform it into individual “Frozen Greek Yogurt Peanut Butter Bites” and get them ready for their chilling adventure. This is where they truly take shape and prepare for their delicious transformation.
- Scoop and Shape the Bites: Now, using your tablespoon or small cookie scoop, begin portioning out the mixture onto your prepared baking sheet. Aim for roughly tablespoon-sized dollops. If using a cookie scoop, it will naturally create neat, uniform rounds. If using spoons, try to keep them as consistent in size as possible. Uniformity isn’t just for aesthetics; it also ensures that all your “Frozen Greek Yogurt Peanut Butter Bites” freeze and thaw at a similar rate. Leave a little space between each bite – about ½ an inch to 1 inch – to prevent them from freezing together. Depending on the size of your bites, you might get anywhere from 20 to 30 individual pieces from this recipe. This part is quite satisfying, watching your mixture turn into adorable little snacks!
- Smooth (Optional, but Recommended): If you want your bites to have a slightly smoother, more refined appearance, you can lightly flatten the tops with the back of a spoon or your finger. This is purely for aesthetics and can make them look a bit more polished, but it’s not strictly necessary for flavor or texture. I sometimes do this if I’m making them for guests, but for a casual snack, I often leave them as rustic dollops.
- The Critical Freezing Process: This is arguably the most important step for our “Frozen Greek Yogurt Peanut Butter Bites With Chocolate Chips”. Carefully transfer your baking sheet, laden with the un-frozen bites, into the freezer. Make sure the baking sheet is placed on a flat, level surface in your freezer so the bites don’t slide or meld together before they solidify. Allow them to freeze for a minimum of 2 to 3 hours. For the best results, and if you have the time, I recommend leaving them in the freezer for at least 4 hours, or even better, overnight. You want them to be completely solid all the way through. They should be firm to the touch and able to be easily lifted from the parchment paper without any resistance or softness. This thorough freezing is what gives them their delightful solid, yet creamy, texture.
Storage and Enjoyment: Keeping Your Bites Perfect
Once your “Frozen Greek Yogurt Peanut Butter Bites With Chocolate Chips” are perfectly frozen, the goal is to store them correctly so you can enjoy their refreshing goodness whenever a craving strikes. Proper storage ensures they maintain their texture and prevents freezer burn, keeping them delicious for longer.
- Transfer to an Airtight Container: Once your bites are completely solid, carefully peel them off the parchment paper or silicone mat. They should pop off quite easily. Transfer them into a freezer-safe, airtight container or a heavy-duty freezer bag. This airtight seal is crucial for protecting them from freezer burn, which can make them icy and diminish their flavor. I prefer using a rigid container over a bag, as it helps prevent the bites from being crushed or squished in the freezer.
- Prevent Sticking (Optional, but Recommended): To prevent the “Frozen Greek Yogurt Peanut Butter Bites” from sticking together in the container, especially if you plan to store them for more than a few days, you can layer them with small pieces of parchment paper. Simply place a sheet of parchment between each layer of bites in your container. This makes it super easy to grab just one or two whenever you want them, without having to defrost a whole clump.
- Store in the Freezer: Store the sealed container or bag in the freezer for up to 1-2 months. While they are usually so delicious they don’t last that long in my house, they can certainly hold their quality for an extended period. The beauty of these “Frozen Greek Yogurt Peanut Butter Bites With Chocolate Chips” is that they are always ready for a quick, wholesome snack or a guilt-free dessert straight from the freezer.
- Serving Suggestions and Enjoyment: These bites are best enjoyed straight from the freezer! Their texture will be firm but creamy, offering a delightful chewiness. If you prefer them a little softer, you can let them sit at room temperature for 5-10 minutes before eating, but don’t let them thaw too much, as they will lose their firmness quickly. I love them as a post-workout snack, a refreshing treat on a hot day, or a healthier alternative to traditional ice cream. They’re also fantastic to pack in a lunch box (they’ll thaw slightly by lunchtime, creating a lovely soft consistency). You can even crumble them over a bowl of fresh fruit or yogurt for an added layer of texture and flavor!
Tips, Tricks, and Creative Variations for Your Bites
The beauty of these “Frozen Greek Yogurt Peanut Butter Bites With Chocolate Chips” lies not just in their simplicity and deliciousness, but also in their incredible versatility! Once you’ve mastered the basic recipe, the possibilities for customization are endless. Here are some of my favorite ways to tweak and enhance this already fantastic treat, along with a few useful tips to ensure your success every time.
Embrace Different Flavors and Textures:
- Nut Butter Swaps: While peanut butter is a classic, don’t hesitate to experiment with other nut or seed butters! Almond butter will give these bites a slightly more sophisticated, nutty flavor. Cashew butter creates an even creamier, milder profile. For those with nut allergies, sunflower seed butter (SunButter) is an excellent, safe alternative that maintains a similar consistency and flavor. Just ensure whatever butter you choose is natural and creamy for the best texture.
- Chocolate Adventures: We’ve used semi-sweet chocolate chips, but why stop there? White chocolate chips would add a sweeter, creamier note. Dark chocolate chunks, roughly chopped, offer an intense cocoa hit and a rustic look. You could even swirl in a little melted chocolate on top of the formed bites before freezing for an extra layer of chocolatey goodness and visual appeal.
- Add-In Extravaganza: The base for these “Frozen Greek Yogurt Peanut Butter Bites” is incredibly accommodating to various mix-ins. Consider adding:
- Toasted Coconut Flakes: Fold them into the mixture for a tropical twist and delightful chewiness.
- Chopped Nuts: Finely chopped almonds, peanuts, or pecans would add a fantastic crunch and intensify the nutty flavor.
- Dried Fruit Bits: Small pieces of dried cranberries, raisins, or chopped apricots could add a burst of fruity sweetness and a chewy texture. Just make sure they’re finely chopped so they distribute evenly.
- Granola: A small amount of crushed granola folded in would give a wonderful crunch and a heartier feel.
- Protein Boost: For an extra boost, you could mix in a scoop of unflavored or vanilla protein powder. Start with a small amount (½ scoop) and add a tiny splash of milk or water if the mixture becomes too thick. This turns your “Frozen Greek Yogurt Peanut Butter Bites With Chocolate Chips” into an even more powerful post-workout snack!
- Flavor Extracts: Beyond vanilla, a tiny drop of almond extract could be lovely with almond butter, or a touch of peppermint extract for a festive, mint-chocolate version. Start with just a quarter teaspoon as extracts can be potent!
Tips for Perfect Bites Every Time:
- Consistency is Key: If your peanut butter is very runny (common with natural varieties), you might find the mixture a little softer. To counteract this, you can chill the mixed base in the refrigerator for 15-20 minutes before scooping. This will firm it up slightly and make it easier to handle. Conversely, if your Greek yogurt is extra thick, or your peanut butter is on the firmer side, you might need an extra tablespoon of maple syrup or even a tiny splash of milk to get the perfect scoopable consistency.
- Don’t Rush the Freeze: Patience is a virtue, especially when it comes to freezing. Ensuring your “Frozen Greek Yogurt Peanut Butter Bites” are completely solid is paramount for their texture and ease of handling. Rushing the freezing process can result in soft, crumbly bites that don’t hold their shape well. Aim for at least 3-4 hours, or ideally, overnight.
- Portion Control Made Easy: Using a cookie scoop is not only great for uniformity but also for portion control. These bites are so delicious, it’s easy to overindulge, but knowing each bite is roughly the same size helps you keep track of your intake.
- Kid-Friendly Fun: These “Frozen Greek Yogurt Peanut Butter Bites With Chocolate Chips” are a fantastic, healthier snack for kids! You can get them involved in the scooping process (just be prepared for a little mess!) or let them pick their favorite add-ins. They’re a wonderful alternative to sugary store-bought treats.
- Make Ahead Marvel: This recipe is a fantastic make-ahead option. Prepare a big batch over the weekend, and you’ll have healthy, satisfying snacks ready to grab from the freezer all week long. They’re perfect for meal prepping your snacks!
By keeping these tips in mind and getting creative with variations, you can tailor these “Frozen Greek Yogurt Peanut Butter Bites With Chocolate Chips” to your exact preferences and enjoy them in countless delicious ways!

Conclusion:
Well, my friends, we’ve come to the end of our journey, but truly, it’s just the beginning of your delicious adventure! If there’s one recipe I absolutely insist you add to your repertoire, it’s this one. I know I’m biased, but I truly believe these Frozen Greek Yogurt Peanut Butter Bites With Chocolate Chips are nothing short of magical. They seamlessly combine the creamy tang of Greek yogurt with the rich, comforting flavor of peanut butter, all elevated by those delightful bursts of chocolate, and then transformed into a refreshingly cool, satisfying bite. It’s the kind of snack that makes you wonder how something so simple can deliver such a profound sense of satisfaction.
The Irresistible Appeal
Why are they a must-try? For starters, they are ridiculously easy to make, requiring minimal ingredients and no baking whatsoever. This makes them perfect for busy weeknights, last-minute cravings, or when you simply don’t want to turn on the oven. Beyond their effortless preparation, they’re a powerhouse of goodness. We’re talking about a snack that’s packed with protein from the Greek yogurt, healthy fats from the peanut butter, and just enough sweetness to curb any dessert craving without going overboard. They strike that perfect balance between indulgent and wholesome, making them an ideal choice for anyone looking for a healthier alternative to traditional sweet treats. The texture alone is enough to convert anyone – a delightfully firm yet creamy interior that slowly melts in your mouth, contrasted by the slight chew of the chocolate chips. They’re fantastic for meal prepping, too; whip up a big batch and you’ll have a convenient, guilt-free treat ready whenever hunger strikes. My kids adore them, and honestly, so do I!
But the beauty of these bites extends far beyond their core deliciousness. They are incredibly versatile, offering endless opportunities for customization and creative serving.
Unleash Your Creativity: Serving & Variation Ideas
While they are absolutely divine enjoyed straight from the freezer, there are so many ways to switch things up! For an extra layer of flavor and texture, consider sprinkling a tiny pinch of flaky sea salt over the top of each bite just before they freeze – it truly enhances the chocolate and peanut butter notes. A delicate drizzle of honey or maple syrup right before serving can add a touch more sweetness and a lovely sheen. If you’re a nut lover like me, a sprinkle of finely chopped roasted peanuts, almonds, or even pecans could add a wonderful crunch. For those who adore coconut, a light dusting of shredded unsweetened coconut would be a fantastic addition. Don’t limit yourself to classic semi-sweet chocolate chips either; try dark chocolate chips for a more intense cocoa flavor, white chocolate chips for extra sweetness, or even a mix! You could also experiment with different types of nut butters – almond butter or cashew butter would work beautifully for a slightly different flavor profile, or even sunflower seed butter for a nut-free option. For an extra protein boost, feel free to blend in a scoop of your favorite vanilla or unflavored protein powder with the Greek yogurt mixture. And who says they have to be bites? You could press the mixture into a parchment-lined loaf pan, freeze it, and then slice it into bars or squares. Get playful with silicone molds in fun shapes if you’re making them for little ones! They’re also surprisingly good crumbled over a bowl of oatmeal or a smoothie bowl for a breakfast with a difference.
So, what are you waiting for? I wholeheartedly encourage you to give this recipe a whirl. It’s a simple pleasure that delivers big on taste, health, and convenience. Once you try these Frozen Greek Yogurt Peanut Butter Bites With Chocolate Chips, I have a feeling they’ll become a staple in your household, just like they have in mine. And please, please share your experience! I absolutely love hearing about your creations and any clever variations you come up with. Snap a picture, leave a comment, and let us all know how you enjoyed this delightful, frosty treat. Happy snacking!
Frozen Greek Yogurt Peanut Butter Bites With Chocolate Chips
Are you searching for that perfect guilt-free indulgence that satisfies your sweet tooth while also offering a boost of protein? Look no further! I’m thrilled to share a recipe today that I know you’ll fall in love with, combining wholesome ingredients into a truly delightful frozen treat that makes healthy snacking effortless and enjoyable. I started making these as a quick after-school snack for the kids, but let’s be honest—now I make a double batch just to keep up with how fast they disappear. What’s even better is how customizable they are. You can go full peanut butter or swap in almond butter, sprinkle on some shredded coconut or sea salt, or even roll them in crushed peanuts for extra crunch. It’s like a snack bar met a frozen dessert and they had the most delicious little baby.
Ingredients
-
1 ½ cups Full-Fat Plain Greek Yogurt
-
½ cup Natural Creamy Peanut Butter
-
¼ cup Maple Syrup or Honey
-
1 teaspoon Pure Vanilla Extract
-
½ cup Mini Semi-Sweet Chocolate Chips
-
Pinch of Sea Salt
Instructions
- Step 1
Grab a standard baking sheet (13×18 inches or similar) and line it completely with either parchment paper or a silicone baking mat. This step is crucial to prevent the frozen bites from sticking, making them easy to remove once frozen solid. Ensure the paper or mat lays flat and covers the entire surface. - Step 2
Make sure you have a large mixing bowl, a sturdy spatula or spoon for mixing, and a tablespoon or a small cookie scoop ready. A cookie scoop (about 1-tablespoon size) is recommended for making consistently sized bites. - Step 3
Practice ‘mise en place’ by measuring all your ingredients before you start mixing. Get your Greek yogurt, peanut butter, maple syrup (or honey), vanilla extract, and chocolate chips all measured out and within easy reach. - Step 4
In your large mixing bowl, add the full-fat plain Greek yogurt and the natural creamy peanut butter. Using your sturdy spatula or spoon, vigorously mix these two ingredients together until you achieve a completely smooth and uniform mixture, free of any streaks. The mixture should be thick and creamy. - Step 5
Once the yogurt and peanut butter are combined, add the maple syrup (or honey), vanilla extract, and a pinch of sea salt. Stir everything together thoroughly until fully incorporated. Taste and adjust sweetness if desired. - Step 6
Carefully add your mini semi-sweet chocolate chips to the yogurt and peanut butter base. Gently fold them in with your spatula until they are evenly distributed throughout the mixture, avoiding overmixing to prevent crushing the chips or causing them to melt. - Step 7
Using your tablespoon or small cookie scoop, portion out roughly tablespoon-sized dollops onto your prepared baking sheet. Leave about ½ an inch to 1 inch of space between each bite to prevent them from freezing together. You should get 20 to 30 individual pieces. - Step 8
For a slightly smoother, more refined appearance, lightly flatten the tops of the bites with the back of a spoon or your finger. This step is purely for aesthetics. - Step 9
Carefully transfer your baking sheet into the freezer, placing it on a flat, level surface. Allow the bites to freeze for a minimum of 2 to 3 hours, or ideally 4 hours to overnight, until they are completely solid and firm to the touch. - Step 10
Once completely solid, carefully peel the bites off the parchment paper or silicone mat. Transfer them into a freezer-safe, airtight container or a heavy-duty freezer bag. This seal protects them from freezer burn. - Step 11
To prevent bites from sticking together, especially for longer storage, layer them with small pieces of parchment paper in the container. This makes it easy to grab individual bites. - Step 12
Store the sealed container or bag in the freezer for up to 1-2 months. They are always ready for a quick, wholesome snack or guilt-free dessert straight from the freezer. - Step 13
Enjoy these bites straight from the freezer for a firm yet creamy texture. If you prefer them a little softer, let them sit at room temperature for 5-10 minutes. They are perfect as a post-workout snack, a refreshing treat, or a healthier ice cream alternative. They can also be crumbled over fresh fruit or yogurt.
Important Information
Nutrition Facts (Per Serving)
It is important to consider this information as approximate and not to use it as definitive health advice.
Allergy Information
Please check ingredients for potential allergens and consult a health professional if in doubt.