
White Christmas Pie is not merely a dessert; it is a captivating culinary creation that truly embodies the magical essence of the holiday season. Imagine a picturesque landscape blanketed in fresh, untouched snow, glistening softly under the winter light – that same serene beauty and comforting delight are what await you with every perfect slice of this exquisite treat. I often find myself dreaming of this pie long before December even arrives!
While the specific recipe for White Christmas Pie might not trace back to ancient culinary scrolls, its very essence speaks to the cherished traditions and modern nostalgia of a festive, snowy celebration. It’s a dish that has quickly become a beloved part of contemporary holiday tables, evoking warmth, joy, and that unmistakable feeling of a ‘White Christmas.’ It’s more than just food; it’s an experience.
What truly elevates this dish to a holiday showstopper and a consistent crowd-pleaser? It’s the utterly irresistible harmony of textures and flavors: a luscious, cloud-like filling – often infused with delicate vanilla or a whisper of coconut – perfectly cradled in a buttery, crisp crust. Its elegant, pristine appearance makes it an undeniable centerpiece, while its remarkably straightforward preparation means you can spend less time in the kitchen and more time making precious memories. I assure you, mastering this enchanting White Christmas Pie will be a delightful addition to your holiday repertoire.

Ingredients:
-
For the Vanilla Wafer Crust:
- 2 cups (about 11 ounces or one standard box) vanilla wafer crumbs (from approximately 280-300 grams of wafers)
- 1/2 cup (1 stick or 113 grams) unsalted butter, melted
- 2 tablespoons granulated sugar
- 1/4 teaspoon salt
-
For the White Chocolate & Coconut Filling:
- 16 ounces (two 8-ounce blocks or 450 grams) full-fat cream cheese, softened to room temperature
- 1 1/2 cups (180 grams) powdered sugar, sifted
- 1 teaspoon pure vanilla extract
- 1/2 teaspoon pure almond extract (optional, but highly recommended for depth)
- 12 ounces (about 340 grams) good quality white chocolate, finely chopped or in chips
- 2 cups (480 ml) heavy cream, very cold, divided (1 cup for filling, 1 cup for topping)
- 1 cup (80 grams) sweetened shredded coconut, divided (1/2 cup for filling, 1/2 cup for topping/garnish)
-
For the Whipped Cream Topping & Garnish:
- Remaining 1 cup (240 ml) heavy cream, very cold
- 2 tablespoons powdered sugar
- 1/2 teaspoon pure vanilla extract
- Remaining 1/2 cup (40 grams) sweetened shredded coconut
- White chocolate curls or shavings (optional)
- Edible glitter or festive sprinkles (optional)
Preparing the Vanilla Wafer Crust
- Preheat and Prepare: My dear friends, let’s begin crafting our beautiful White Christmas Pie with the foundation – a wonderfully buttery vanilla wafer crust. First things first, if you plan to bake your crust for extra crispness, preheat your oven to 350°F (175°C). While this pie can be entirely no-bake, I find a quick bake on the crust really brings out the vanilla flavor and creates a sturdier base that stands up beautifully to the creamy filling. You’ll also want to grab a 9-inch pie plate. You don’t usually need to grease it, as the butter in the crust prevents sticking, but if you have a non-stick pie plate, that’s ideal.
- Crush the Wafers: Next, let’s get those vanilla wafers ready. You have a couple of excellent options for transforming them into fine crumbs. My personal favorite for speed and consistency is a food processor. Simply toss all the vanilla wafers into the bowl of your food processor and pulse until they are transformed into fine, uniform crumbs. We’re looking for a texture akin to fine sand, without any large chunks left behind. If you don’t have a food processor, don’t worry! An equally effective, albeit slightly more hands-on, method involves a large, sturdy zip-top bag and a rolling pin or even a heavy pan. Place the wafers in the bag, seal it, making sure to push out most of the air, and then start crushing them. Roll over them with your rolling pin, or gently but firmly tap them with the bottom of a heavy skillet until you achieve that same fine crumb consistency. The key here is uniformity; larger chunks can make the crust less stable and harder to cut later, and nobody wants a crumbly pie slice when serving this festive White Christmas Pie! Take your time to ensure all the wafers are evenly crushed.
- Combine Ingredients: Once your wafers are perfectly crumbed, transfer them to a medium mixing bowl. Add the granulated sugar and salt. Give these dry ingredients a good stir with a spoon or whisk to combine them evenly. Now, it’s time for the melted butter. Pour the melted butter over the crumb mixture. Using a fork or your clean hands, mix everything thoroughly until all the crumbs are moistened. You should be able to press a small amount of the mixture between your fingers, and it should hold its shape, indicating it’s perfectly coated with butter. This butter acts as the glue that will hold your White Christmas Pie crust together.
- Press into Pie Plate: Now for the satisfying part – pressing the crust into your pie plate. Pour the entire crumb mixture into the prepared 9-inch pie plate. Begin by evenly distributing the crumbs across the bottom of the plate. Then, using the bottom of a flat-bottomed glass, a measuring cup, or even your knuckles, firmly press the crumbs into the bottom of the pie plate. Once the bottom is compacted, start working your way up the sides, pressing the crumbs firmly against the edges of the plate to form a nice, even rim. The more firmly and evenly you press, the more cohesive and sturdy your White Christmas Pie crust will be, preventing it from crumbling when you slice into it. Aim for an even thickness throughout.
-
Bake or Chill the Crust:
- If Baking (Recommended): Place the pie plate with the pressed crust into your preheated 350°F (175°C) oven. Bake for 8-10 minutes, or until the edges are lightly golden and the crust smells fragrant. Baking helps to set the butter and makes the crust wonderfully crisp. Once baked, remove it from the oven and allow it to cool completely on a wire rack before proceeding. It’s absolutely crucial that the crust is completely cool before adding the filling, otherwise, it could melt your beautiful White Christmas Pie filling!
- If No-Bake: If you’re opting for a completely no-bake approach, simply place the pie plate with the pressed crust into the refrigerator and chill for at least 30 minutes. This will help the butter firm up and set the crust, though it won’t be quite as firm as a baked crust.
Crafting the Creamy White Chocolate & Coconut Filling
- Prepare Cream Cheese Base: While your crust cools or chills, let’s get started on the star of our White Christmas Pie – that luscious, creamy filling! In a large mixing bowl, using an electric mixer (stand mixer or hand mixer), beat the softened cream cheese on medium speed until it is light, fluffy, and completely smooth, with absolutely no lumps remaining. Room temperature cream cheese is non-negotiable here; cold cream cheese will result in a lumpy filling, and we want pure silky smoothness for our White Christmas Pie. This usually takes about 2-3 minutes. Scrape down the sides of the bowl frequently to ensure everything gets incorporated.
- Sweeten and Flavor: Next, gradually add the sifted powdered sugar to the cream cheese mixture, beating on low speed until just combined, then increasing to medium-high and beating until fully incorporated and smooth. Sifting the powdered sugar prevents lumps and ensures a smooth consistency. Now, add the pure vanilla extract and the optional, but highly recommended, almond extract. Beat for another minute until the extracts are fully mixed in and you’re greeted with a delightful aroma.
-
Melt the White Chocolate: It’s time to introduce the white chocolate! There are two good ways to melt white chocolate.
- Double Boiler Method (Preferred for Control): Place the finely chopped white chocolate in a heatproof bowl set over a saucepan of simmering water (make sure the bottom of the bowl does not touch the water). Stir constantly with a rubber spatula until the chocolate is completely melted and smooth. This method offers excellent control and minimizes the risk of scorching.
- Microwave Method: Place the chopped white chocolate in a microwave-safe bowl. Microwave on high power in 20-30 second intervals, stirring well after each interval, until the chocolate is smooth and fully melted. Be very careful not to overheat white chocolate, as it can seize and become grainy quickly.
Regardless of your method, once melted, set the white chocolate aside to cool to room temperature. This step is critical! Adding warm white chocolate to your cold cream cheese mixture will cause it to seize and create a lumpy mess, ruining the texture of your White Christmas Pie filling. It should still be liquid but not warm to the touch.
- Whip First Batch of Heavy Cream: In a separate, very cold mixing bowl (I like to chill my bowl and whisk attachment in the freezer for 10-15 minutes beforehand), add 1 cup of the very cold heavy cream. Using an electric mixer, beat on high speed until stiff peaks form. This means when you lift the beaters, the cream stands up straight and holds its shape without collapsing. Be careful not to over-whip, as it can turn grainy and separate.
- Combine Filling Components: With your cream cheese mixture ready, and your white chocolate cooled but still liquid, gently pour the cooled white chocolate into the cream cheese mixture. Beat on low speed until just combined and smooth. Now, it’s time to fold in that beautiful whipped cream. Using a rubber spatula, add about half of the whipped cream to the cream cheese-white chocolate mixture. Gently fold it in using a light, circular motion, ensuring you don’t deflate the air from the whipped cream. Once partially combined, add the remaining whipped cream and continue folding until just incorporated. The goal is to maintain as much air as possible for a light and airy White Christmas Pie filling, so gentle folding is key.
- Add Coconut: Finally, gently fold in 1/2 cup of the sweetened shredded coconut. This adds a lovely texture and an undeniable tropical sweetness that pairs perfectly with the white chocolate. Your filling for the White Christmas Pie is now complete and ready for assembly!
Assembling and Chilling Your White Christmas Pie
- Assemble the Pie: Retrieve your completely cooled (or chilled) vanilla wafer crust. Carefully spoon the entire white chocolate and coconut filling into the crust, spreading it out evenly with an offset spatula or the back of a spoon. Make sure the top is nice and smooth. You can even create a little swirl pattern if you like, as this will be the base for your topping.
- Chill, Chill, Chill: This is perhaps the most important step for a perfectly set White Christmas Pie. Cover the pie loosely with plastic wrap (or place it in an airtight pie carrier) and transfer it to the refrigerator. Chill for a minimum of 6-8 hours, but ideally overnight. Allowing the pie to chill thoroughly is absolutely crucial for the filling to set properly and firm up, ensuring clean, beautiful slices when you serve your White Christmas Pie. Patience is a virtue here, I promise the wait is worth it!
The Grand Finale: Whipped Cream Topping and Garnish
- Prepare Whipped Cream Topping: Just before you’re ready to serve your spectacular White Christmas Pie, prepare the final whipped cream topping. In another very cold mixing bowl, combine the remaining 1 cup of very cold heavy cream, 2 tablespoons of powdered sugar, and 1/2 teaspoon of pure vanilla extract. Beat on high speed with an electric mixer until stiff peaks form. Again, watch carefully to avoid over-whipping.
-
Decorate Your Pie:
- Apply Whipped Cream: You can spread the whipped cream evenly over the top of the chilled pie, or for a more festive look, use a piping bag fitted with a star tip to pipe beautiful swirls or rosettes around the edge or over the entire surface.
- Add Coconut & White Chocolate: Generously sprinkle the remaining 1/2 cup of sweetened shredded coconut over the whipped cream. If you’re feeling extra fancy, garnish with delicate white chocolate curls or shavings. You can easily make these by using a vegetable peeler on a block of good quality white chocolate.
- Festive Touches: For that ultimate White Christmas sparkle, consider adding a sprinkle of edible glitter or some festive white, silver, or blue sprinkles.
- Serve and Store: Carefully slice your White Christmas Pie with a sharp knife that has been run under hot water and wiped clean between each cut, for the neatest possible slices. Serve immediately to oohs and aahs! Any leftover pie should be stored in an airtight container in the refrigerator for up to 3-4 days. While it’s best enjoyed within a day or two, it remains delightfully delicious for a few days.

Conclusion:
Well, my friends, we’ve reached the sweet end of our journey with this truly magnificent dessert. After all the delightful details we’ve covered, I truly hope you’re as excited as I am about creating this culinary masterpiece in your own kitchen. This isn’t just another pie; it’s a showstopper, a conversation starter, and quite frankly, a slice of pure, unadulterated joy that promises to elevate any gathering, particularly during the festive season. I cannot stress enough how uniquely satisfying it is to present something so elegant, yet surprisingly approachable to make. It’s a recipe that delivers on its promise of delight with every single creamy, dreamy bite, ensuring your efforts are rewarded with beaming smiles and appreciative murmurs from everyone lucky enough to taste it.
What makes this particular recipe a definitive must-try? It’s the exquisite balance, I believe. We’re talking about a symphony of textures and subtle flavors that work in perfect harmony. The light, airy quality of the filling, often kissed with hints of vanilla or perhaps a whisper of coconut, contrasts beautifully with the delicate crunch of a perfect crust. It’s rich without being overly heavy, sweet without being cloying, and utterly delightful from the very first forkful to the last. It embodies that magical feeling of a winter wonderland, translated into a dessert. Imagine the smiles when your family and friends gather around, eager for a taste of this glorious creation. It’s a dessert that encapsulates the spirit of the holidays in every single bite, making memories that last long after the last crumb is gone. Its visual appeal alone, pristine and inviting, makes it an unforgettable centerpiece that draws everyone in.
Now, let’s talk about enjoying your spectacular White Christmas Pie. While it’s absolutely divine served simply, perhaps slightly chilled, there are so many wonderful ways to present and personalize it. For a truly elegant touch, consider garnishing each slice with a sprinkle of toasted coconut flakes – their golden edges providing a lovely visual and textural counterpoint to the creamy white filling. A few fresh cranberries or even some sugared cranberries can add a pop of vibrant color and a delightful tartness that cuts through the sweetness beautifully. If you’re feeling extra indulgent, a drizzle of melted white chocolate or a scattering of finely grated white chocolate curls would make it even more luxurious. A light dusting of powdered sugar, mimicking freshly fallen snow, is another simple yet effective way to enhance its festive appeal. Pair it with a steaming mug of coffee, a glass of chilled dessert wine, or even a simple glass of milk for the ultimate comforting experience.
Thinking about variations? This is where you can truly let your creativity shine! For a subtle change, try adding a teaspoon of pure almond extract to the filling mixture alongside the vanilla – it introduces a wonderful, sophisticated note that many find irresistible. If you prefer a fruity twist, a thin layer of raspberry jam spread on the bottom of the crust before adding the filling can introduce a delightful burst of tang and color that truly surprises the palate. For those who adore a bit of crunch, consider incorporating finely chopped macadamia nuts into the crust or even lightly toasting them and sprinkling them over the top for an added layer of texture. And for a truly unexpected holiday twist, a pinch of crushed peppermint candy cane mixed into the filling or sprinkled as a garnish would transform it into a minty dream, evoking classic holiday flavors. For friends or family with dietary restrictions, remember you can easily adapt this recipe by using a gluten-free pie crust or a dairy-free cream alternative in the filling, proving that everyone deserves a piece of this holiday magic. Don’t be afraid to experiment; this recipe is wonderfully forgiving.
My dearest readers, I truly hope this recipe has inspired you. I genuinely encourage you to carve out some time in your schedule, gather your ingredients, and embark on the delightful journey of baking your very own White Christmas Pie. It’s more than just a recipe; it’s an experience, a tradition waiting to be born in your home. There’s an immense sense of satisfaction that comes from creating something so beautiful and delicious from scratch, especially when you see the joy it brings to those you share it with. And once you’ve done it, once you’ve tasted that first glorious slice, I would absolutely love to hear about your experience! Did you stick to the recipe, or did you add your own creative twist? What was your favorite part of making and sharing this incredible dessert? Please, don’t be shy. Share your triumphs, your photos, and your feedback in the comments section below. Your insights and culinary adventures inspire me and countless other home bakers. Happy baking, and may your holidays be filled with delicious moments!
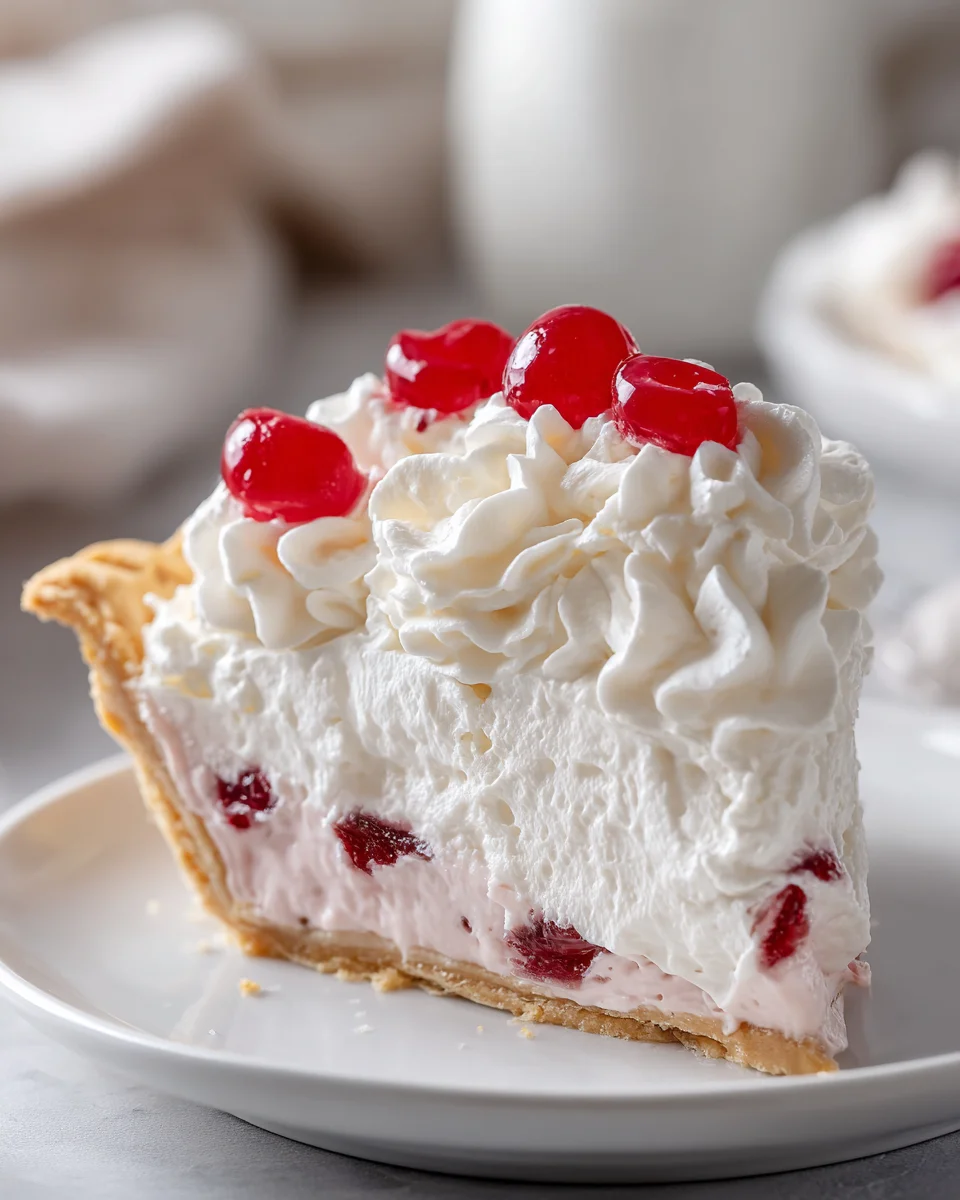
White Christmas Pie
A captivating culinary creation that truly embodies the magical essence of the holiday season. Imagine a picturesque landscape blanketed in fresh, untouched snow, glistening softly under the winter light – that same serene beauty and comforting delight are what await you with every perfect slice of this exquisite treat. It’s a dish that has quickly become a beloved part of contemporary holiday tables, evoking warmth, joy, and that unmistakable feeling of a ‘White Christmas.’ It’s more than just food; it’s an experience.
Ingredients
-
Cold butter, cut into pats (for crust)
-
All-purpose flour (for crust)
-
Salt (for crust)
-
Granulated sugar (for crust)
-
Cold shortening (for crust)
-
Ice water (for crust, as needed)
-
Gelatin powder
-
Cold water (for gelatin)
-
1/3 cup granulated sugar (for filling base)
-
Flour (for filling base)
-
Salt (for filling base)
-
Milk
-
Vanilla extract
-
Almond extract
-
1/2 cup heavy cream (for filling), whipped
-
Egg whites
-
Cream of tartar
-
1/3 cup granulated sugar (for meringue)
-
Sweetened shredded coconut (for filling)
-
2 cups heavy cream (for topping), whipped
-
Sweetened shredded coconut (for topping)
-
Strawberries, diced
-
Confectioners’ sugar
Instructions
-
Step 1
Cut cold butter into pats and place on a plate in the freezer while preparing other ingredients. In a food processor, combine flour, salt, and granulated sugar; pulse to combine. Add cold shortening and pulse a few times. Add the frozen butter and pulse until the butter is pea-sized. While pulsing, gradually add cold water, one tablespoon at a time, until the dough comes together. Pour the dough onto a floured counter, press it into a disc, wrap tightly with plastic wrap, and refrigerate for 30 minutes. -
Step 2
Remove the dough from the refrigerator and, on a floured surface, roll it out so it is two inches larger than your standard 10-inch pie plate (a 9-inch pie plate can be used, but the filling will be right up to the top). Place the dough over the pie plate and gently press it in, then up and over the edges. Trim any extra dough with a knife or scissors. Pinch the overhanging dough into a high ridge all around, then create a decorative edge (e.g., scalloped). Place the completed pie dough in the freezer for 30 minutes to set up, preventing the sides from collapsing during baking. -
Step 3
Preheat your oven to 375°F (190°C). Once the pie dough has chilled in the freezer for 30 minutes, remove it, add parchment paper, and either pie weights or dry beans. (To make the parchment fit, cut it into a circle larger than the pie plate and make four slits a few inches long around the edge halfway to the center, so the slits overlap and fit up the sides when placed in the shell.) Place in the oven for 20 minutes. Remove the pie weights or beans, and with a fork, puncture the bottom in a few places to release steam. Place back in the oven without the weights and parchment, and bake for 15 more minutes. Cool the baked pie shell completely to room temperature. -
Step 4
While the crust is baking, start the filling by blooming the gelatin. Place the gelatin in cold water in a small bowl to dissolve and set aside. -
Step 5
In a medium saucepan, mix 1/3 cup of the granulated sugar, flour, and salt. Add milk and whisk to combine. Over medium heat, bring the mixture to a boil and cook for one minute. Add the bloomed gelatin mixture and whisk to combine over medium heat, then remove from heat. Whisk in the vanilla extract and almond extract. Place the saucepan in a bowl with ice to quickly cool the mixture. -
Step 6
Beat 1/2 cup of heavy cream to soft peaks and set aside. -
Step 7
Beat egg whites with cream of tartar and the remaining 1/3 cup of granulated sugar to stiff peaks and set aside. -
Step 8
Place the cooled whipped filling base into a mixer and whip just to make the mixture creamy. In a large bowl, place the cooled creamy filling and gently fold in the whipped cream, beaten egg whites, and sweetened shredded coconut using a rubber spatula. Scrape the mixture evenly into the baked and cooled pie shell. -
Step 9
Whip the two cups of heavy cream to stiff peaks. Using a large pastry bag with a large star tip, pipe a decorative top over the filling. Sprinkle some sweetened shredded coconut over the top. Dice strawberries and mix in a bowl with the confectioners’ sugar; the strawberries will eventually give up enough liquid to mix with the confectioners’ sugar to create a sauce for garnish. -
Step 10
Cover the pie loosely and refrigerate for a minimum of 6-8 hours, or ideally overnight, to allow the filling to set completely. Slice carefully with a sharp knife (wiped clean between cuts) and serve. Store any leftovers in an airtight container in the refrigerator for up to 3-4 days.
Important Information
Nutrition Facts (Per Serving)
It is important to consider this information as approximate and not to use it as definitive health advice.
Allergy Information
Please check ingredients for potential allergens and consult a health professional if in doubt.