
Marshmallow Swirl Fudge is more than just a sweet treat; it’s a delightful journey for your taste buds, promising a perfect harmony of rich chocolate and pillowy marshmallow in every single bite. I’m absolutely thrilled to guide you through crafting this utterly irresistible confection that consistently steals the show at any gathering.
While fudge itself boasts a heartwarming American legacy, often associated with home kitchens and cherished memories since the late 19th century, the addition of a luscious marshmallow swirl elevates it to an art form. This isn’t just any fudge; it’s a celebration of contrasting textures and complementary flavors that truly makes it special. People adore this Marshmallow Swirl Fudge for countless reasons: the creamy, intense chocolate base melts beautifully on the tongue, while pockets of soft, sweet marshmallow offer a dreamy counterpoint. It’s not only incredibly delicious but also surprisingly simple to prepare, making it an ideal choice for a festive gift, a comforting dessert, or just a spontaneous indulgence. Prepare to fall in love with its stunning marbled appearance and its unforgettable taste!

Ingredients:
- 1 (14-ounce) can sweetened condensed milk: This is the backbone of our creamy fudge! Make sure it’s sweetened condensed milk, not evaporated milk, for that perfect rich texture.
- 24 ounces (about 4 cups) good quality chocolate chips or chopped chocolate: I highly recommend using a mix of semi-sweet and milk chocolate for the best flavor balance in your marshmallow swirl fudge. Semi-sweet gives it depth, while milk chocolate adds that classic melt-in-your-mouth sweetness. You can certainly use all semi-sweet for a more intense chocolate flavor, or all milk chocolate for a sweeter, milder fudge. High-quality chocolate makes a noticeable difference in the final taste and texture!
- 1/2 cup (1 stick) unsalted butter: Cut into smaller pieces, this will help it melt more evenly and quickly with the chocolate and condensed milk. Butter adds richness and a beautiful smooth mouthfeel to our fudge.
- 1 teaspoon pure vanilla extract: Don’t skimp on the vanilla! It truly enhances the chocolate flavor and adds a warmth that makes this marshmallow swirl fudge irresistible.
- 1/4 teaspoon fine sea salt: A little bit of salt goes a long way to balance the sweetness and really make the chocolate flavor pop. Trust me on this, it’s a game-changer!
- 7 ounces (about 1 1/2 cups) marshmallow fluff or marshmallow creme: This is where the “swirl” magic happens! Make sure you have a fresh jar for easy spreading and swirling. You can also use mini marshmallows, but they require a little more work to melt and incorporate smoothly for the swirl effect.
- Optional: Flaky sea salt for sprinkling: A pinch of flaky sea salt on top before it sets can add a beautiful contrasting texture and an extra layer of gourmet flavor.
- Optional: Chopped nuts (e.g., pecans, walnuts): If you like a bit of crunch in your fudge, feel free to fold in about 1/2 cup of chopped nuts with the vanilla extract.
Preparing the Fudge Base
- Prepare your baking pan: First things first, let’s get our pan ready. You’ll need an 8×8 or 9×9-inch square baking pan for this delicious marshmallow swirl fudge. Line it completely with parchment paper, leaving an overhang on all sides. This overhang acts as little handles, making it incredibly easy to lift the set fudge out of the pan for cutting. If you don’t have parchment paper, you can lightly grease and flour the pan, but parchment truly makes your life so much easier. I always say, a little prep work now saves a lot of hassle later!
- Melt the chocolate mixture: Grab a large, heavy-bottomed saucepan – this is key to preventing scorching. Combine the sweetened condensed milk, chocolate chips (or chopped chocolate), and cubed butter in the saucepan. Place the saucepan over low to medium-low heat. The trick here is patience! We want a gentle melt. Stir the mixture continuously with a rubber spatula or a wooden spoon. You’ll notice the butter melting first, then the chocolate slowly starts to soften and combine with the condensed milk.
- Continue stirring until smooth and glossy: This step requires your full attention. Keep stirring constantly, scraping the bottom and sides of the pan to ensure no chocolate sticks or burns. Burning chocolate is a sad affair, and we want beautiful, creamy marshmallow swirl fudge! The mixture will transform into a rich, thick, and perfectly smooth ganache-like consistency. It should be glossy and homogenous, with no visible streaks of butter or unmelted chocolate. This usually takes about 5 to 10 minutes, depending on your heat setting and how quickly your chocolate melts. Do not walk away from the stove during this crucial step. If the mixture seems too thick to stir easily, your heat might be too high; lower it immediately. We’re looking for a smooth, pourable consistency, not a thick paste.
- Remove from heat and stir in flavorings: Once your chocolate mixture is perfectly smooth and glossy, remove the saucepan from the heat immediately. This prevents any further cooking and potential burning. Now, quickly stir in the pure vanilla extract and the fine sea salt. The vanilla adds an incredible aroma and deepens the chocolate flavor, while the salt, though a small amount, is crucial here; it really helps to enhance the chocolate and balance the sweetness, preventing the fudge from being cloyingly sweet. Stir vigorously until the vanilla and salt are fully incorporated. If you’re adding chopped nuts, this is the time to fold them in as well.
- Pour half the fudge into the prepared pan: Carefully pour about half of the warm, luscious fudge mixture into your prepared 8×8 or 9×9-inch pan. Using your spatula, gently spread it evenly across the bottom of the pan. Don’t worry about getting it absolutely perfect at this stage, as we’ll be adding more layers. The key is to have a relatively flat base for our marshmallow swirl.
Incorporating the Marshmallow Swirl
- Dollop marshmallow fluff over the first fudge layer: Now for the marshmallow! Take your marshmallow fluff or creme and drop spoonfuls evenly over the first layer of fudge in the pan. You don’t need to cover every inch, as we’re going for a beautiful swirl, not a solid layer. Aim for about 5-6 dollops distributed across the surface. This step is where the visual appeal of our marshmallow swirl fudge truly begins to take shape. The warmth of the fudge will slightly soften the marshmallow, making it easier to swirl.
- Pour the remaining fudge over the marshmallow dollops: Gently pour the rest of your warm chocolate fudge mixture over the marshmallow dollops. Be careful not to disturb the marshmallow too much at this point. Use your spatula to spread the top layer of fudge as evenly as possible, trying to cover most of the marshmallow without completely burying it. This creates the distinct layers needed for a striking swirl. It’s okay if some marshmallow peeks through; that’s part of the charm!
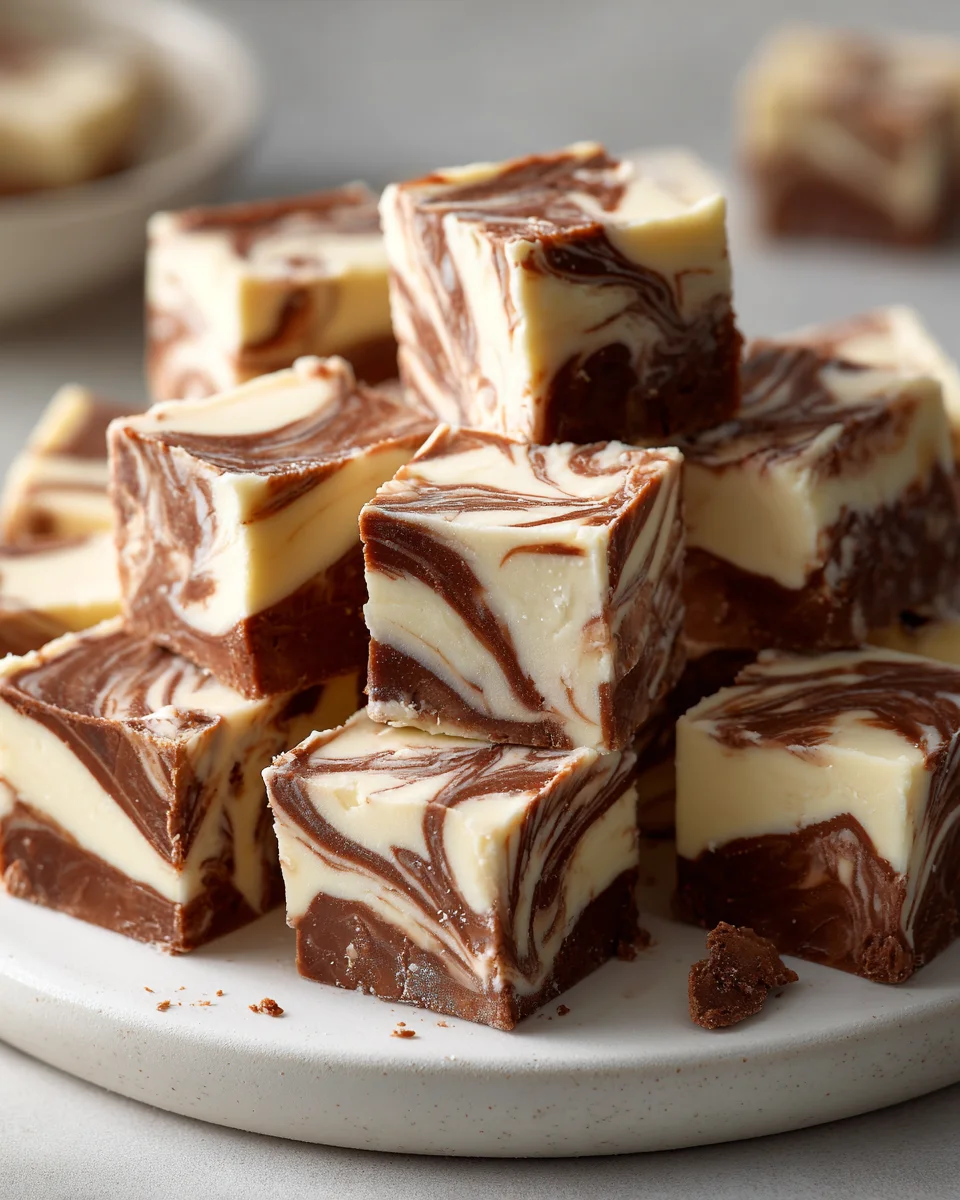
- Add more marshmallow and create the swirl: For an extra dose of marshmallow goodness and a more pronounced swirl, add a few more small dollops of marshmallow fluff on top of this second fudge layer. Now comes the fun part! Take a butter knife or a skewer and gently drag it through the fudge and marshmallow, creating beautiful, ribbon-like swirls. Don’t overmix, or you’ll lose the distinct white and brown pattern; a few elegant swipes are all you need. You’re aiming for a marbled effect, where the white of the marshmallow contrasts beautifully with the deep brown of the fudge. If you’re adding flaky sea salt, sprinkle it evenly over the top of the swirled fudge now. This adds a fantastic textural element and another layer of flavor. This gentle swirling is what gives our “Marshmallow Swirl Fudge” its signature look!
Setting and Slicing
- Chill the fudge until firm: Once your marshmallow swirl fudge is beautifully swirled, cover the pan loosely with plastic wrap. Transfer the pan to the refrigerator and chill for at least 2 to 4 hours, or until the fudge is completely firm and set. You want it to be firm enough to cut cleanly without sticking to your knife or deforming. I often leave mine overnight to ensure it’s perfectly solid. Patience is a virtue when waiting for perfectly set fudge! Rushing this step will result in sticky, messy pieces.
- Lift and prepare for cutting: Once fully chilled and firm, use the parchment paper overhang to carefully lift the entire slab of marshmallow swirl fudge out of the pan and onto a clean cutting board. This is where that parchment paper truly shines! Gently peel away the parchment paper from the sides and bottom of the fudge.
- Cut into squares and enjoy!: Using a sharp, large knife, cut the fudge into your desired size squares. For the cleanest cuts, I like to wipe my knife clean after every few cuts, especially when dealing with the sticky marshmallow swirl. You can cut it into 1-inch, 1.5-inch, or even 2-inch squares, depending on how generous you’re feeling! This recipe typically yields about 36-64 pieces, depending on your preferred size. Arrange your beautiful marshmallow swirl fudge on a platter and serve!
Tips and Variations for Your Marshmallow Swirl Fudge
- Storage Solutions for Freshness: Once your delectable marshmallow swirl fudge is cut, store it in an airtight container at room temperature for up to 1 week, or in the refrigerator for up to 2 weeks. If you choose to refrigerate it, I recommend letting it sit at room temperature for about 15-20 minutes before serving. This allows it to soften slightly, bringing out its creamy texture and rich flavor. For longer storage, this fudge freezes beautifully! Wrap individual pieces or small blocks tightly in plastic wrap, then place them in a freezer-safe bag or container for up to 3 months. Thaw in the refrigerator overnight or at room temperature for a few hours.
- Playing with Chocolate Combinations: While I highly recommend the semi-sweet and milk chocolate blend for a balanced marshmallow swirl fudge, don’t hesitate to experiment! For a deeper, less sweet fudge, use all good quality dark chocolate (60-70% cacao). If you prefer a very sweet and mild chocolate flavor, use all milk chocolate. You could even try a portion of white chocolate chips for a cookies-and-cream variation, though you might want to adjust the sweetness of the other chocolate types accordingly. Remember, the quality of your chocolate directly impacts the richness and smoothness of your fudge.
-
Adding Extra Flavor Boosts: The beauty of this marshmallow swirl fudge recipe is its versatility. Beyond the suggested chopped nuts, consider adding other mix-ins to the warm fudge base along with the vanilla.
- Coffee/Espresso Powder: A teaspoon of instant espresso powder will deepen the chocolate flavor without adding a coffee taste. It truly makes the chocolate sing!
- Orange Zest: For a chocolate-orange delight, add 1 tablespoon of finely grated orange zest.
- Peppermint Extract: During the holidays, a 1/2 teaspoon of peppermint extract (instead of or in addition to vanilla) creates a festive peppermint marshmallow swirl fudge.
- Spices: A pinch of cayenne pepper for a Mexican hot chocolate kick, or a touch of cinnamon, can add intriguing warmth.
- Achieving the Perfect Swirl: For the most visually appealing marshmallow swirl, remember not to overmix. The goal is distinct ribbons of white and brown. After pouring the second layer of fudge and adding the final dollops of marshmallow fluff, use a gentle hand. A simple zig-zag motion with a knife or skewer, perhaps only 2-3 passes in each direction, is usually sufficient. Less is often more when it comes to creating that elegant marbled effect for your marshmallow swirl fudge. If you swirl too much, the colors will blend into a uniform light brown, and you’ll lose that beautiful contrast.
-
Troubleshooting Common Fudge Issues:
- Fudge is too soft: This often means it wasn’t chilled long enough, or perhaps the ratio of ingredients was slightly off (too much condensed milk or butter relative to chocolate). Make sure to measure accurately and allow ample chilling time.
- Fudge is grainy: This usually happens if the chocolate mixture was cooked at too high a heat or stirred too vigorously at the beginning. Low and slow is the way to go for smooth fudge. It can also occur if sugar crystals formed; ensure all ingredients are fully melted and integrated.
- Fudge is too hard: This is less common with condensed milk fudge but can happen if it’s overcooked. Remove from heat as soon as it’s smooth and glossy.
With these tips, your homemade marshmallow swirl fudge is sure to be a showstopper!

Conclusion:
This is not just another sweet treat; it’s an experience waiting to happen. The delightful combination of rich, velvety chocolate and sweet, pillowy marshmallow swirled throughout makes this Marshmallow Swirl Fudge an absolute showstopper. I truly believe you’re going to fall in love with its irresistible charm. It’s the kind of dessert that brings smiles, sparks conversations, and quite frankly, disappears faster than you can say “more please!” What makes it so special, you ask? Well, it’s the perfect balance of deep cocoa flavor with the gentle, yielding texture of marshmallow, creating a melt-in-your-mouth sensation that is utterly addictive. It’s surprisingly simple to make, despite its gourmet appearance, which means you can impress your friends and family without spending hours in the kitchen. Whether you’re a seasoned baker or a complete novice, this recipe is designed for success.
It’s ideal for holiday parties, potlucks, homemade gifts, or simply a cozy night in when you crave something truly indulgent. The visual appeal alone, with those beautiful streaks of white against dark chocolate, is enough to make anyone’s mouth water. Trust me, once you taste the creamy texture and the harmonious blend of flavors, you’ll understand why this fudge quickly becomes a treasured favorite in any dessert repertoire. It’s pure comfort, elevated, and a fantastic way to satisfy any sweet tooth. You’ll find that its dense, yet creamy texture is unlike anything store-bought, providing a truly artisanal feel to every bite. The joy of creating something so professional-looking with such ease is incredibly rewarding.
Now that you’re convinced this fudge is a winner, let’s talk about how to make it even more spectacular. While it’s utterly perfect on its own, a tiny dusting of flaky sea salt can elevate the chocolate notes to new heights, offering a sophisticated sweet-and-salty contrast that is truly divine. Imagine serving small squares alongside a steaming mug of hot chocolate or a rich, dark coffee – pure bliss! For a fun twist, you could chop the fudge into smaller pieces and use them as a delightful topping for vanilla ice cream, creating an instant sundae that everyone will adore. Or, how about crumbling a bit over a bowl of fresh berries for an unexpected yet delicious dessert? This fudge is also marvelous when chilled slightly, providing a firmer, yet still decadent texture that is perfect for a warmer day.
Thinking about variations? The beauty of this recipe lies in its adaptability. Feel free to experiment with different extracts – a touch of peppermint extract around the holidays could transform it into a festive treat, or perhaps a hint of almond or orange extract for a more gourmet profile. You could also mix in additional ingredients before the fudge sets. Consider adding chopped nuts like pecans or walnuts for an extra crunch and earthy flavor. Mini chocolate chips or white chocolate chunks could be folded in to add another layer of chocolatey goodness. For those who love a little heat, a pinch of cayenne pepper could be stirred into the chocolate mixture for a surprising chili-chocolate kick. If you want to make it even more visually stunning, consider adding a sprinkle of edible glitter or crushed candy canes on top while the fudge is still soft. The possibilities are truly endless, allowing you to personalize this incredible treat to suit any taste or occasion. Don’t forget, this fudge also makes an exquisite homemade gift. Package a few squares in a beautiful box or cellophane bag, tie with a ribbon, and you have a thoughtful, delicious present that shows you care. It keeps well at room temperature in an airtight container for up to a week, or you can refrigerate it for longer freshness, making it perfect for preparing ahead for parties or events.
Ready to create something amazing?
So, what are you waiting for? I wholeheartedly encourage you to roll up your sleeves and give this incredible recipe a try. You’ll be amazed at how simple it is to create something so utterly delicious and impressive. Once you experience the joy of making and tasting your own homemade Marshmallow Swirl Fudge, I have a feeling it will become a regular feature in your kitchen. And please, don’t keep this delicious secret to yourself! I would absolutely love to hear about your experience. Did you add any unique twists? Who did you share it with? Head over to the comments section and tell me all about your fudge-making adventure. Your feedback, tips, and photos inspire me and fellow home bakers, creating a wonderful community of dessert lovers. Happy baking!
Marshmallow Swirl Fudge
Indulge in this irresistible Marshmallow Swirl Fudge, a delightful journey for your taste buds. This homemade confection promises a perfect harmony of rich chocolate and pillowy marshmallow in every single bite, offering contrasting textures and complementary flavors. It’s surprisingly simple to prepare and makes a stunning gift or dessert.
Ingredients
-
1 (14-ounce) can sweetened condensed milk
-
24 ounces (about 4 cups) good quality chocolate chips or chopped chocolate (mix of semi-sweet and milk chocolate recommended)
-
1/2 cup (1 stick) unsalted butter, cut into smaller pieces
-
1 teaspoon pure vanilla extract
-
1/4 teaspoon fine sea salt
-
7 ounces (about 1 1/2 cups) marshmallow fluff or marshmallow creme
-
Optional: Flaky sea salt for sprinkling
-
Optional: 1/2 cup chopped nuts (e.g., pecans, walnuts)
Instructions
-
Step 1
Line an 8×8 or 9×9-inch square baking pan completely with parchment paper, leaving an overhang on all sides for easy lifting. -
Step 2
In a large, heavy-bottomed saucepan over low to medium-low heat, combine sweetened condensed milk, chocolate chips, and cubed butter. Stir continuously with a rubber spatula or wooden spoon until melted. -
Step 3
Keep stirring constantly, scraping the bottom and sides, until the mixture is rich, thick, smooth, and glossy, with no visible streaks. This usually takes about 5 to 10 minutes. Do not walk away from the stove during this crucial step. -
Step 4
Immediately remove the saucepan from heat. Quickly stir in the pure vanilla extract and fine sea salt until fully incorporated. If adding chopped nuts, fold them in now. -
Step 5
Carefully pour about half of the warm, luscious fudge mixture into your prepared pan and gently spread it evenly across the bottom. -
Step 6
Drop spoonfuls of marshmallow fluff or creme evenly over the first layer of fudge. Aim for about 5-6 dollops distributed across the surface. -
Step 7
Gently pour the rest of your warm chocolate fudge mixture over the marshmallow dollops. Use your spatula to spread the top layer of fudge as evenly as possible, trying to cover most of the marshmallow. -
Step 8
Add a few more small dollops of marshmallow fluff on top of this second fudge layer. Take a butter knife or skewer and gently drag it through the fudge and marshmallow, creating beautiful, ribbon-like swirls. Don’t overmix to preserve distinct white and brown patterns. If desired, sprinkle flaky sea salt evenly over the top. -
Step 9
Cover the pan loosely with plastic wrap and transfer to the refrigerator. Chill for at least 2 to 4 hours, or until the fudge is completely firm and set. Overnight chilling is often ideal for perfectly solid fudge. -
Step 10
Once fully chilled and firm, use the parchment paper overhang to carefully lift the entire slab of fudge out of the pan onto a clean cutting board. Gently peel away the parchment paper. -
Step 11
Using a sharp, large knife, cut the fudge into your desired size squares (e.g., 1-inch, 1.5-inch, or 2-inch). For the cleanest cuts, wipe the knife clean after every few cuts. Arrange your beautiful marshmallow swirl fudge on a platter and serve!
Important Information
Nutrition Facts (Per Serving)
It is important to consider this information as approximate and not to use it as definitive health advice.
Allergy Information
Please check ingredients for potential allergens and consult a health professional if in doubt.