
Chocolate Chip Cannoli Pie is more than just a dessert; it’s a culinary dream come true, perfectly blending two iconic treats into one spectacular creation. Have you ever wished you could enjoy the luscious, creamy filling of a traditional cannoli without the fuss of individual fried shells? Well, prepare to have your dessert prayers answered!
This ingenious pie takes the beloved flavors of a classic Sicilian cannoli – rich, sweetened ricotta cheese studded with miniature chocolate chips – and nestles them into a buttery, crisp pie crust. While traditional cannoli have a history rooted deeply in Italian festive tables, often associated with Carnival, my Chocolate Chip Cannoli Pie offers a modern, convenient twist that still honors those delicious origins.
Why You’ll Fall in Love with This Pie
People adore this dish for countless reasons. First, there’s the incredible texture contrast: the delicate crunch of the pie crust gives way to an unbelievably smooth, velvety, and utterly decadent ricotta filling. Then, the taste – a harmonious balance of sweet, tangy, and subtly spiced ricotta, punctuated by bursts of rich chocolate. It’s also remarkably convenient, transforming a typically individual-serving dessert into a communal treat that’s effortless to slice and share at any gathering. Get ready to impress everyone with this unique and unforgettable dessert!

Ingredients:
Creating an incredible Chocolate Chip Cannoli Pie starts with selecting the right ingredients. Quality truly makes a difference here, especially with the ricotta cheese, which is the heart and soul of our filling. Let’s gather everything we need for this delightful dessert.
- For the Pie Crust:
- 1 (9-inch) unbaked deep-dish pie crust, store-bought or homemade (I often opt for a good quality store-bought crust to save time, and it works wonderfully!)
- Pie weights, dried beans, or uncooked rice (essential for blind baking)
- For the Chocolate Chip Cannoli Filling:
- 2 pounds (approximately 32 ounces) whole milk ricotta cheese, preferably fresh if you can find it. This is absolutely crucial for the best texture and flavor.
- 1 cup granulated sugar (or a mix of 3/4 cup granulated and 1/4 cup confectioners’ sugar for extra smoothness)
- 1 teaspoon pure vanilla extract (use good quality for the best aroma and taste)
- 1/2 teaspoon ground cinnamon (optional, but I find it really elevates the traditional cannoli flavor)
- 1/4 teaspoon fine sea salt (helps balance the sweetness and brings out the other flavors)
- 1 cup mini semi-sweet chocolate chips (mini chips distribute more evenly and melt beautifully in each bite of your Chocolate Chip Cannoli Pie)
- 1 tablespoon orange zest (optional, but highly recommended for an authentic cannoli experience, brightening the flavor profile)
- For Garnish (Optional):
- Confectioners’ sugar, for dusting
- Additional mini chocolate chips or chocolate shavings
Preparing the Pie Crust for Your Chocolate Chip Cannoli Pie
Before we even think about our luscious filling, we need to prepare our pie crust. For a pie with a wet, custard-like filling such as our Chocolate Chip Cannoli Pie, blind baking is not just a suggestion, it’s a critical step. Skipping this will almost certainly result in a soggy bottom, which is a culinary tragedy we want to avoid at all costs!
-
Preheat Your Oven and Prepare the Crust: Begin by preheating your oven to 400°F (200°C). If you’re using a frozen store-bought pie crust, make sure it’s thawed according to package directions. Carefully unroll it and fit it into your 9-inch deep-dish pie plate. Gently press it into the bottom and up the sides of the plate, ensuring there are no air bubbles underneath. Trim any excess dough, leaving about a 1/2-inch overhang.
-
Crimp the Edges: Now, for the aesthetic and structural part! Fold the overhanging dough under itself, creating a thicker edge. Then, use your thumb and forefinger to flute or crimp the edges decoratively. This not only looks lovely but also helps to create a barrier and prevent the filling from seeping between the crust and the plate.
-
Prick and Chill: Using a fork, generously prick the bottom and sides of the pie crust all over. These small holes are crucial because they act as vents, allowing steam to escape during baking. This prevents the crust from puffing up excessively and creating large air pockets. After pricking, place the pie plate in the refrigerator for at least 15-20 minutes, or even better, in the freezer for 10 minutes. Chilling the dough helps firm up the butter, which in turn helps prevent the crust from shrinking too much during blind baking. This is a key trick for a perfectly shaped Chocolate Chip Cannoli Pie crust.
-
Blind Baking – The Essential Step: Line the chilled pie crust with parchment paper or aluminum foil, making sure it extends up and over the crimped edges. This prevents the edges from over-browning. Fill the liner with pie weights, dried beans, or uncooked rice. Make sure the weights are distributed evenly and reach up the sides to support the crust during baking. This weight prevents the crust from shrinking and puffing up. Bake for 15 minutes.
-
Remove Weights and Continue Baking: Carefully remove the pie plate from the oven. Gently lift out the parchment paper or foil along with the pie weights. Be cautious as they will be hot! Return the pie crust to the oven and continue baking for another 5-10 minutes, or until the bottom of the crust looks dry and lightly golden brown. This second stage ensures the bottom of the crust is fully cooked and less prone to becoming soggy once the filling is added. Keep a close eye on it to prevent it from burning. Once it’s done, remove it from the oven and let it cool completely on a wire rack while you prepare the glorious Chocolate Chip Cannoli Pie filling.
Preparing the Ricotta: The Secret to a Perfect Chocolate Chip Cannoli Pie Filling
The success of your Chocolate Chip Cannoli Pie hinges significantly on the preparation of your ricotta cheese. Cannoli filling, by nature, needs to be firm and not watery. Ricotta cheese, especially whole milk ricotta, contains a lot of excess moisture. If you don’t remove this moisture, your pie filling will be runny, and it will make your beautiful pie crust soggy. Trust me, this step is non-negotiable for that authentic cannoli texture.
-
Choose the Right Ricotta: Always, always, always opt for whole milk ricotta. It has a richer flavor and a creamier texture than part-skim ricotta, which can sometimes be gritty. If you can find fresh ricotta from an Italian deli or specialty store, even better! It will have a superior taste and often a better initial consistency.
-
The Draining Process – Method 1 (Overnight/Recommended for Best Results): This is my preferred method because it yields the driest, most professional-quality ricotta for your Chocolate Chip Cannoli Pie.
- Line a fine-mesh sieve with two layers of cheesecloth or a clean kitchen towel.
- Place the sieve over a bowl, ensuring there’s enough space between the bottom of the sieve and the bowl for the liquid to collect.
- Spoon all 2 pounds of the whole milk ricotta cheese into the cheesecloth-lined sieve.
- Gather the edges of the cheesecloth and gently twist to form a bundle, but don’t squeeze too hard initially.
- Place a plate or a flat lid directly on top of the ricotta and weigh it down with something heavy, like a few cans of food or a small cast iron skillet. The weight helps press out the moisture more efficiently.
- Refrigerate this setup for at least 8 hours, but ideally overnight (12-24 hours). You’ll be amazed at how much liquid drains out! The longer it drains, the firmer and drier your ricotta will be, which is exactly what we want for a robust Chocolate Chip Cannoli Pie filling.
-
The Draining Process – Method 2 (Faster Alternative): If you’re short on time, you can still drain the ricotta, but it might not be quite as dry as the overnight method.
- Place the ricotta in a fine-mesh sieve directly over a bowl, without the cheesecloth.
- Place the sieve in the refrigerator for at least 2-4 hours, stirring occasionally. You won’t be able to press it as effectively, but gravity will still do a good job.
- Alternatively, you can gently press the ricotta with the back of a spoon against the sieve to help express some of the liquid. Be careful not to press so hard that the ricotta itself goes through the sieve.
-
Check for Consistency: Once drained, the ricotta should be thick, almost like cream cheese, and significantly reduced in volume. You should see a good amount of pale yellow liquid in the bowl beneath the sieve. If it still looks very wet, continue draining for a bit longer. A dry ricotta is the cornerstone of a non-soggy, perfectly textured Chocolate Chip Cannoli Pie filling.
Crafting the Chocolate Chip Cannoli Filling
Now that our ricotta is perfectly drained and our pie crust is cooling, it’s time for the most exciting part: creating the irresistible chocolate chip cannoli filling! This is where all the magical flavors come together.
-
Whip the Ricotta: Transfer your well-drained, firm ricotta cheese into a large mixing bowl. Using an electric mixer (either a stand mixer with a paddle attachment or a hand mixer), beat the ricotta on medium speed for 2-3 minutes. This step is important because it breaks down any remaining small lumps, making the ricotta incredibly smooth and airy. You want it to be light and fluffy, almost cloud-like, before adding the other ingredients. A super smooth ricotta ensures a silky Chocolate Chip Cannoli Pie filling.
-
Add the Sweeteners and Flavorings: Reduce the mixer speed to low. Gradually add the granulated sugar (and confectioners’ sugar if you’re using a blend) to the ricotta. Continue beating until the sugar is fully incorporated and dissolved. The mixture should become even creamier and slightly sweeter, of course. Next, add the pure vanilla extract, ground cinnamon (if using), fine sea salt, and orange zest (if using). Increase the speed to medium and beat for another 1-2 minutes, making sure all these wonderful aromatics are evenly distributed throughout the ricotta. The orange zest, even just a tablespoon, truly brightens the overall flavor and adds that authentic cannoli zestiness.
-
Incorporate the Chocolate Chips: Remove the bowl from the mixer. Now, it’s time to fold in those delightful mini semi-sweet chocolate chips. Using a spatula, gently fold the chocolate chips into the ricotta mixture until they are evenly distributed. Be careful not to overmix at this stage, as too much agitation can melt the chocolate chips prematurely or break them down too much. You want distinct chocolate chips in every bite of your Chocolate Chip Cannoli Pie.
-
Taste and Adjust: This is my favorite part! Take a small spoonful of the filling and taste it. Does it need a tiny pinch more salt to balance the sweetness? Would a touch more cinnamon or vanilla enhance it? Now is the time to make any minor adjustments to suit your personal preference. Remember, the flavors will meld and deepen as the pie chills.
-
Chill the Filling (Optional but Recommended): For best results, I recommend covering the bowl of filling with plastic wrap and refrigerating it for at least 30 minutes, or up to a few hours. This allows the flavors to fully meld and the filling to firm up a bit more, making it easier to spread into the pie crust and ensuring a richer flavor profile for your baked Chocolate Chip Cannoli Pie.
Assembling and Baking Your Chocolate Chip Cannoli Pie
With our perfectly blind-baked crust and rich, flavorful cannoli filling ready, we’re just a few steps away from baking our show-stopping Chocolate Chip Cannoli Pie. This stage brings everything together, transforming our individual components into a cohesive and delightful dessert.
-
Prepare for Filling: Ensure your blind-baked pie crust is completely cool. If it’s still warm, it could slightly melt the filling, especially the chocolate chips, and make the bottom of the crust less crisp. Place the cooled crust on a baking sheet, which will make it easier to transfer in and out of the oven and catch any potential spills.
-
Fill the Crust: Gently spoon the prepared chocolate chip cannoli filling into the cooled pie crust. Use an offset spatula or the back of a spoon to spread the filling evenly across the bottom of the crust, ensuring it reaches all the way to the crimped edges. You want a smooth, level surface. Try not to press down too hard, as this can compress the airy texture we worked so hard to achieve in the ricotta. The filling should be mounded slightly in the center, as it will settle a little during baking.
-
Preheat Oven and Bake: Reduce your oven temperature to 350°F (175°C). Place the baking sheet with the filled pie into the preheated oven. Bake for approximately 45-60 minutes. The baking time can vary slightly depending on your oven and the exact moisture content of your ricotta. We are looking for specific cues to determine doneness.
-
Checking for Doneness: The pie is ready when the edges of the filling appear set and are lightly golden, while the center still has a slight, delicate jiggle when you gently shake the pie plate. It shouldn’t be liquidy, but a very slight quiver in the very center is perfectly normal for a custard-like pie. If the edges of your pie crust start to brown too quickly, you can loosely cover them with aluminum foil or use a pie shield. Overbaking can lead to a dry, cracked filling, so watch your Chocolate Chip Cannoli Pie carefully!
-
Cooling – Patience is a Virtue: Once baked, carefully remove the pie from the oven and place the baking sheet on a wire rack. Let the pie cool completely at room temperature for at least 2-3 hours. This gradual cooling is critical for the filling to fully set and helps prevent cracks from forming. Resist the urge to cut into it too soon! After cooling to room temperature, transfer the pie to the refrigerator and chill for at least 4 hours, or preferably overnight. Chilling is non-negotiable for a firm, sliceable Chocolate Chip Cannoli Pie. The flavors also deepen and meld beautifully as it chills.
Serving and Storing Your Masterpiece
Congratulations! You’ve successfully created a magnificent Chocolate Chip Cannoli Pie. Now comes the rewarding part: enjoying the fruits of your labor. Serving it correctly enhances the experience, and proper storage ensures you can savor it longer.
-
Slicing Your Pie: When you’re ready to serve, remove the chilled pie from the refrigerator. For the cleanest slices, I recommend using a long, sharp knife that has been run under hot water and then wiped dry between each cut. This helps to glide through the creamy filling and the chocolate chips without dragging or sticking, giving you beautiful, neat slices of your Chocolate Chip Cannoli Pie.
-
Garnishing for Presentation: For a final flourish, you can lightly dust each slice, or the entire pie, with confectioners’ sugar using a fine-mesh sieve. This adds a lovely snowy aesthetic and a touch more sweetness. For extra visual appeal and a burst of texture, sprinkle a few additional mini chocolate chips or some elegant chocolate shavings on top of each slice. If you enjoy a hint of citrus, a tiny bit of fresh orange zest grated over the top before serving can also be delightful.
-
Optimal Serving Temperature: This Chocolate Chip Cannoli Pie is best enjoyed cold, straight from the refrigerator. The chilling process allows the flavors to fully develop and the texture to become perfectly firm and creamy, just like an authentic cannoli. If it sits out at room temperature for too long, the filling will soften considerably.
-
Storing Leftovers: Any leftover Chocolate Chip Cannoli Pie should be stored in an airtight container or tightly covered with plastic wrap in the refrigerator. Proper storage is key to maintaining its freshness, flavor, and texture. It will remain delicious for up to 3-4 days in the refrigerator. While the crust might soften slightly over time, the filling will remain wonderfully creamy. This makes it an excellent make-ahead dessert!
-
Beyond the Slice: Consider preparing individual servings if you’re hosting a gathering. You could even use small tart pans and follow the same instructions for charming mini Chocolate Chip Cannoli Pies, perfect for portion control and elegant presentation. The delight of this pie lies in its unique blend of traditional Italian flavors with a familiar, comforting pie format, making it a crowd-pleaser for any occasion.
Conclusion:
So there you have it, my friends! We’ve journeyed through the creation of what I truly believe is one of the most exciting and utterly delicious desserts you’ll ever encounter. This isn’t just another pie; it’s a masterpiece that marries the creamy, ricotta-rich indulgence of classic cannoli filling with the comforting, familiar embrace of a perfect pie crust. Think about it: that delicate, sweet ricotta cheese, studded generously with mini chocolate chips, all nestled within a crisp, golden shell. It’s a symphony of textures and flavors – the cool, smooth filling contrasting beautifully with the slight crunch of the crust and the delightful melt of chocolate. I’ve seen faces light up with the first bite, a genuine ‘wow’ escaping every time. It’s elegant enough for a special occasion, yet surprisingly approachable to make, ensuring you can impress without the stress. This dessert truly stands out in a crowded field of sweets; it’s unique, memorable, and frankly, absolutely irresistible. The sheer joy it brings, whether you’re making it for a family gathering, a dinner party, or just a delightful treat for yourself, is immeasurable. It’s a testament to how combining two beloved classics can result in something even greater than the sum of its parts. If you’ve ever dreamt of a dessert that delivers on both nostalgia and innovation, this is it. It captures the essence of an Italian bakery favorite and transforms it into a comforting, shareable format that everyone will adore. The delicate sweetness and the almost cheesecake-like texture make it incredibly appealing, and the burst of chocolate in every bite ensures a truly satisfying experience from start to finish. Trust me, this pie is destined to become a staple in your dessert repertoire.
Elevate Your Slice: Serving Suggestions & Creative Twists
Now, while this pie is absolutely phenomenal on its own, there are so many wonderful ways to elevate the experience or tailor it to your personal taste. For a simple yet elegant presentation, I often serve a slice chilled, perhaps with a dusting of cocoa powder or a few candied orange peels scattered artfully around the plate – those citrus notes really play well with the ricotta and chocolate. For a truly decadent treat, imagine a warm slice (yes, it’s also fantastic slightly warmed!) alongside a scoop of vanilla bean gelato or a dollop of freshly whipped cream. You could even drizzle a little raspberry coulis for a vibrant pop of color and tartness that cuts through the richness beautifully. And don’t stop there with variations! Feel free to experiment with the chocolate – perhaps swap out some of the mini chocolate chips for dark chocolate chunks for a more intense cocoa hit, or even white chocolate for a sweeter profile. A sprinkle of chopped pistachios or toasted almonds over the top before serving adds a lovely crunch and a nutty dimension. For a twist on the crust, consider a graham cracker crust for an even simpler, no-bake-style base, or a crushed biscotti crust for an extra layer of Italian-inspired flavor. A touch of lemon or orange zest directly into the filling can brighten the flavors considerably, enhancing that classic cannoli zestiness. For an adult-friendly version, a splash of Amaretto or rum in the filling could add a sophisticated warmth. The possibilities are truly endless, allowing you to make this already incredible dessert uniquely yours, adapting it to any season or occasion. This versatility is just another reason why it’s such a standout dessert.
Your Turn! Bake, Share, and Inspire!
So, my dear readers, I implore you: don’t just dream about this magnificent dessert. Take the plunge and whip up your very own Chocolate Chip Cannoli Pie! I promise you, the effort is minimal compared to the incredible reward waiting for you. It’s an experience that tantalizes the taste buds and warms the soul, creating smiles and memories with every single bite. This recipe is designed to bring joy and a touch of Italian-American bakery magic right into your kitchen, and I genuinely believe you’re going to love every moment of baking and, of course, eating it! Once you’ve had a chance to bake it and share it (or hoard it all for yourself, no judgment here!), I would absolutely love to hear about your experience. Did you try a fun variation? What was the reaction from your loved ones? Did it bring back any fond memories? Share your stories and photos with me – your feedback truly makes my day and inspires even more culinary adventures. Happy baking, and enjoy the delicious journey!

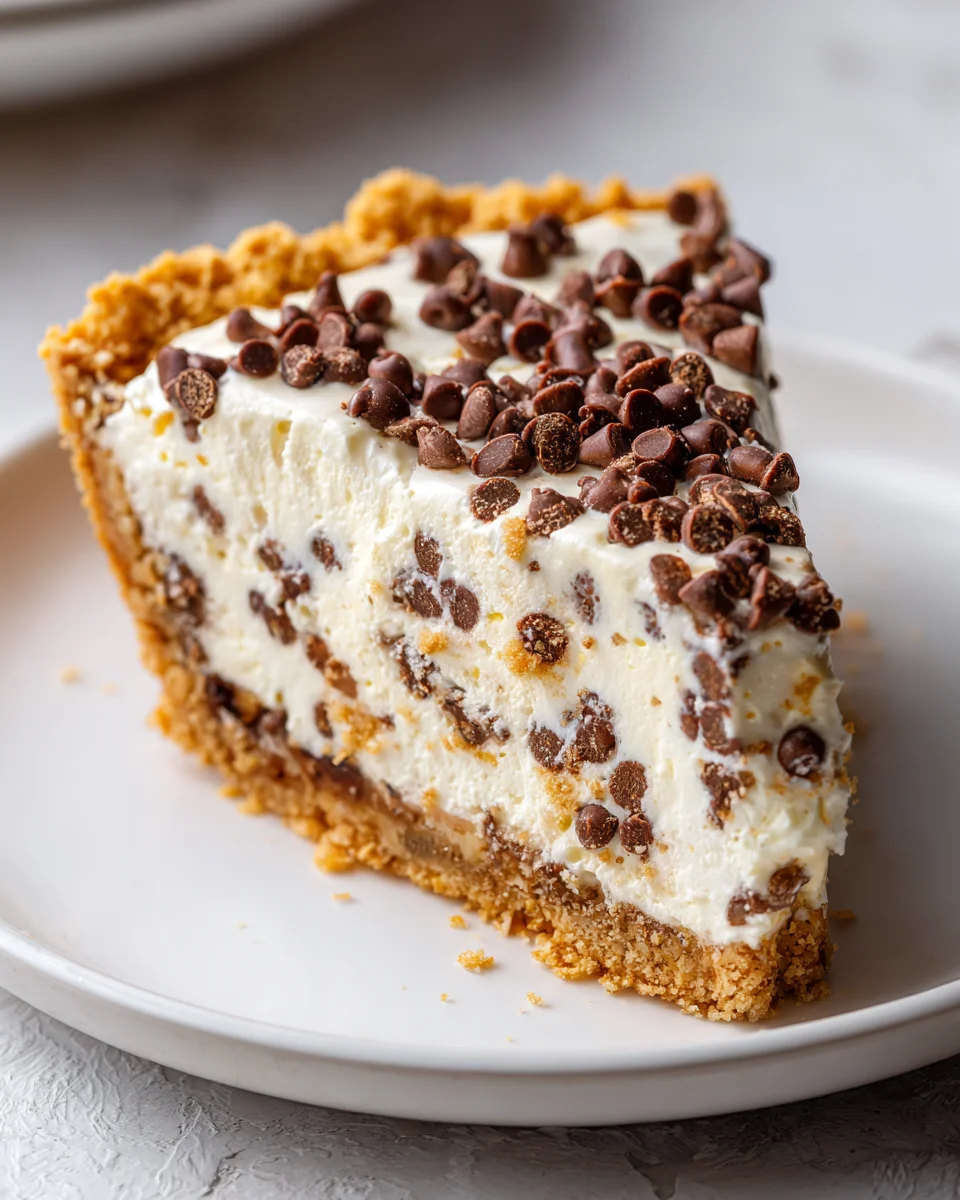
Chocolate Chip Cannoli Pie
Chocolate Chip Cannoli Pie is a culinary dream, perfectly blending two iconic Italian treats into one spectacular creation. This ingenious pie takes the beloved flavors of a classic Sicilian cannoli – rich, sweetened ricotta cheese studded with miniature chocolate chips – and nestles them into a buttery, crisp pie crust, offering a modern, convenient twist on a delicious classic.
Ingredients
-
2¼ cups vanilla wafer crumbs (or graham cracker crumbs)
-
¼ cup brown sugar
-
½ cup unsalted butter, melted
-
1 cup mascarpone cheese
-
½ cup confectioner’s sugar
-
1½ tsp vanilla extract
-
¼ tsp ground cinnamon
-
2-3 tsp lemon zest
-
1 cup whole milk ricotta cheese
-
¾ cup heavy whipping cream
-
1⅓ cups mini chocolate chips, divided
Instructions
-
Step 1
Begin by preheating your oven to 400°F (200°C). If using a frozen store-bought pie crust, make sure it’s thawed according to package directions. Carefully unroll it and fit it into your 9-inch deep-dish pie plate. Gently press it into the bottom and up the sides of the plate, ensuring no air bubbles underneath. Trim any excess dough, leaving about a 1/2-inch overhang. -
Step 2
Fold the overhanging dough under itself, creating a thicker edge. Then, use your thumb and forefinger to flute or crimp the edges decoratively. This not only looks lovely but also helps to create a barrier and prevent the filling from seeping between the crust and the plate. -
Step 3
Using a fork, generously prick the bottom and sides of the pie crust all over. These small holes are crucial because they act as vents, allowing steam to escape during baking. After pricking, place the pie plate in the refrigerator for at least 15-20 minutes, or even better, in the freezer for 10 minutes. Chilling the dough helps firm up the butter, which in turn helps prevent the crust from shrinking too much during blind baking. -
Step 4
Line the chilled pie crust with parchment paper or aluminum foil, making sure it extends up and over the crimped edges. Fill the liner with pie weights, dried beans, or uncooked rice. Make sure the weights are distributed evenly and reach up the sides to support the crust during baking. Bake for 15 minutes. -
Step 5
Carefully remove the pie plate from the oven. Gently lift out the parchment paper or foil along with the pie weights. Return the pie crust to the oven and continue baking for another 5-10 minutes, or until the bottom of the crust looks dry and lightly golden brown. Once it’s done, remove it from the oven and let it cool completely on a wire rack. -
Step 6
Always opt for whole milk ricotta. It has a richer flavor and a creamier texture than part-skim ricotta. If you can find fresh ricotta from an Italian deli or specialty store, even better! -
Step 7
This is the preferred method for the driest, most professional-quality ricotta. Line a fine-mesh sieve with two layers of cheesecloth or a clean kitchen towel. Place the sieve over a bowl, ensuring enough space for liquid to collect. Spoon the whole milk ricotta cheese into the cheesecloth-lined sieve. Gather the edges of the cheesecloth and gently twist to form a bundle. Place a plate or flat lid directly on top of the ricotta and weigh it down with something heavy. Refrigerate this setup for at least 8 hours, but ideally overnight (12-24 hours). The longer it drains, the firmer and drier your ricotta will be. -
Step 8
If short on time, place the ricotta in a fine-mesh sieve directly over a bowl, without cheesecloth. Place the sieve in the refrigerator for at least 2-4 hours, stirring occasionally. Alternatively, gently press the ricotta with the back of a spoon against the sieve to help express some liquid. Be careful not to press so hard that the ricotta itself goes through the sieve. -
Step 9
Once drained, the ricotta should be thick, almost like cream cheese, and significantly reduced in volume. You should see a good amount of pale yellow liquid in the bowl beneath the sieve. If it still looks very wet, continue draining for a bit longer. -
Step 10
Transfer your well-drained, firm ricotta cheese into a large mixing bowl. Using an electric mixer, beat the ricotta on medium speed for 2-3 minutes to break down any remaining lumps, making it incredibly smooth and airy, almost cloud-like. -
Step 11
Reduce the mixer speed to low. Gradually add the granulated sugar (and confectioners’ sugar if using a blend) to the ricotta. Continue beating until the sugar is fully incorporated and dissolved. Next, add the pure vanilla extract, ground cinnamon (if using), fine sea salt, and orange zest (if using). Increase the speed to medium and beat for another 1-2 minutes, ensuring all aromatics are evenly distributed. -
Step 12
Remove the bowl from the mixer. Using a spatula, gently fold in the mini semi-sweet chocolate chips until they are evenly distributed. Be careful not to overmix to avoid melting or breaking the chocolate chips. -
Step 13
Take a small spoonful of the filling and taste it. Adjust for sweetness, salt, cinnamon, or vanilla to suit your personal preference. -
Step 14
Cover the bowl of filling with plastic wrap and refrigerate for at least 30 minutes, or up to a few hours. This allows flavors to meld and the filling to firm up, making it easier to spread and ensuring a richer flavor. -
Step 15
Ensure your blind-baked pie crust is completely cool. Place the cooled crust on a baking sheet, which will make it easier to transfer in and out of the oven and catch any potential spills. -
Step 16
Gently spoon the prepared chocolate chip cannoli filling into the cooled pie crust. Use an offset spatula or the back of a spoon to spread the filling evenly across the bottom of the crust, ensuring it reaches all the way to the crimped edges. The filling should be mounded slightly in the center. -
Step 17
Reduce your oven temperature to 350°F (175°C). Place the baking sheet with the filled pie into the preheated oven. Bake for approximately 45-60 minutes. -
Step 18
The pie is ready when the edges of the filling appear set and are lightly golden, while the center still has a slight, delicate jiggle when you gently shake the pie plate. If the edges of your pie crust start to brown too quickly, you can loosely cover them with aluminum foil or use a pie shield. Overbaking can lead to a dry, cracked filling. -
Step 19
Once baked, carefully remove the pie from the oven and place the baking sheet on a wire rack. Let the pie cool completely at room temperature for at least 2-3 hours. After cooling to room temperature, transfer the pie to the refrigerator and chill for at least 4 hours, or preferably overnight. Chilling is non-negotiable for a firm, sliceable pie; flavors also deepen and meld beautifully. -
Step 20
When ready to serve, remove the chilled pie from the refrigerator. For the cleanest slices, use a long, sharp knife that has been run under hot water and then wiped dry between each cut. This helps glide through the creamy filling and chocolate chips without dragging or sticking. -
Step 21
For a final flourish, lightly dust each slice, or the entire pie, with confectioners’ sugar using a fine-mesh sieve. Sprinkle a few additional mini chocolate chips or some elegant chocolate shavings on top of each slice for extra visual appeal and texture. A tiny bit of fresh orange zest grated over the top before serving can also be delightful. -
Step 22
This Chocolate Chip Cannoli Pie is best enjoyed cold, straight from the refrigerator. The chilling process allows the flavors to fully develop and the texture to become perfectly firm and creamy. If it sits out at room temperature for too long, the filling will soften considerably. -
Step 23
Any leftover Chocolate Chip Cannoli Pie should be stored in an airtight container or tightly covered with plastic wrap in the refrigerator. It will remain delicious for up to 3-4 days. While the crust might soften slightly over time, the filling will remain wonderfully creamy, making it an excellent make-ahead dessert! -
Step 24
Consider preparing individual servings by using small tart pans for charming mini Chocolate Chip Cannoli Pies, perfect for portion control and elegant presentation.
Important Information
Nutrition Facts (Per Serving)
It is important to consider this information as approximate and not to use it as definitive health advice.
Allergy Information
Please check ingredients for potential allergens and consult a health professional if in doubt.