
Salted caramel ice cream is a delightful treat that perfectly balances sweet and savory flavors, making it a favorite among dessert lovers. As I take a scoop of this creamy indulgence, I am reminded of the rich history behind caramel, which dates back to the 17th century when it was first created in Europe. The combination of salt and caramel has become a culinary sensation, elevating the traditional ice cream experience to new heights. People adore salted caramel ice cream not only for its luscious texture but also for the way it tantalizes the taste buds with each bite. The contrast of the sweet caramel and the hint of salt creates a symphony of flavors that is simply irresistible. Whether enjoyed on a hot summer day or as a comforting dessert after dinner, salted caramel ice cream is sure to bring joy to any occasion.

Ingredients:
- 2 cups heavy cream
- 1 cup whole milk
- 3/4 cup granulated sugar
- 1 teaspoon pure vanilla extract
- 1/2 teaspoon sea salt
- 1 cup homemade or store-bought caramel sauce
- 1/2 cup chopped pecans or walnuts (optional)
Preparing the Base
1. In a medium saucepan, combine the heavy cream, whole milk, and granulated sugar. 2. Place the saucepan over medium heat and stir the mixture gently until the sugar has completely dissolved. This usually takes about 3-5 minutes. Be careful not to let it boil. 3. Once the sugar is dissolved, remove the saucepan from the heat. 4. Stir in the vanilla extract and sea salt. This will enhance the flavor of your ice cream and give it that delightful salted caramel taste. 5. Allow the mixture to cool to room temperature. You can speed up this process by placing the saucepan in an ice bath or simply letting it sit on the counter for about 30 minutes.Chilling the Mixture
6. Once the base has cooled, cover the saucepan with plastic wrap or a lid and refrigerate it for at least 4 hours, or overnight if you have the time. Chilling the mixture thoroughly is crucial for achieving a creamy texture in your ice cream.Churning the Ice Cream
7. After the mixture has chilled, it’s time to churn it. If you have an ice cream maker, pour the chilled mixture into the machine according to the manufacturer’s instructions. 8. Churn the ice cream for about 20-25 minutes, or until it reaches a soft-serve consistency. If you don’t have an ice cream maker, you can use a large bowl and a whisk or a hand mixer. Just beat the mixture vigorously every 30 minutes for about 2-3 hours until it becomes creamy and fluffy. 9. During the last few minutes of churning, slowly drizzle in the caramel sauce. This will create beautiful swirls of caramel throughout your ice cream. If you’re adding nuts, fold them in at this stage as well.Freezing the Ice Cream
10. Once the ice cream is churned, transfer it to an airtight container. I like to use a loaf pan or a quart-sized container for easy storage. 11. Drizzle a little extra caramel sauce on top of the ice cream before sealing the container. This adds an extra touch of sweetness and makes for a beautiful presentation when you scoop it out later. 12. Cover the container with a lid or plastic wrap and place it in the freezer. Let it freeze for at least 4 hours, or until it’s firm enough to scoop.Serving the Ice Cream
13. When you’re ready to serve your salted caramel ice cream, take it out of the freezer and let it sit at room temperature for about 5-10 minutes. This will make it easier to scoop. 14. Use an ice cream scoop to serve the ice cream into bowls or cones. 15. For an extra indulgent treat, drizzle more caramel sauce over the top and sprinkle with a pinch of sea salt. You can also add whipped cream or chocolate shavings if you’re feeling fancy!Storing Leftovers
16. If you have any leftovers (which is rare, but it happens!), store the ice cream in the freezer in an airtight container. It should keep well for about 2-3 weeks, although it’s best enjoyed fresh. 17. To prevent ice crystals from forming, press a piece of parchment paper directly onto the surface of the ice cream before sealing the container.Tips for Success
– Make sure your ice cream maker bowl is completely frozen before you start churning. This is key to achieving that creamy texture. – If you prefer a stronger caramel flavor, feel free to add more caramel sauce during the churning process. – Experiment with different mix-ins! Chocolate chips, crushed cookies, or even a swirl of fudge can add a fun twist to your salted caramel ice cream. Now that you have all the steps laid out, I can’t wait for you to try making this salted caramel ice cream at home! It’s a delightful treat that’s perfect for any occasion, and I promise it will impress your family and friends. Enjoy every creamy, sweet, and salty bite!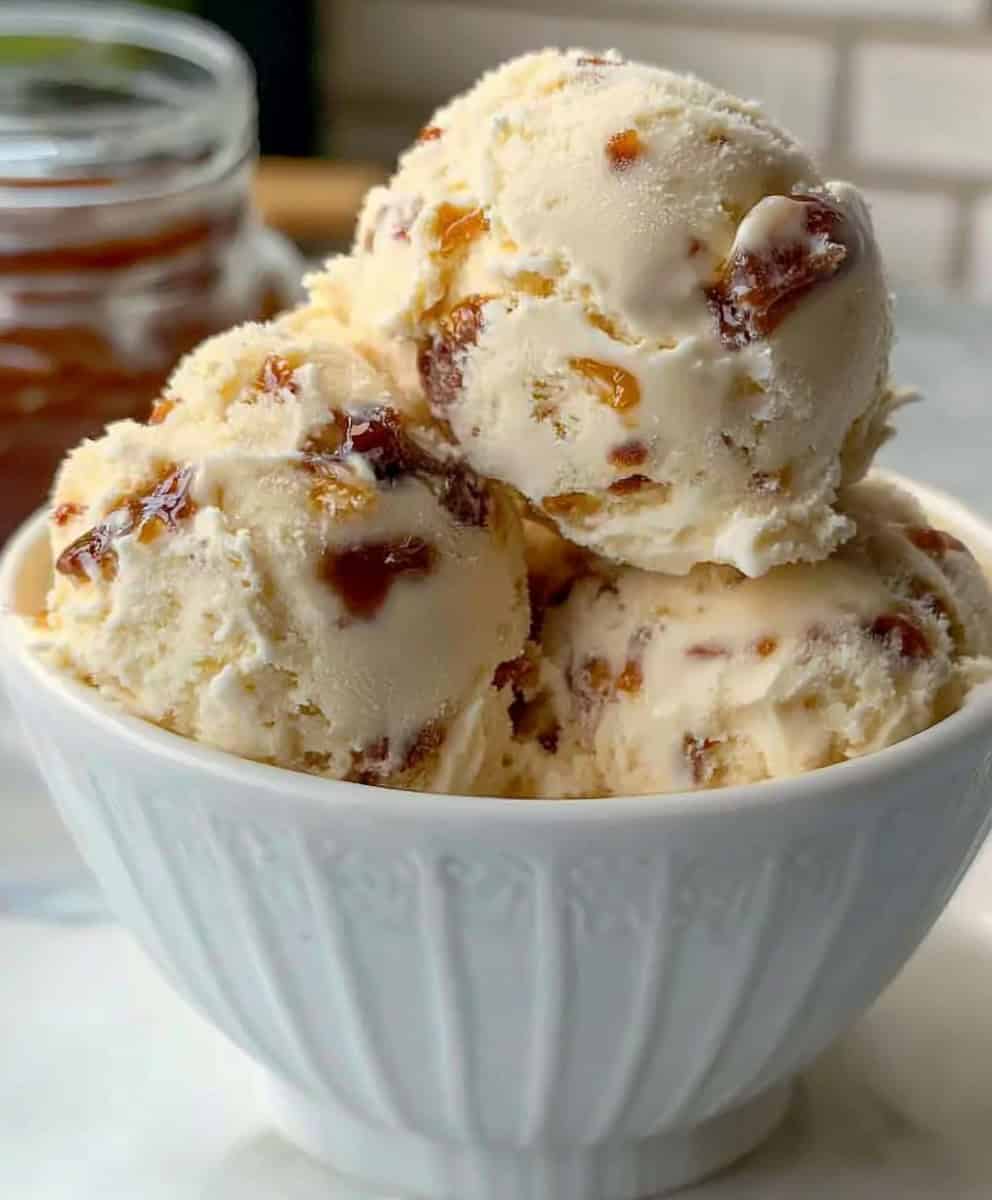
Conclusion:
In summary, this salted caramel ice cream recipe is an absolute must-try for anyone who loves a perfect blend of sweet and salty flavors. The creamy texture combined with the rich, buttery caramel creates a delightful treat that is sure to impress your family and friends. Whether you enjoy it on its own, as a topping for warm brownies, or sandwiched between two cookies, this ice cream is versatile enough to elevate any dessert experience. Feel free to get creative with serving suggestions! You can drizzle extra salted caramel sauce on top, sprinkle some sea salt for an added crunch, or even mix in your favorite nuts or chocolate chips for a delightful twist. If you’re feeling adventurous, try adding a hint of espresso or a splash of bourbon to the base for a unique flavor profile that will leave everyone wanting more. I encourage you to give this salted caramel ice cream recipe a try and share your experience with me! I would love to hear how it turned out for you and any variations you might have tried. Remember, the joy of making ice cream at home is not just in the delicious end result, but also in the fun of creating something special. So grab your ice cream maker and get started on this delightful journey—your taste buds will thank you! Print
Salted Caramel Ice Cream: The Ultimate Recipe for a Creamy Delight
- Total Time: 295 minutes
- Yield: 1 quart 1x
Description
Enjoy the rich and creamy flavor of homemade Salted Caramel Ice Cream, made with heavy cream, whole milk, and a delightful swirl of caramel sauce. This sweet and salty dessert is perfect for impressing guests or treating yourself on a warm day!
Ingredients
- 2 cups heavy cream
- 1 cup whole milk
- 3/4 cup granulated sugar
- 1 teaspoon pure vanilla extract
- 1/2 teaspoon sea salt
- 1 cup homemade or store-bought caramel sauce
- 1/2 cup chopped pecans or walnuts (optional)
Instructions
- In a medium saucepan, combine the heavy cream, whole milk, and granulated sugar. Place over medium heat and stir gently until the sugar dissolves (3-5 minutes). Do not let it boil. Remove from heat and stir in vanilla extract and sea salt. Allow to cool to room temperature.
- Cover the saucepan and refrigerate for at least 4 hours, or overnight for best results.
- Pour the chilled mixture into an ice cream maker and churn according to the manufacturer’s instructions (20-25 minutes) until it reaches a soft-serve consistency. If you don’t have an ice cream maker, beat the mixture vigorously every 30 minutes for 2-3 hours until creamy. During the last few minutes, drizzle in the caramel sauce and fold in nuts if using.
- Transfer the churned ice cream to an airtight container. Drizzle extra caramel sauce on top before sealing. Freeze for at least 4 hours or until firm.
- Let the ice cream sit at room temperature for 5-10 minutes before scooping. Serve in bowls or cones, drizzled with more caramel sauce and a sprinkle of sea salt. Add whipped cream or chocolate shavings for an extra treat!
- Store any leftovers in an airtight container in the freezer for 2-3 weeks. To prevent ice crystals, press parchment paper onto the surface before sealing.
Notes
- Ensure your ice cream maker bowl is completely frozen before churning.
- Adjust the amount of caramel sauce to your taste preference.
- Feel free to experiment with mix-ins like chocolate chips or crushed cookies.
- Prep Time: 30 minutes
- Cook Time: 25 minutes